ATC

Abandon the Cube

Archives May 2014

French Dresser Upcycle

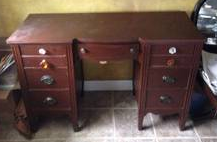
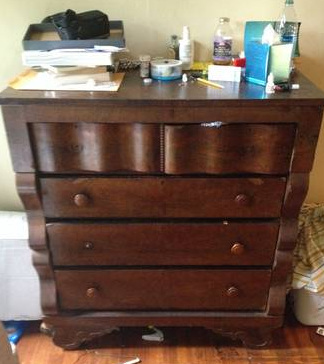
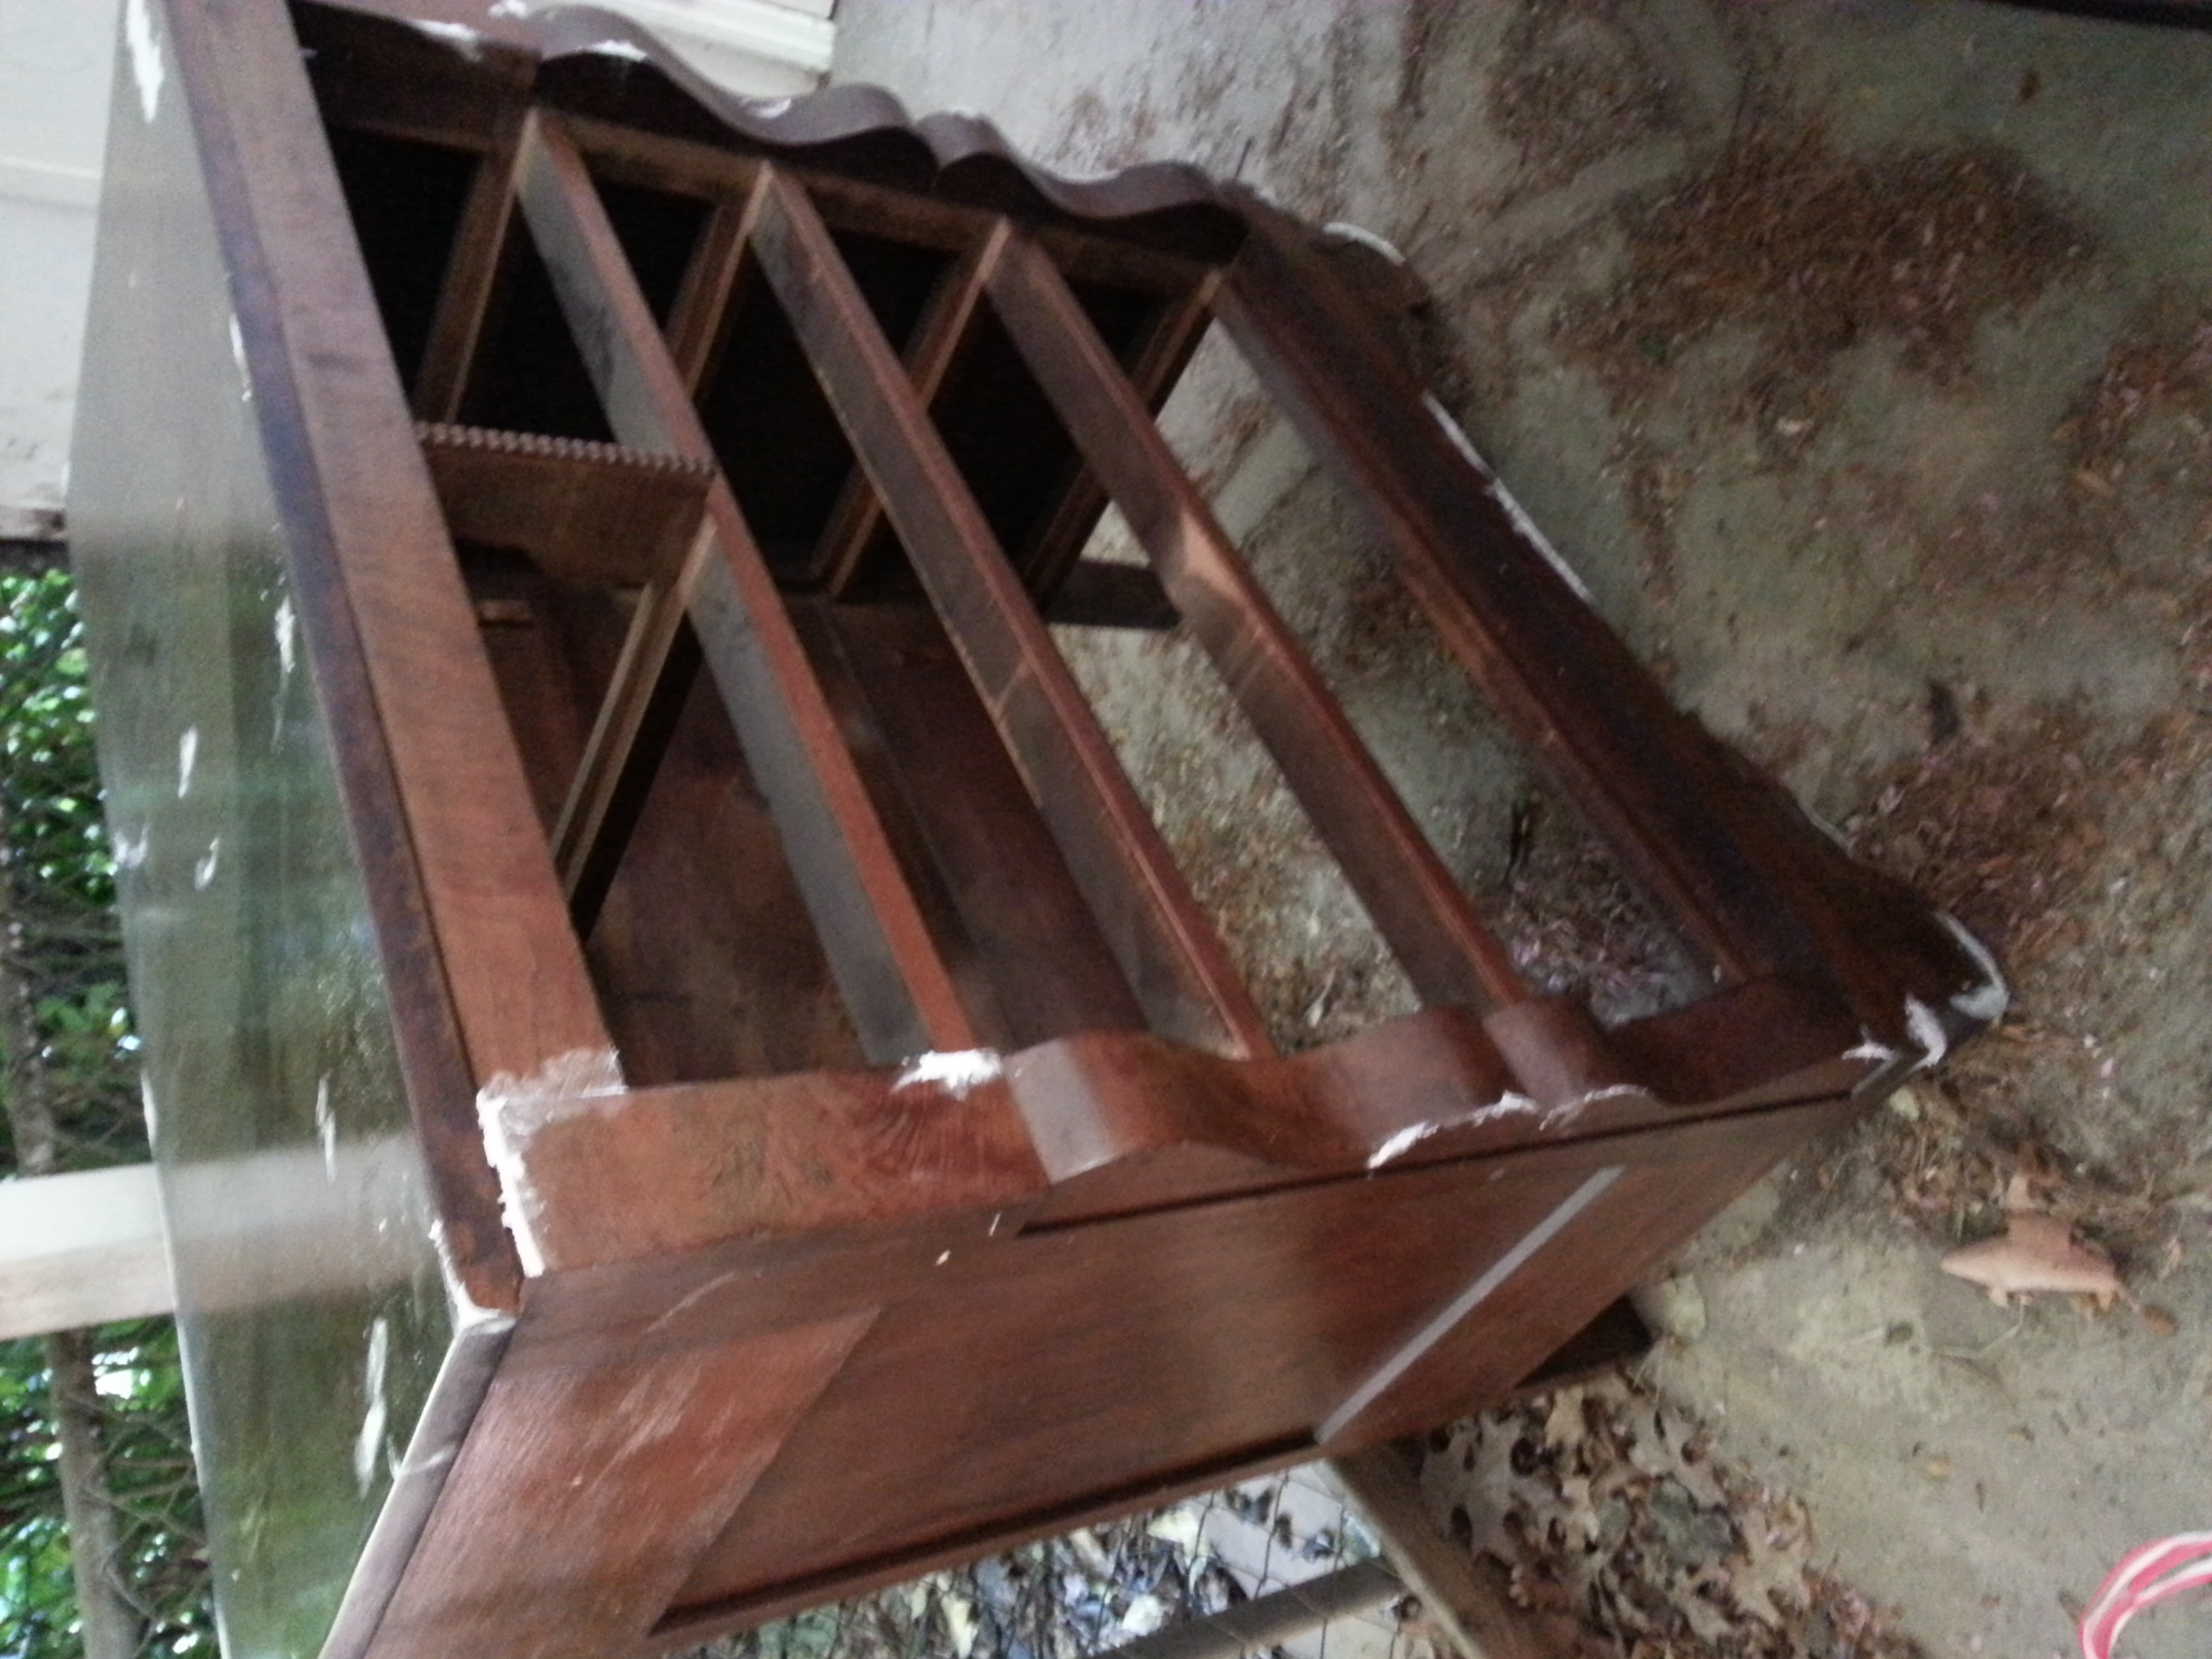
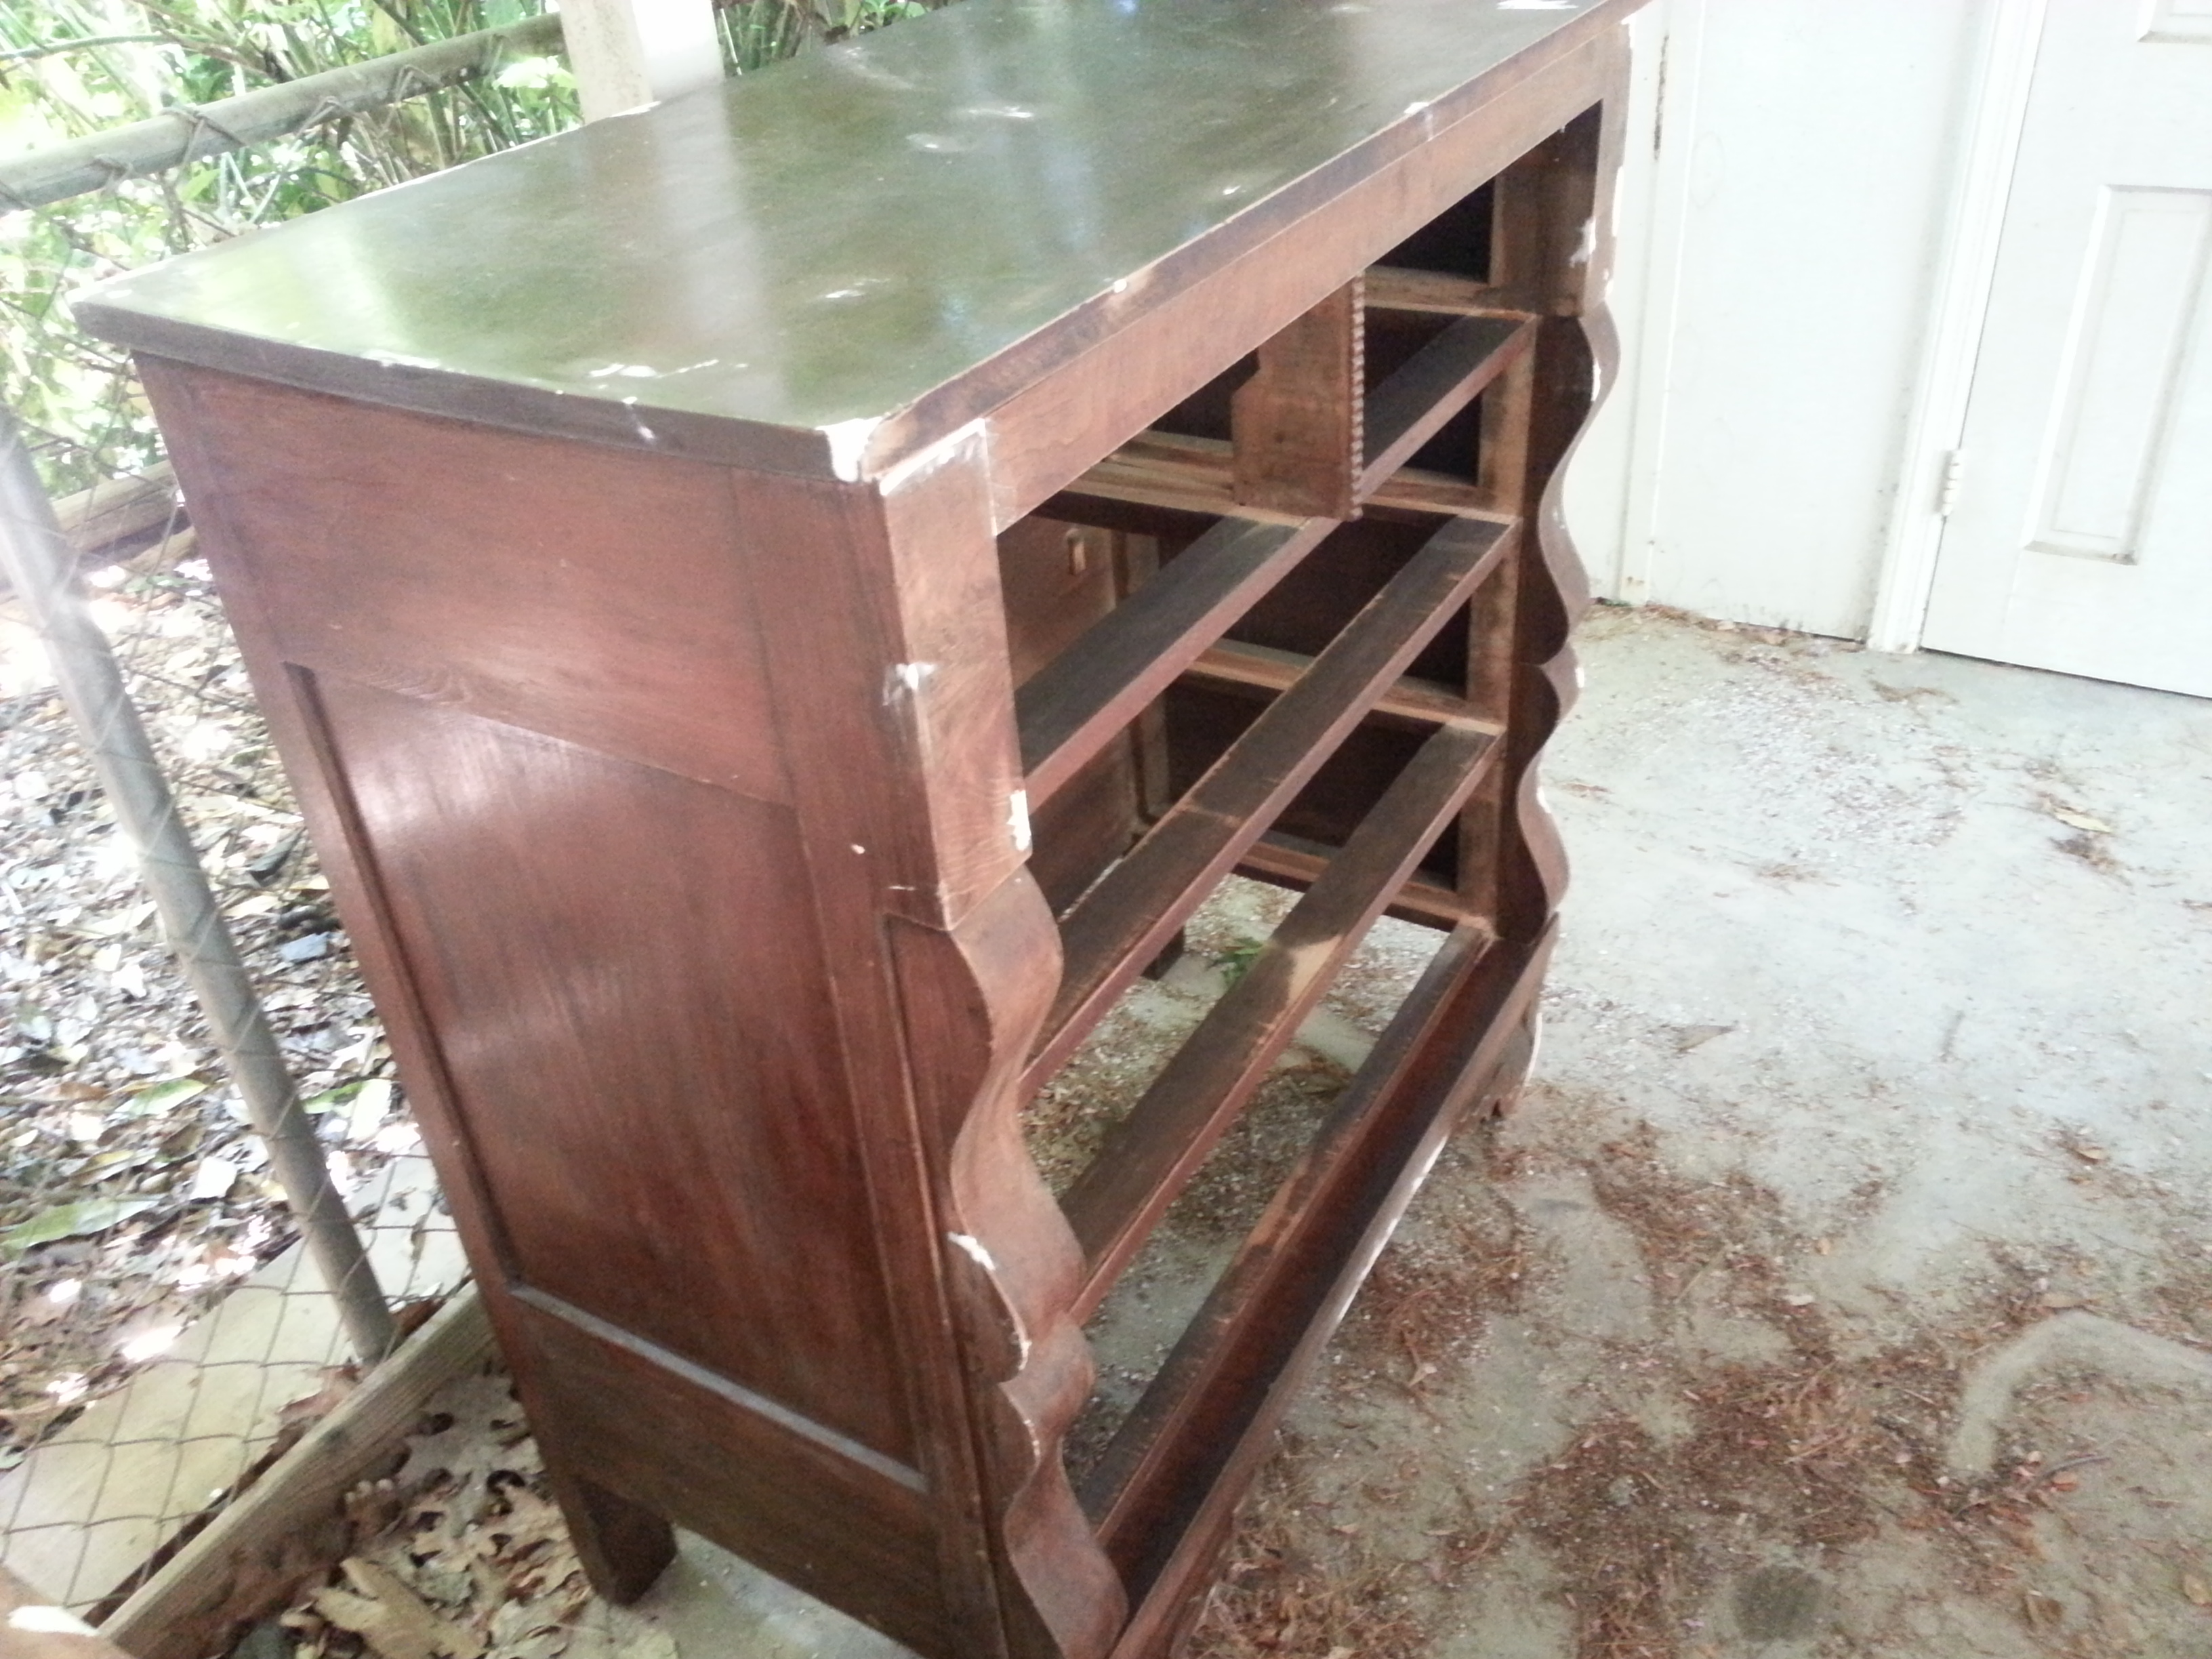
I found another dresser with a decent frame on Craigslist. Yes, I check out the listings every few days for cheap, sturdy furniture that I can refinish and hopefully sell. Here is the original photo posted to Craigslist.

Screen Shot 2014-05-12 at 2.36.02 PM
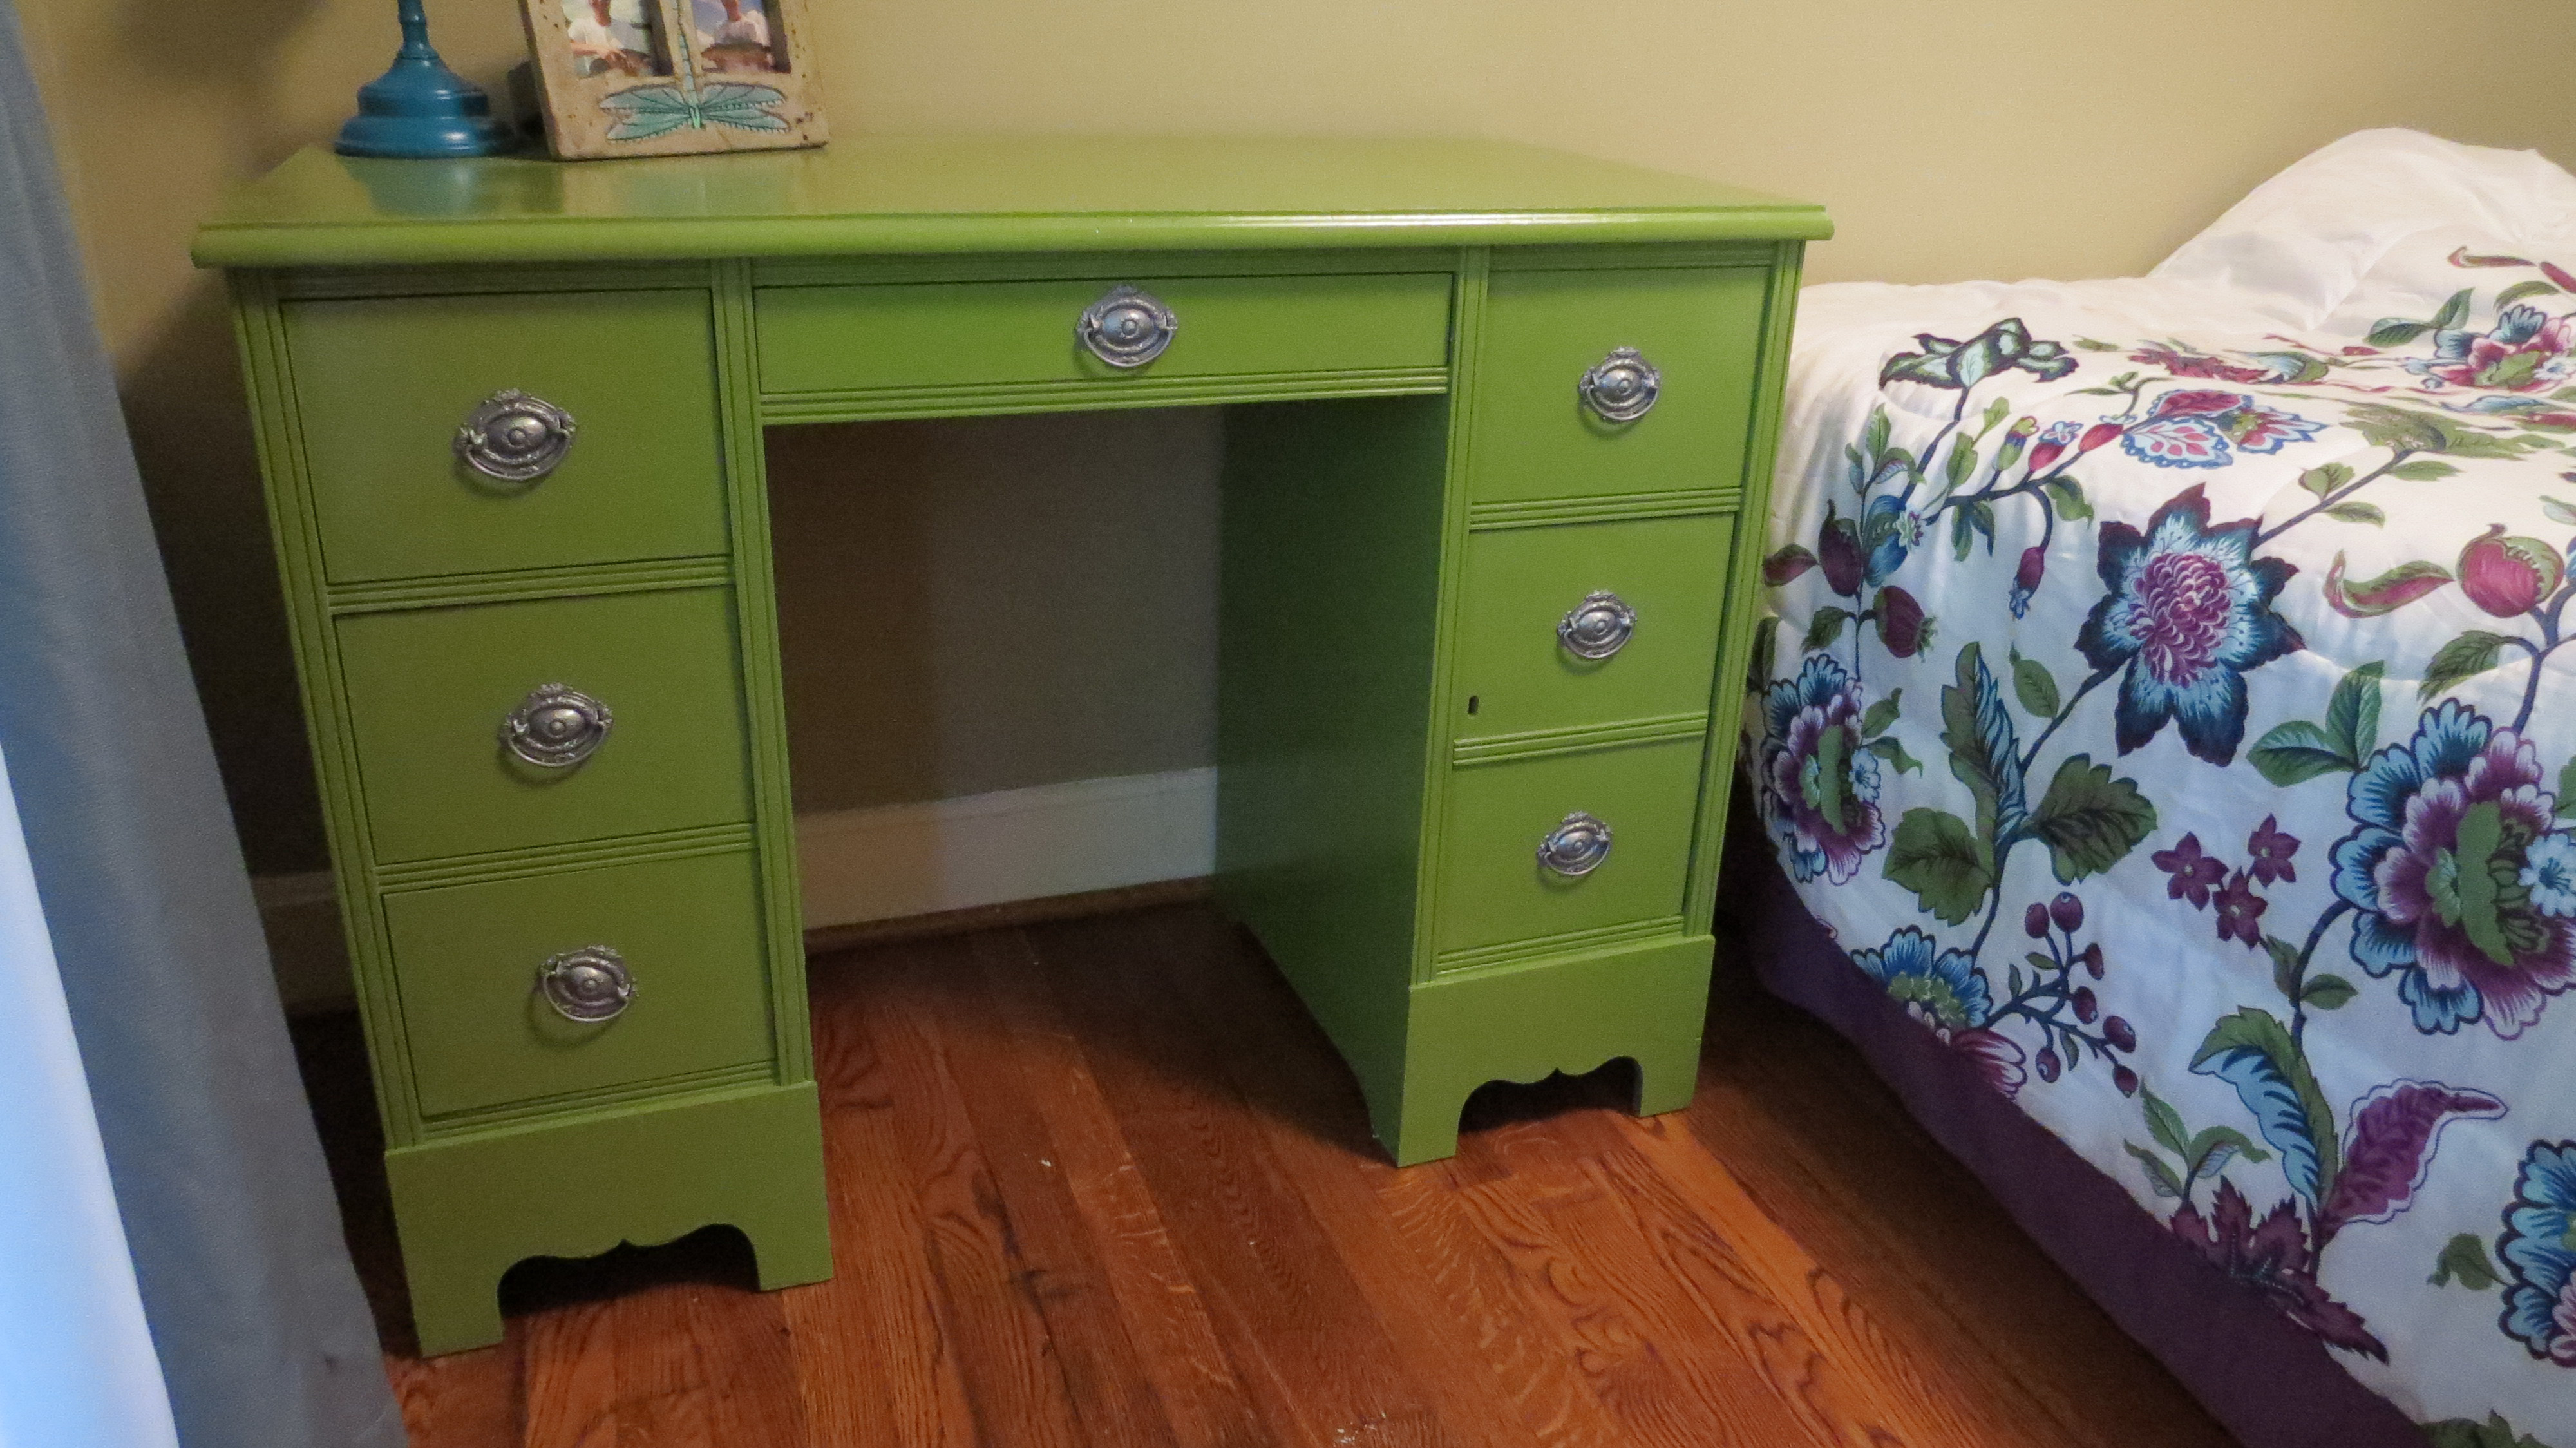
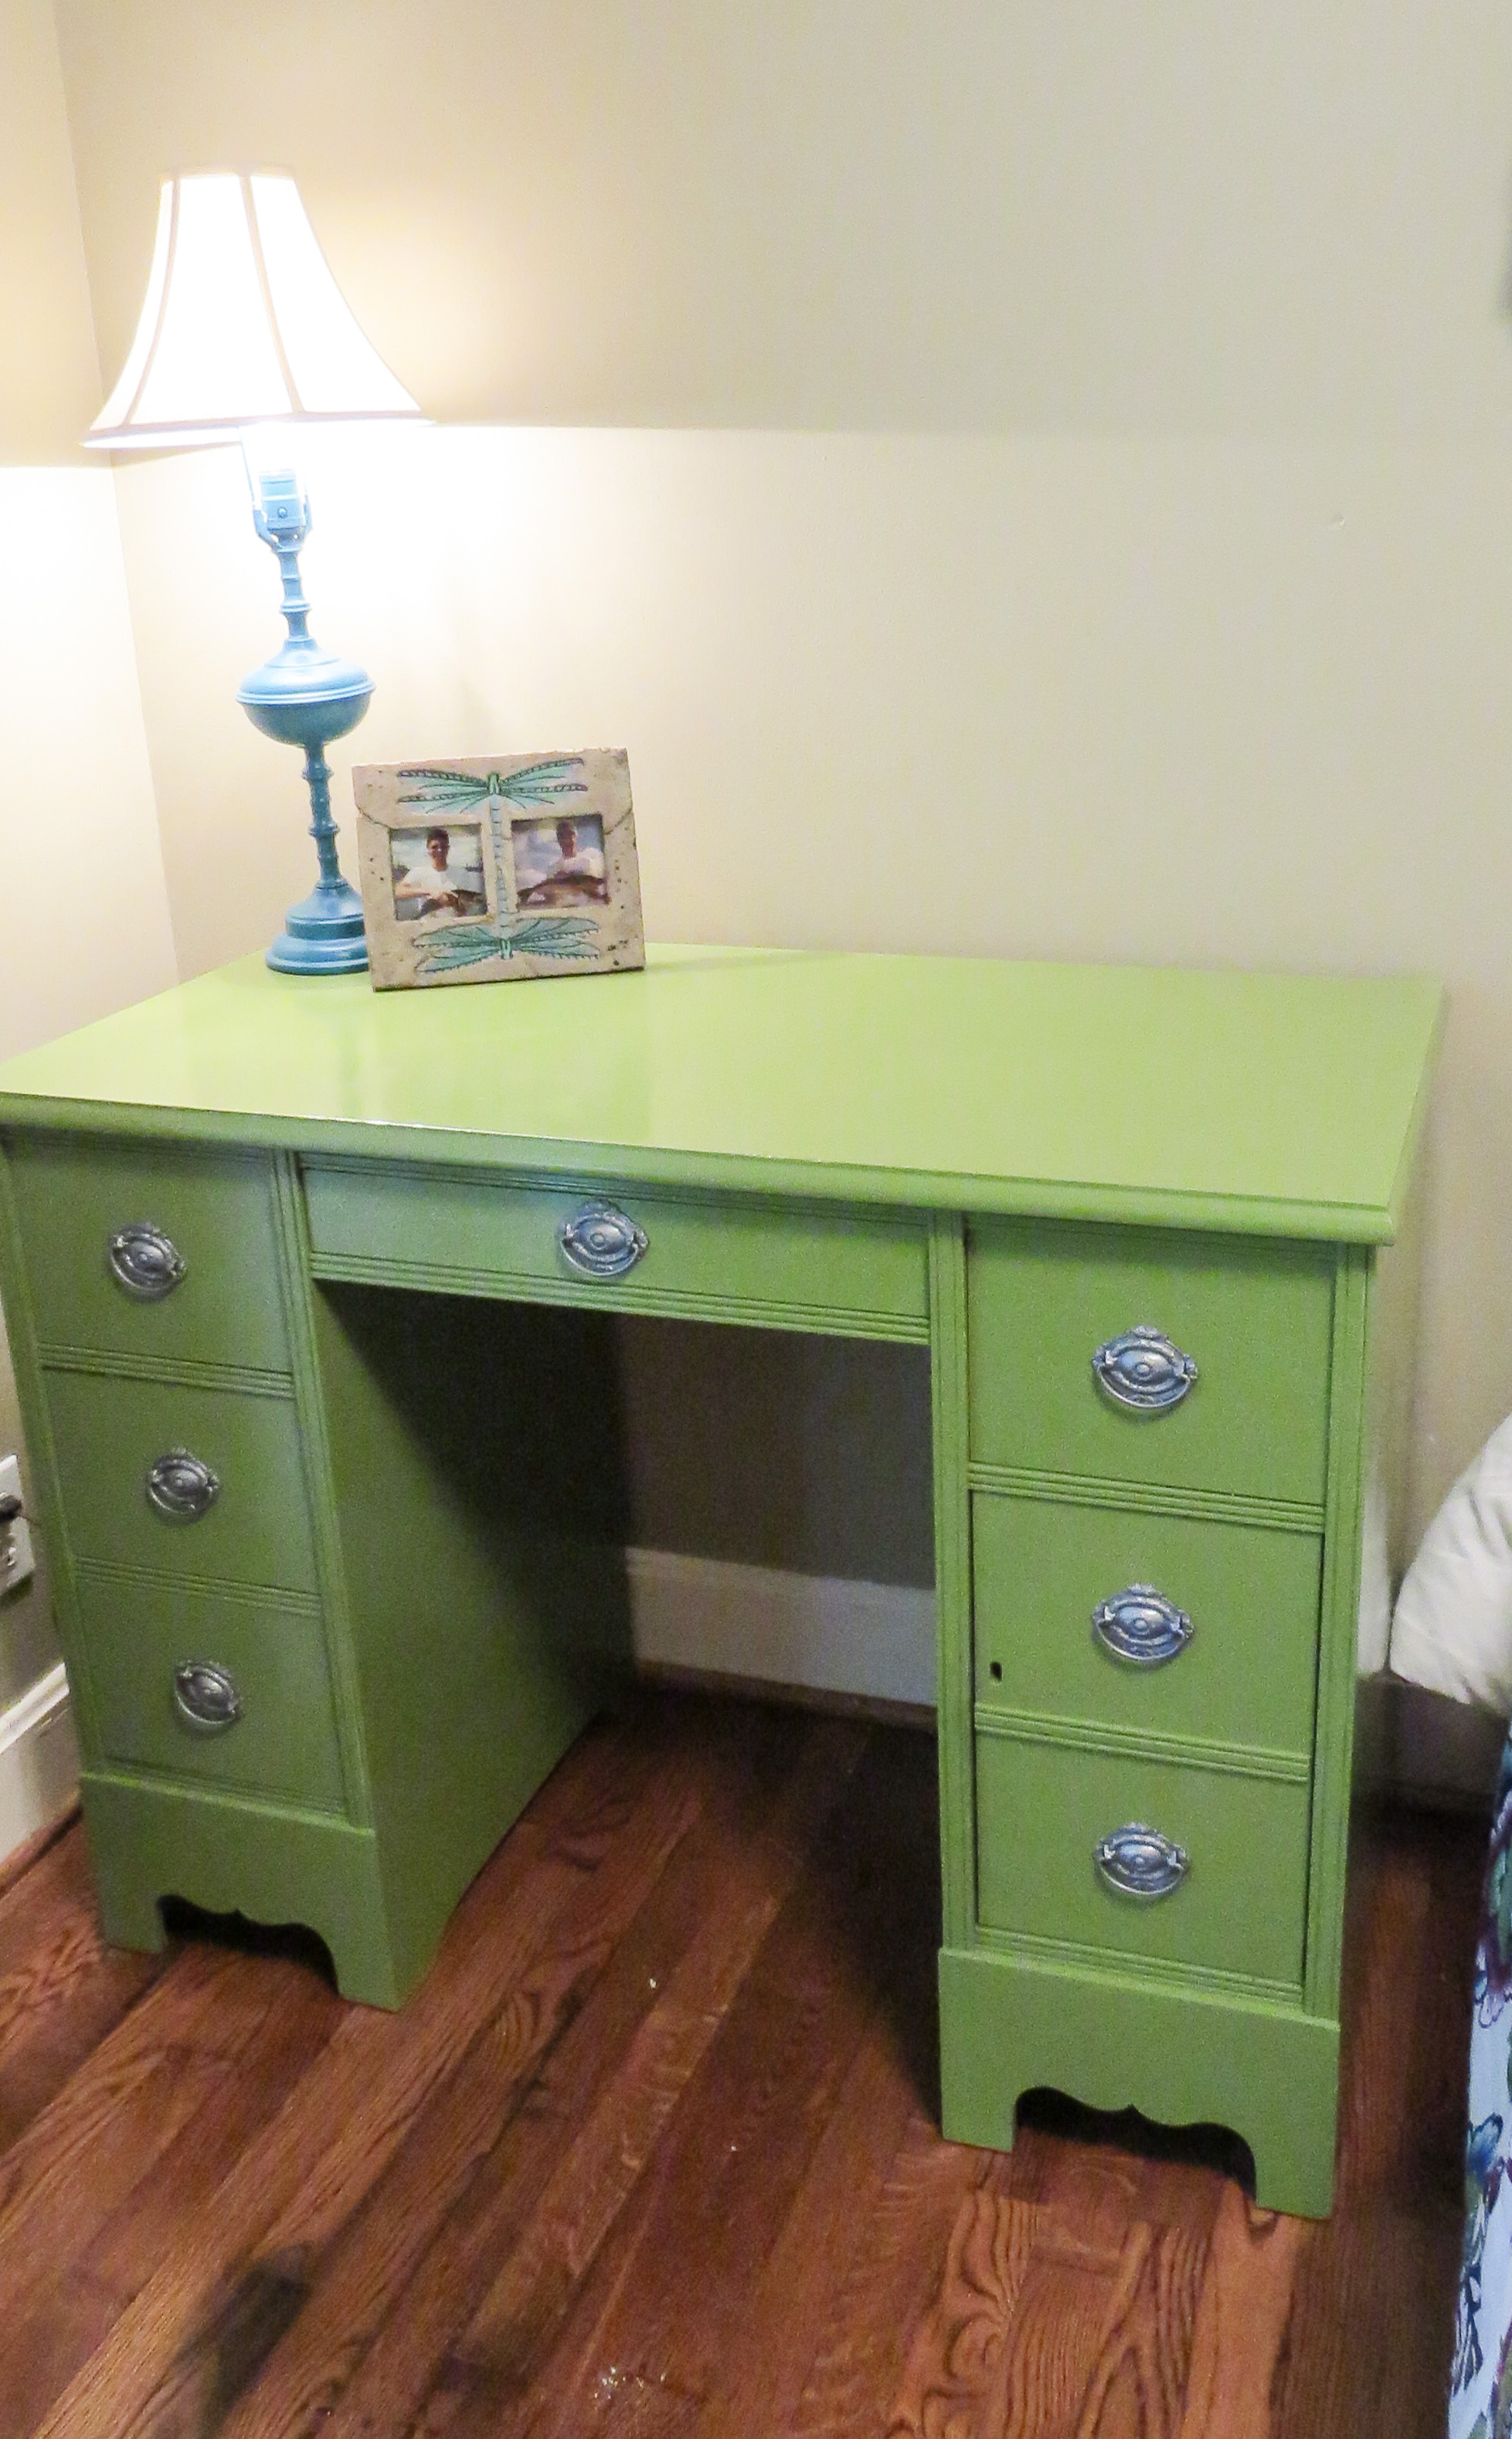
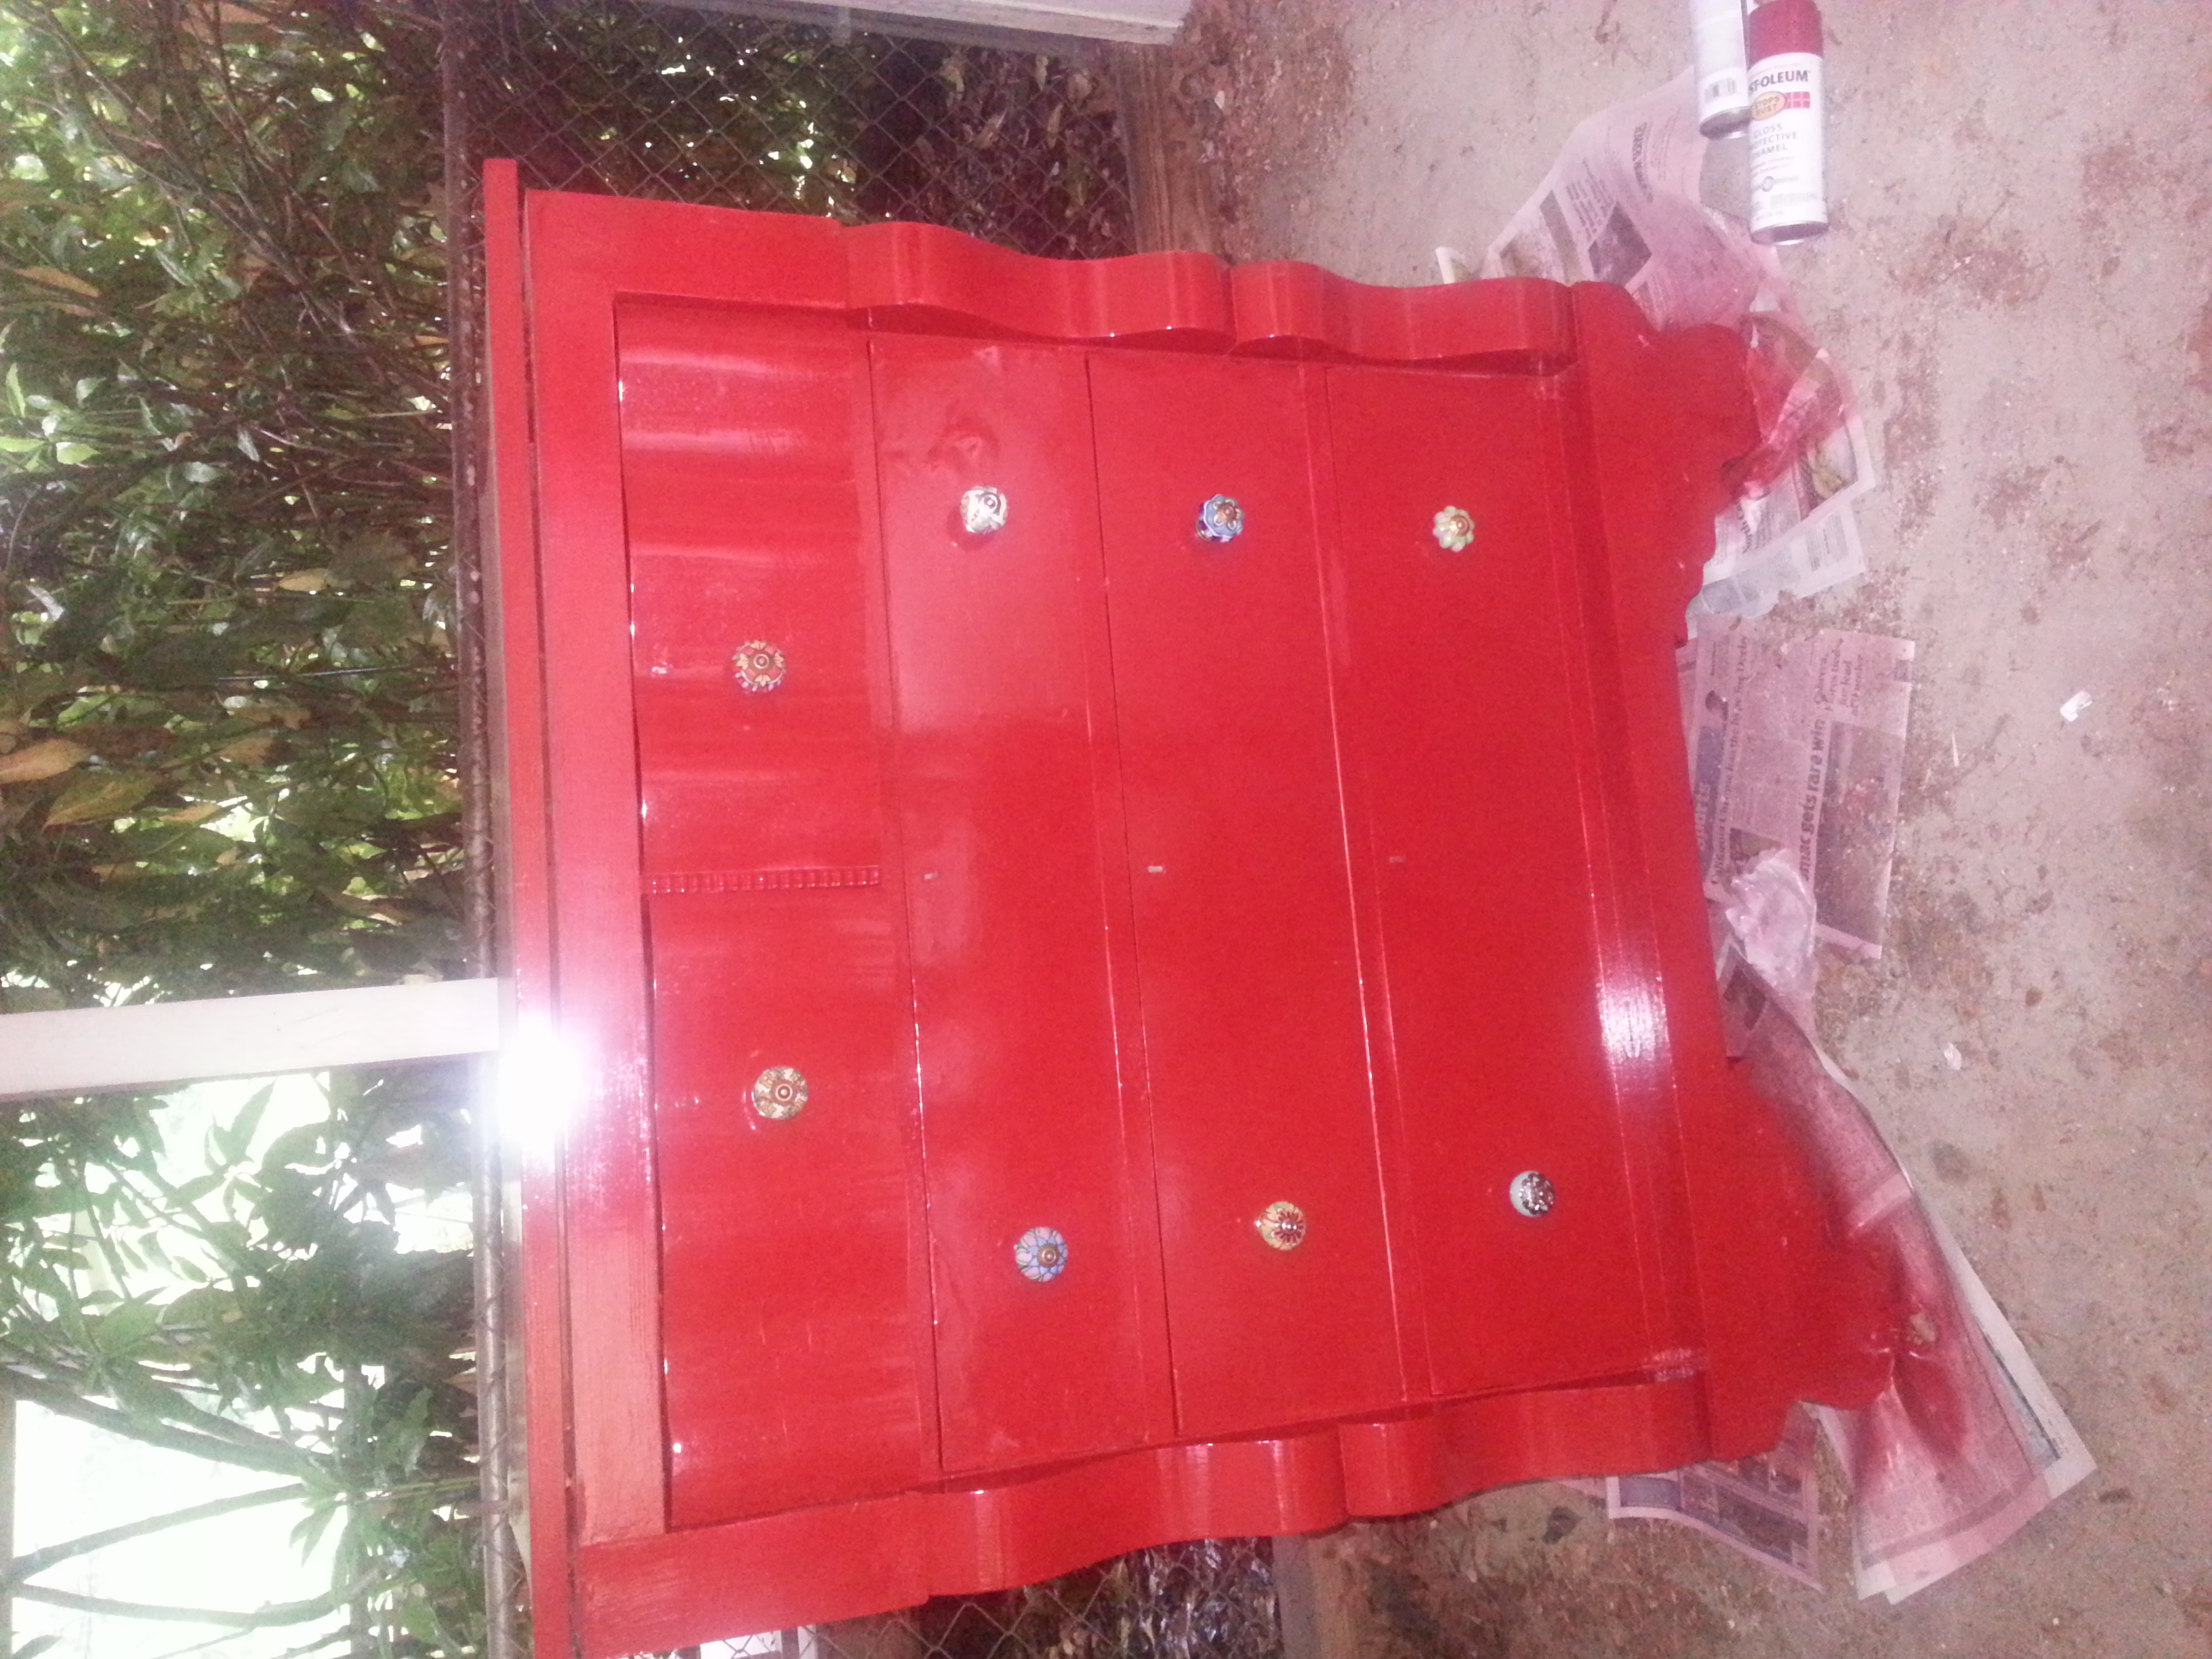
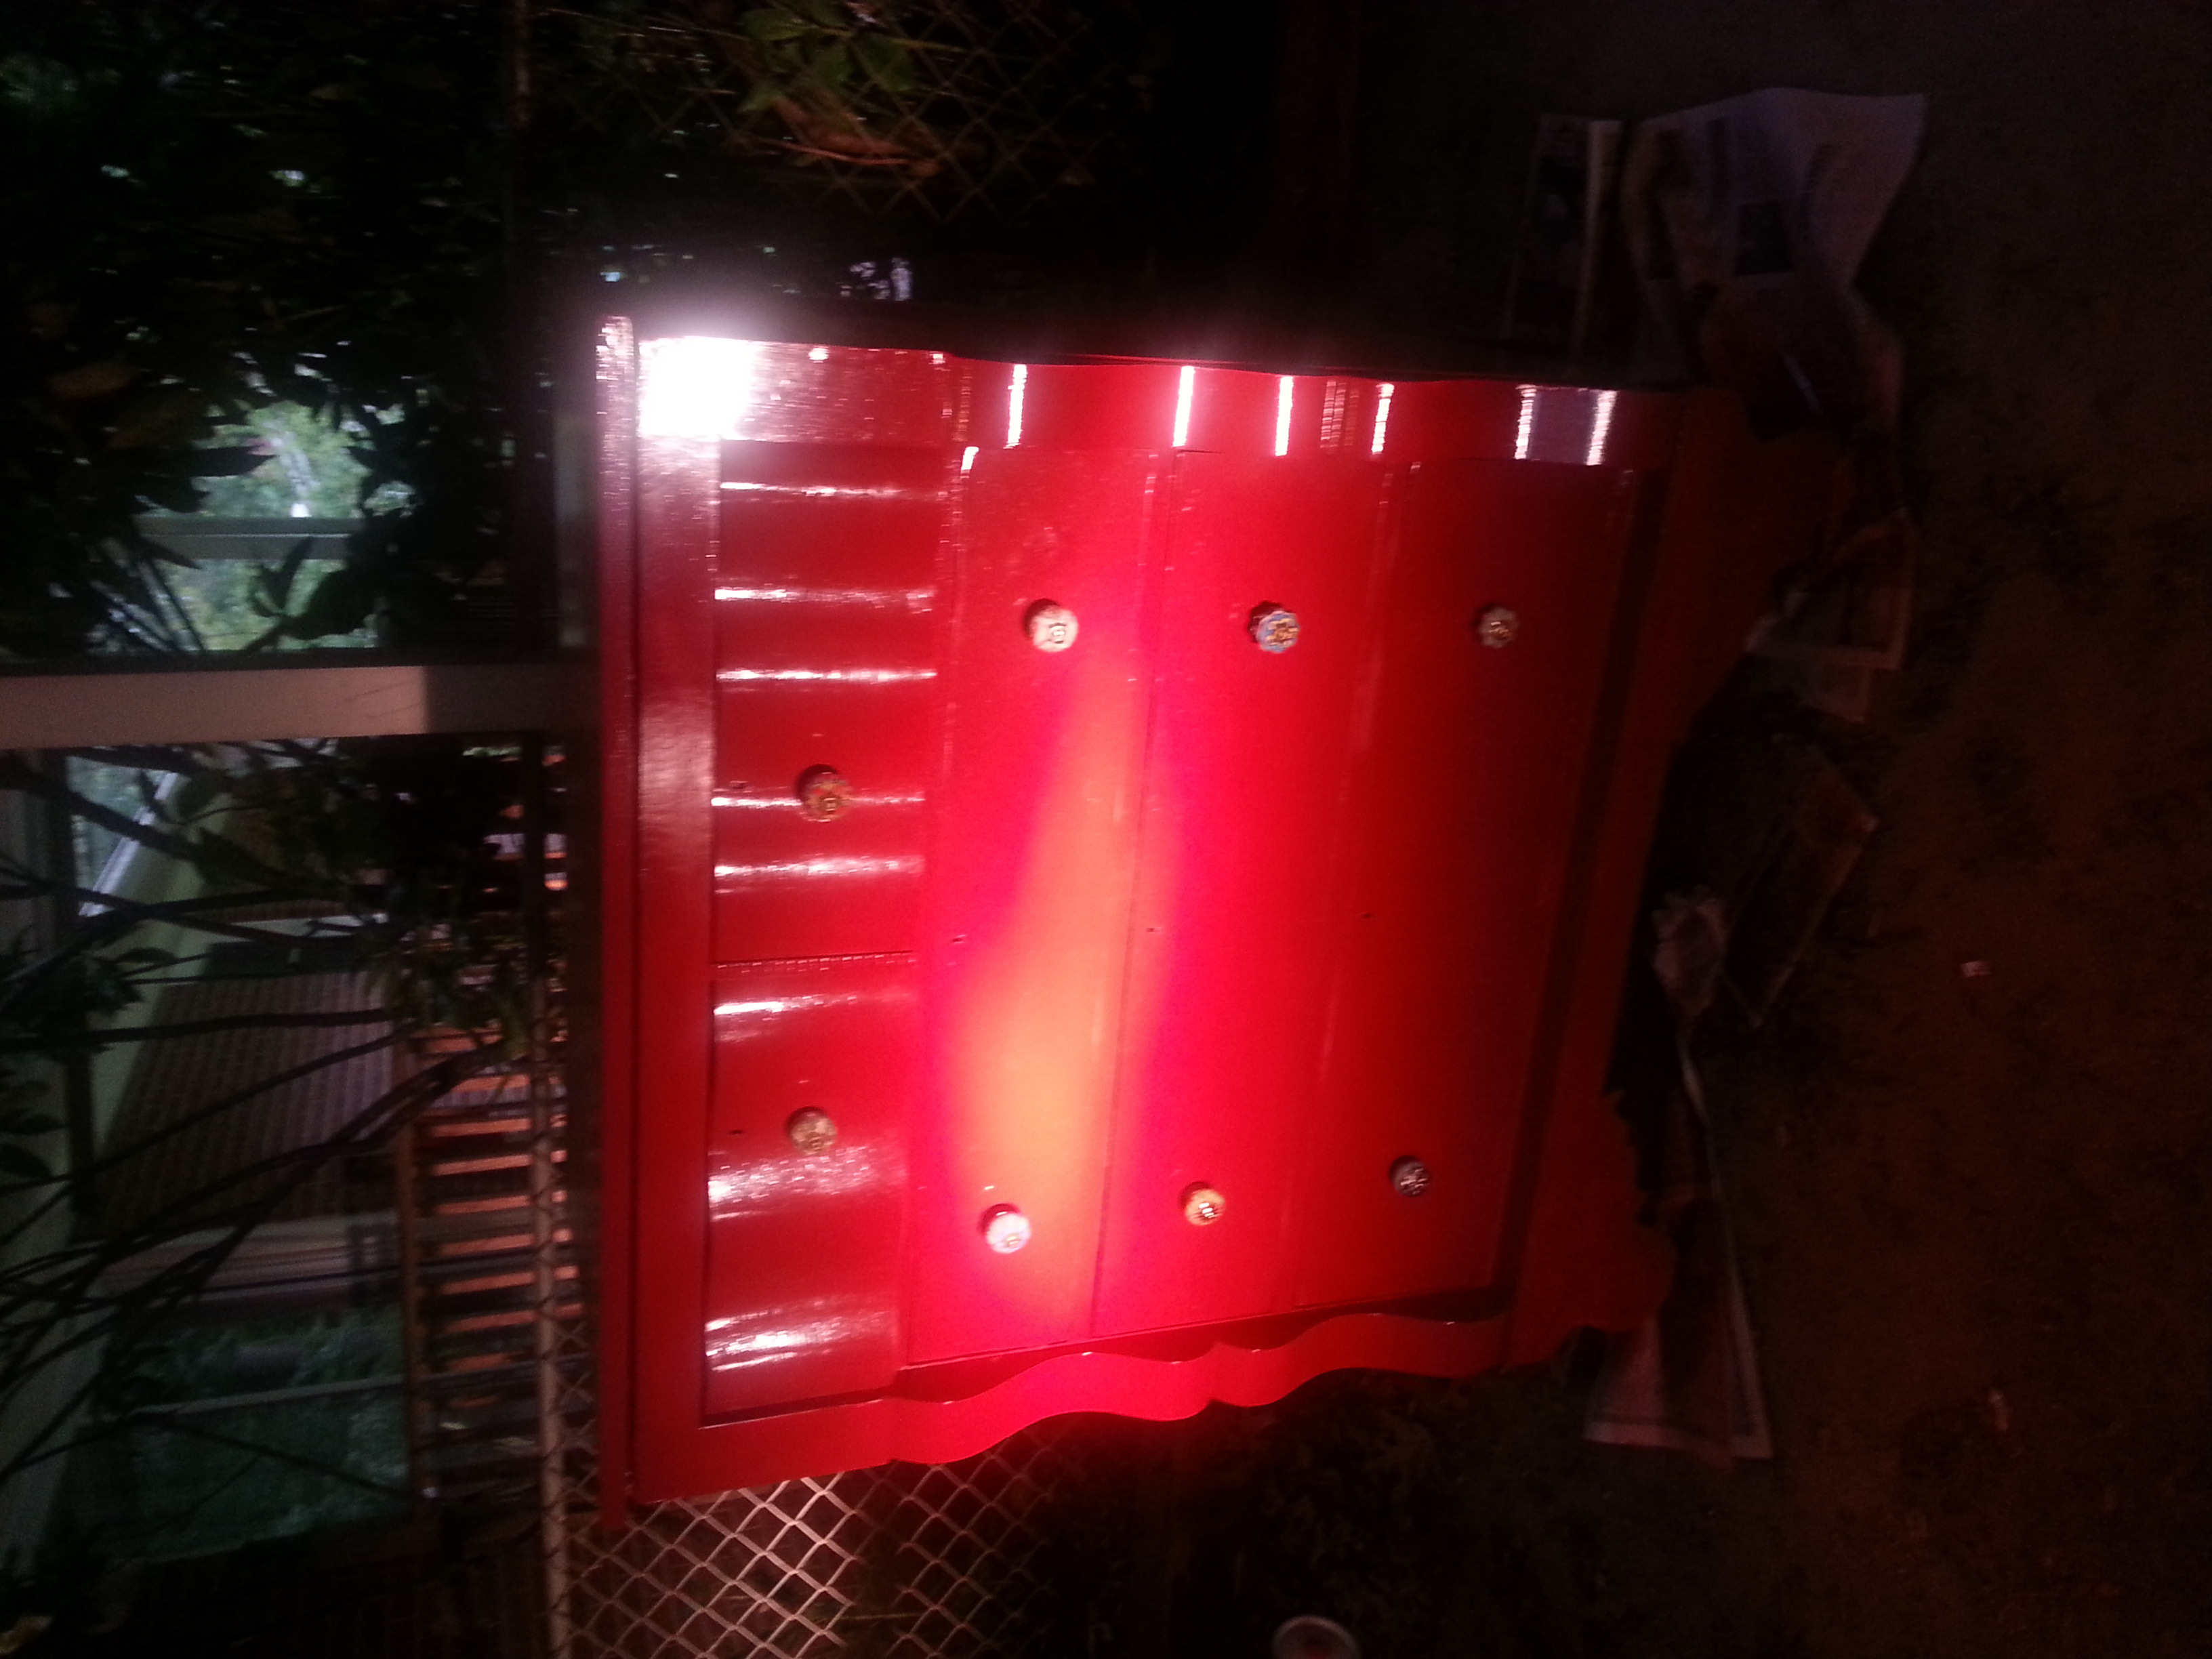
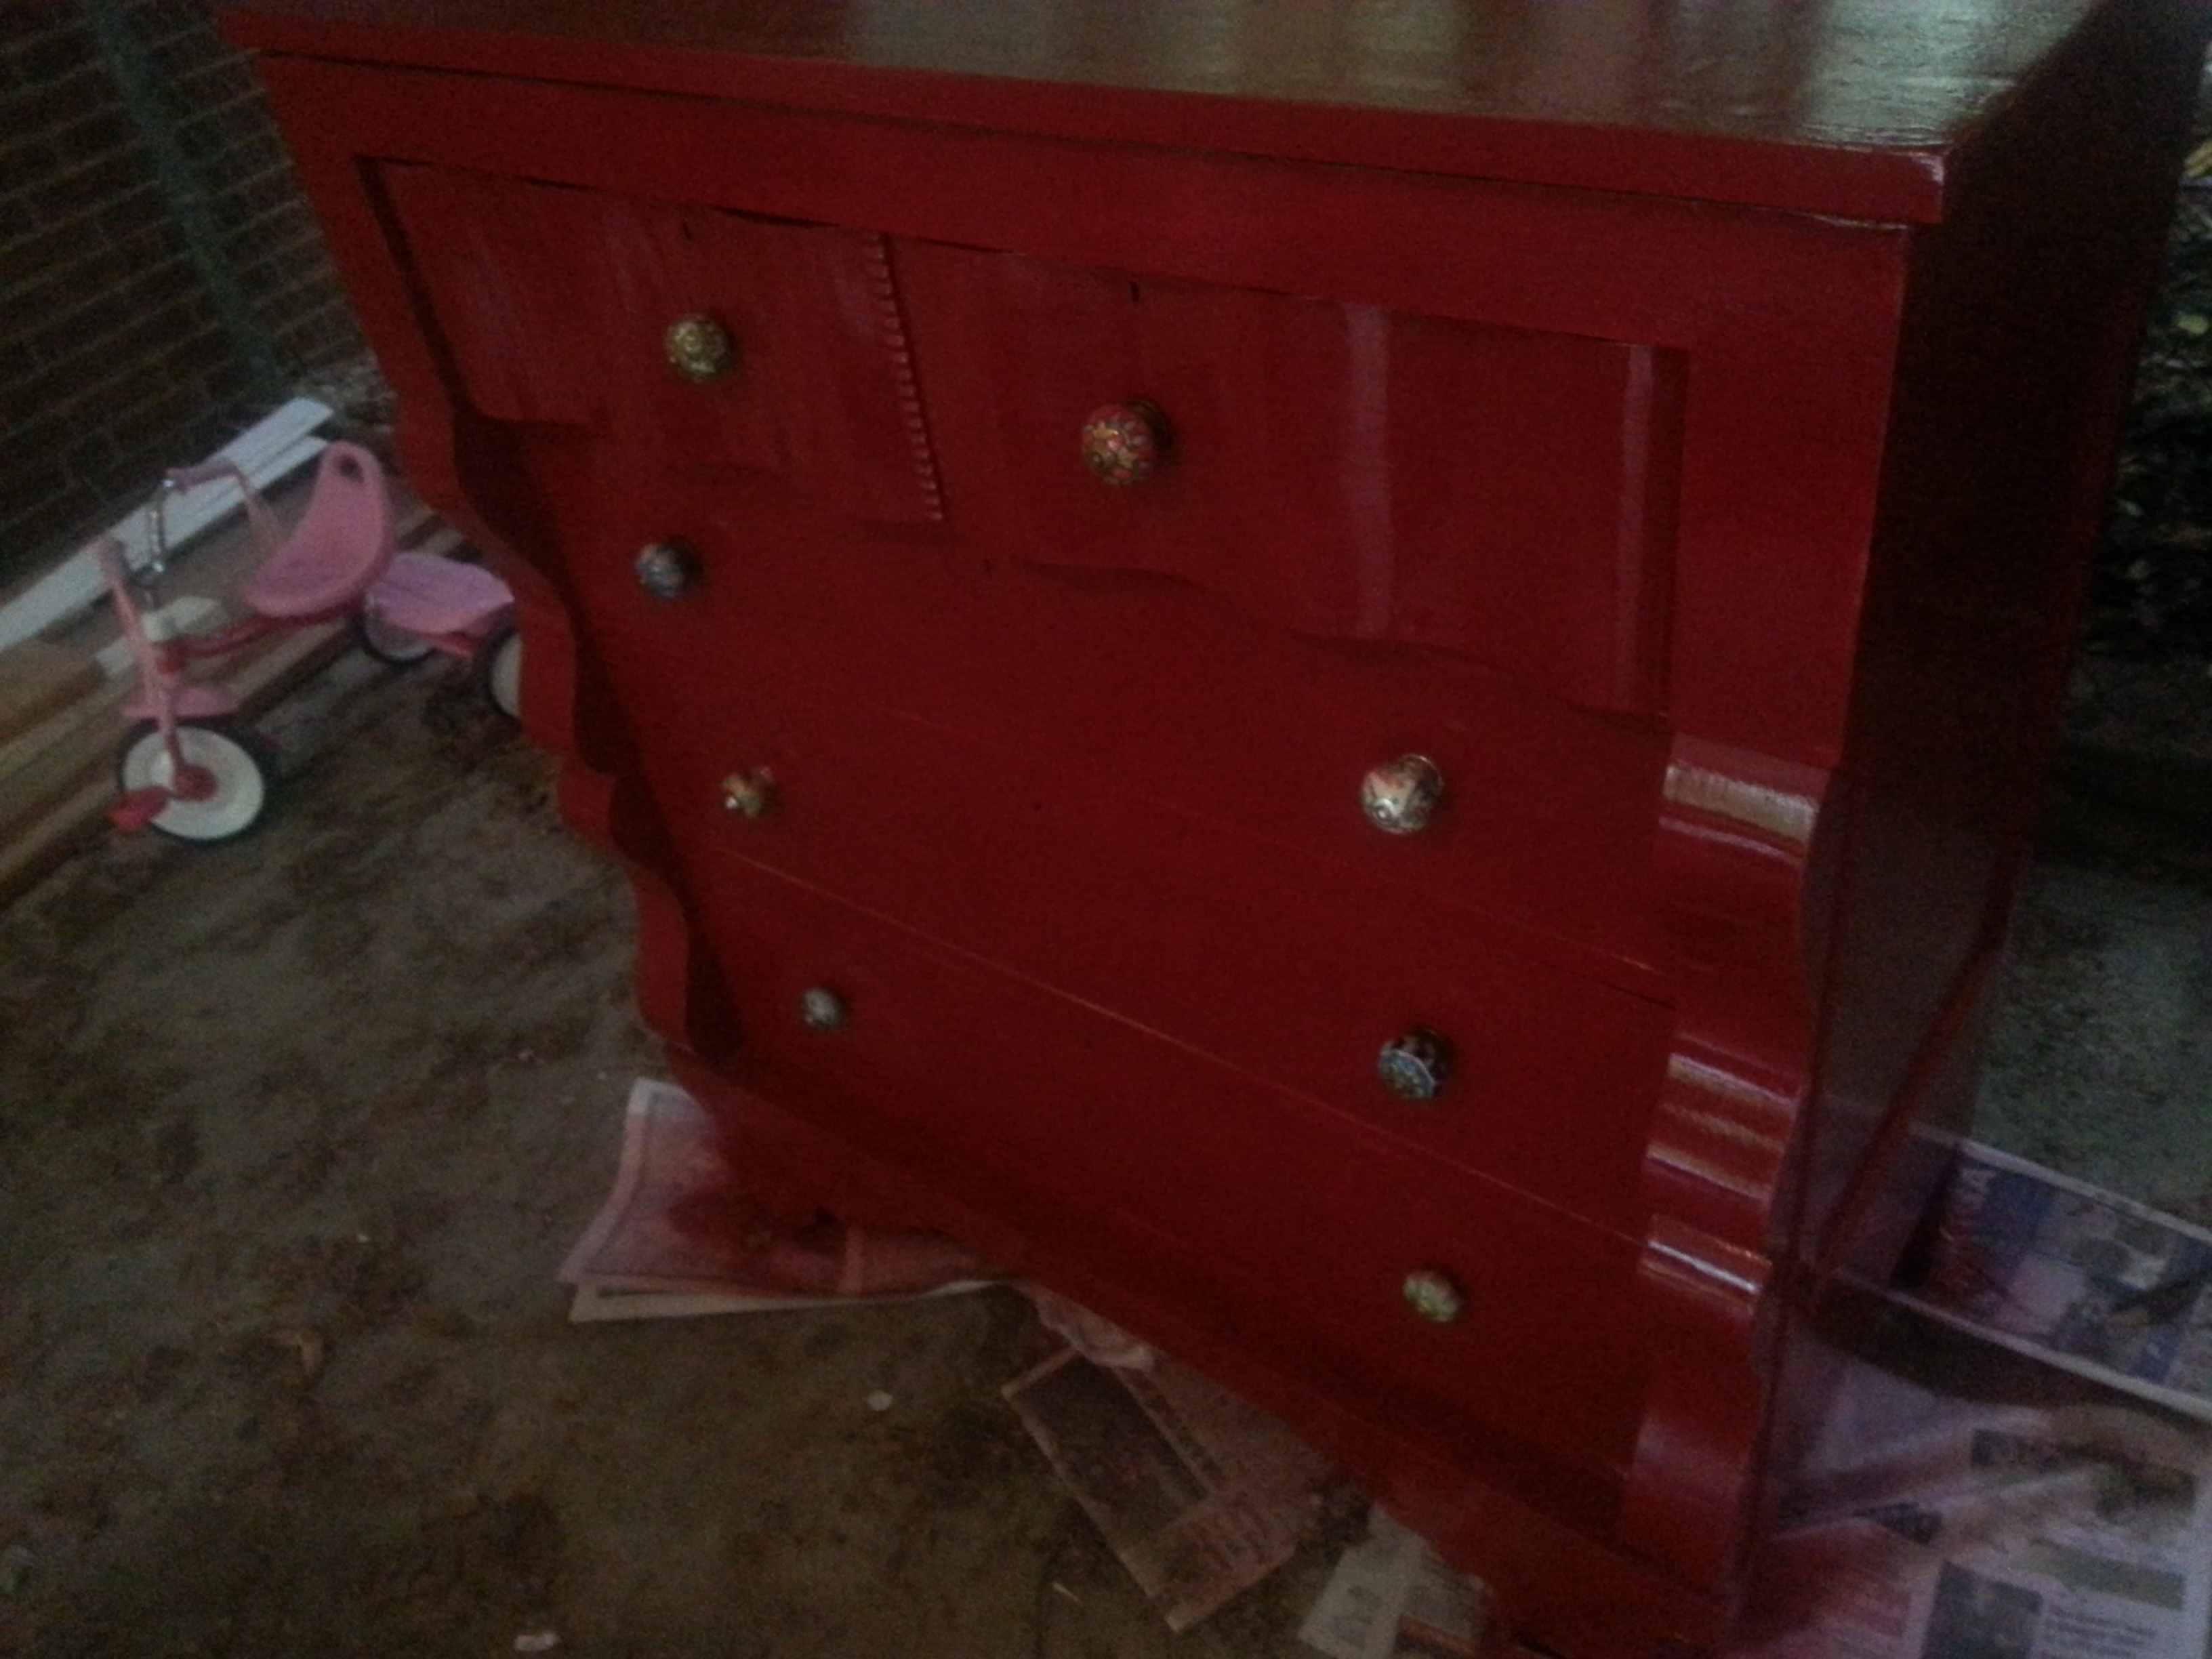
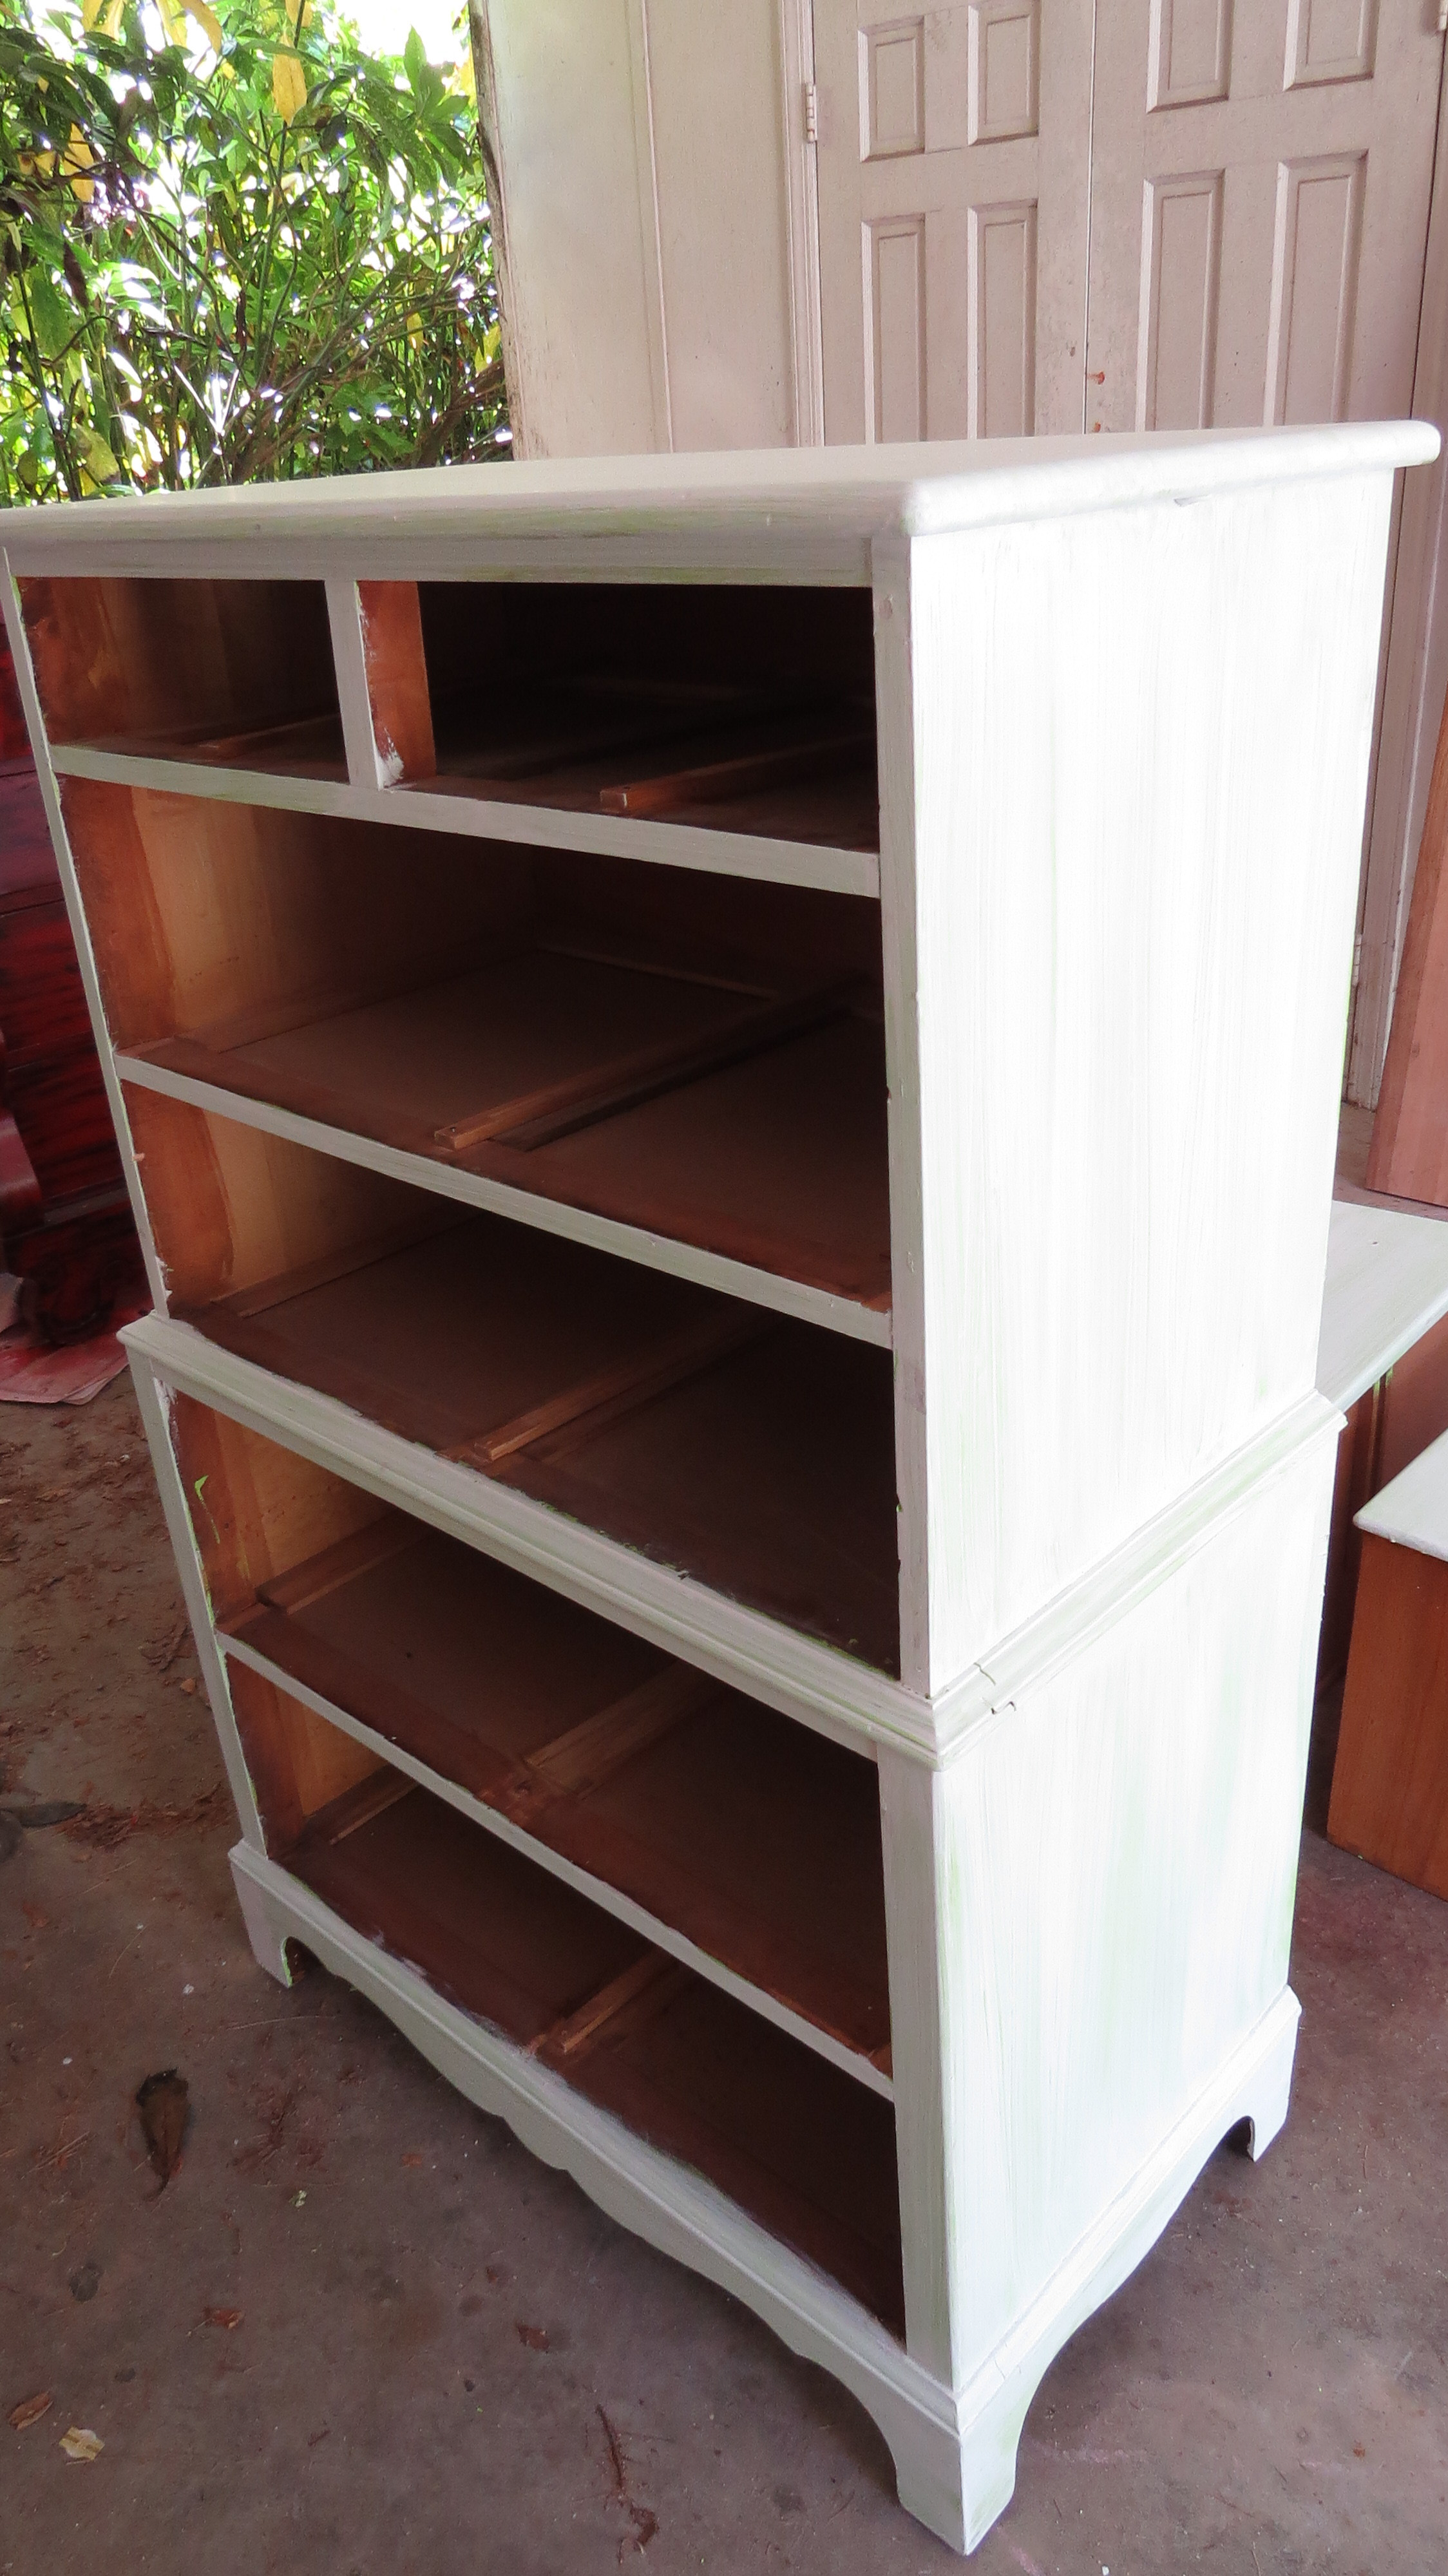
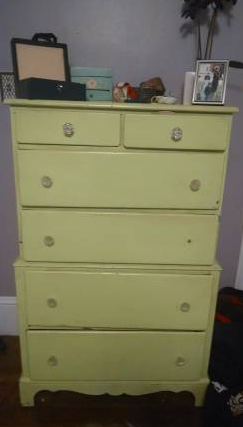
I really like the tiered look, the two sections and the cute cut-out by the legs. Not a bad shape and I think the clean lines will make this a nice canvas for something a bit more wacky and fun than I normally do. I want to treat this basically like a canvas of wood that happens to have drawers instead of a dresser to paint on. It is going to need some new hardware, and it looks like the second-to-last drawer has a chunk missing that I’ll have to replace, but all in all not bad for $30 bucks! I pick it up tomorrow so we’ll see if it was a good buy.

TOMORROW HAS ARRIVED:

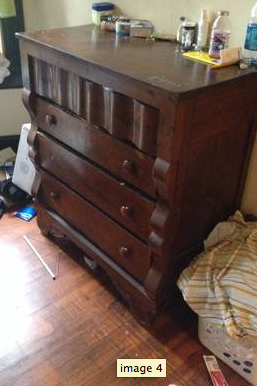
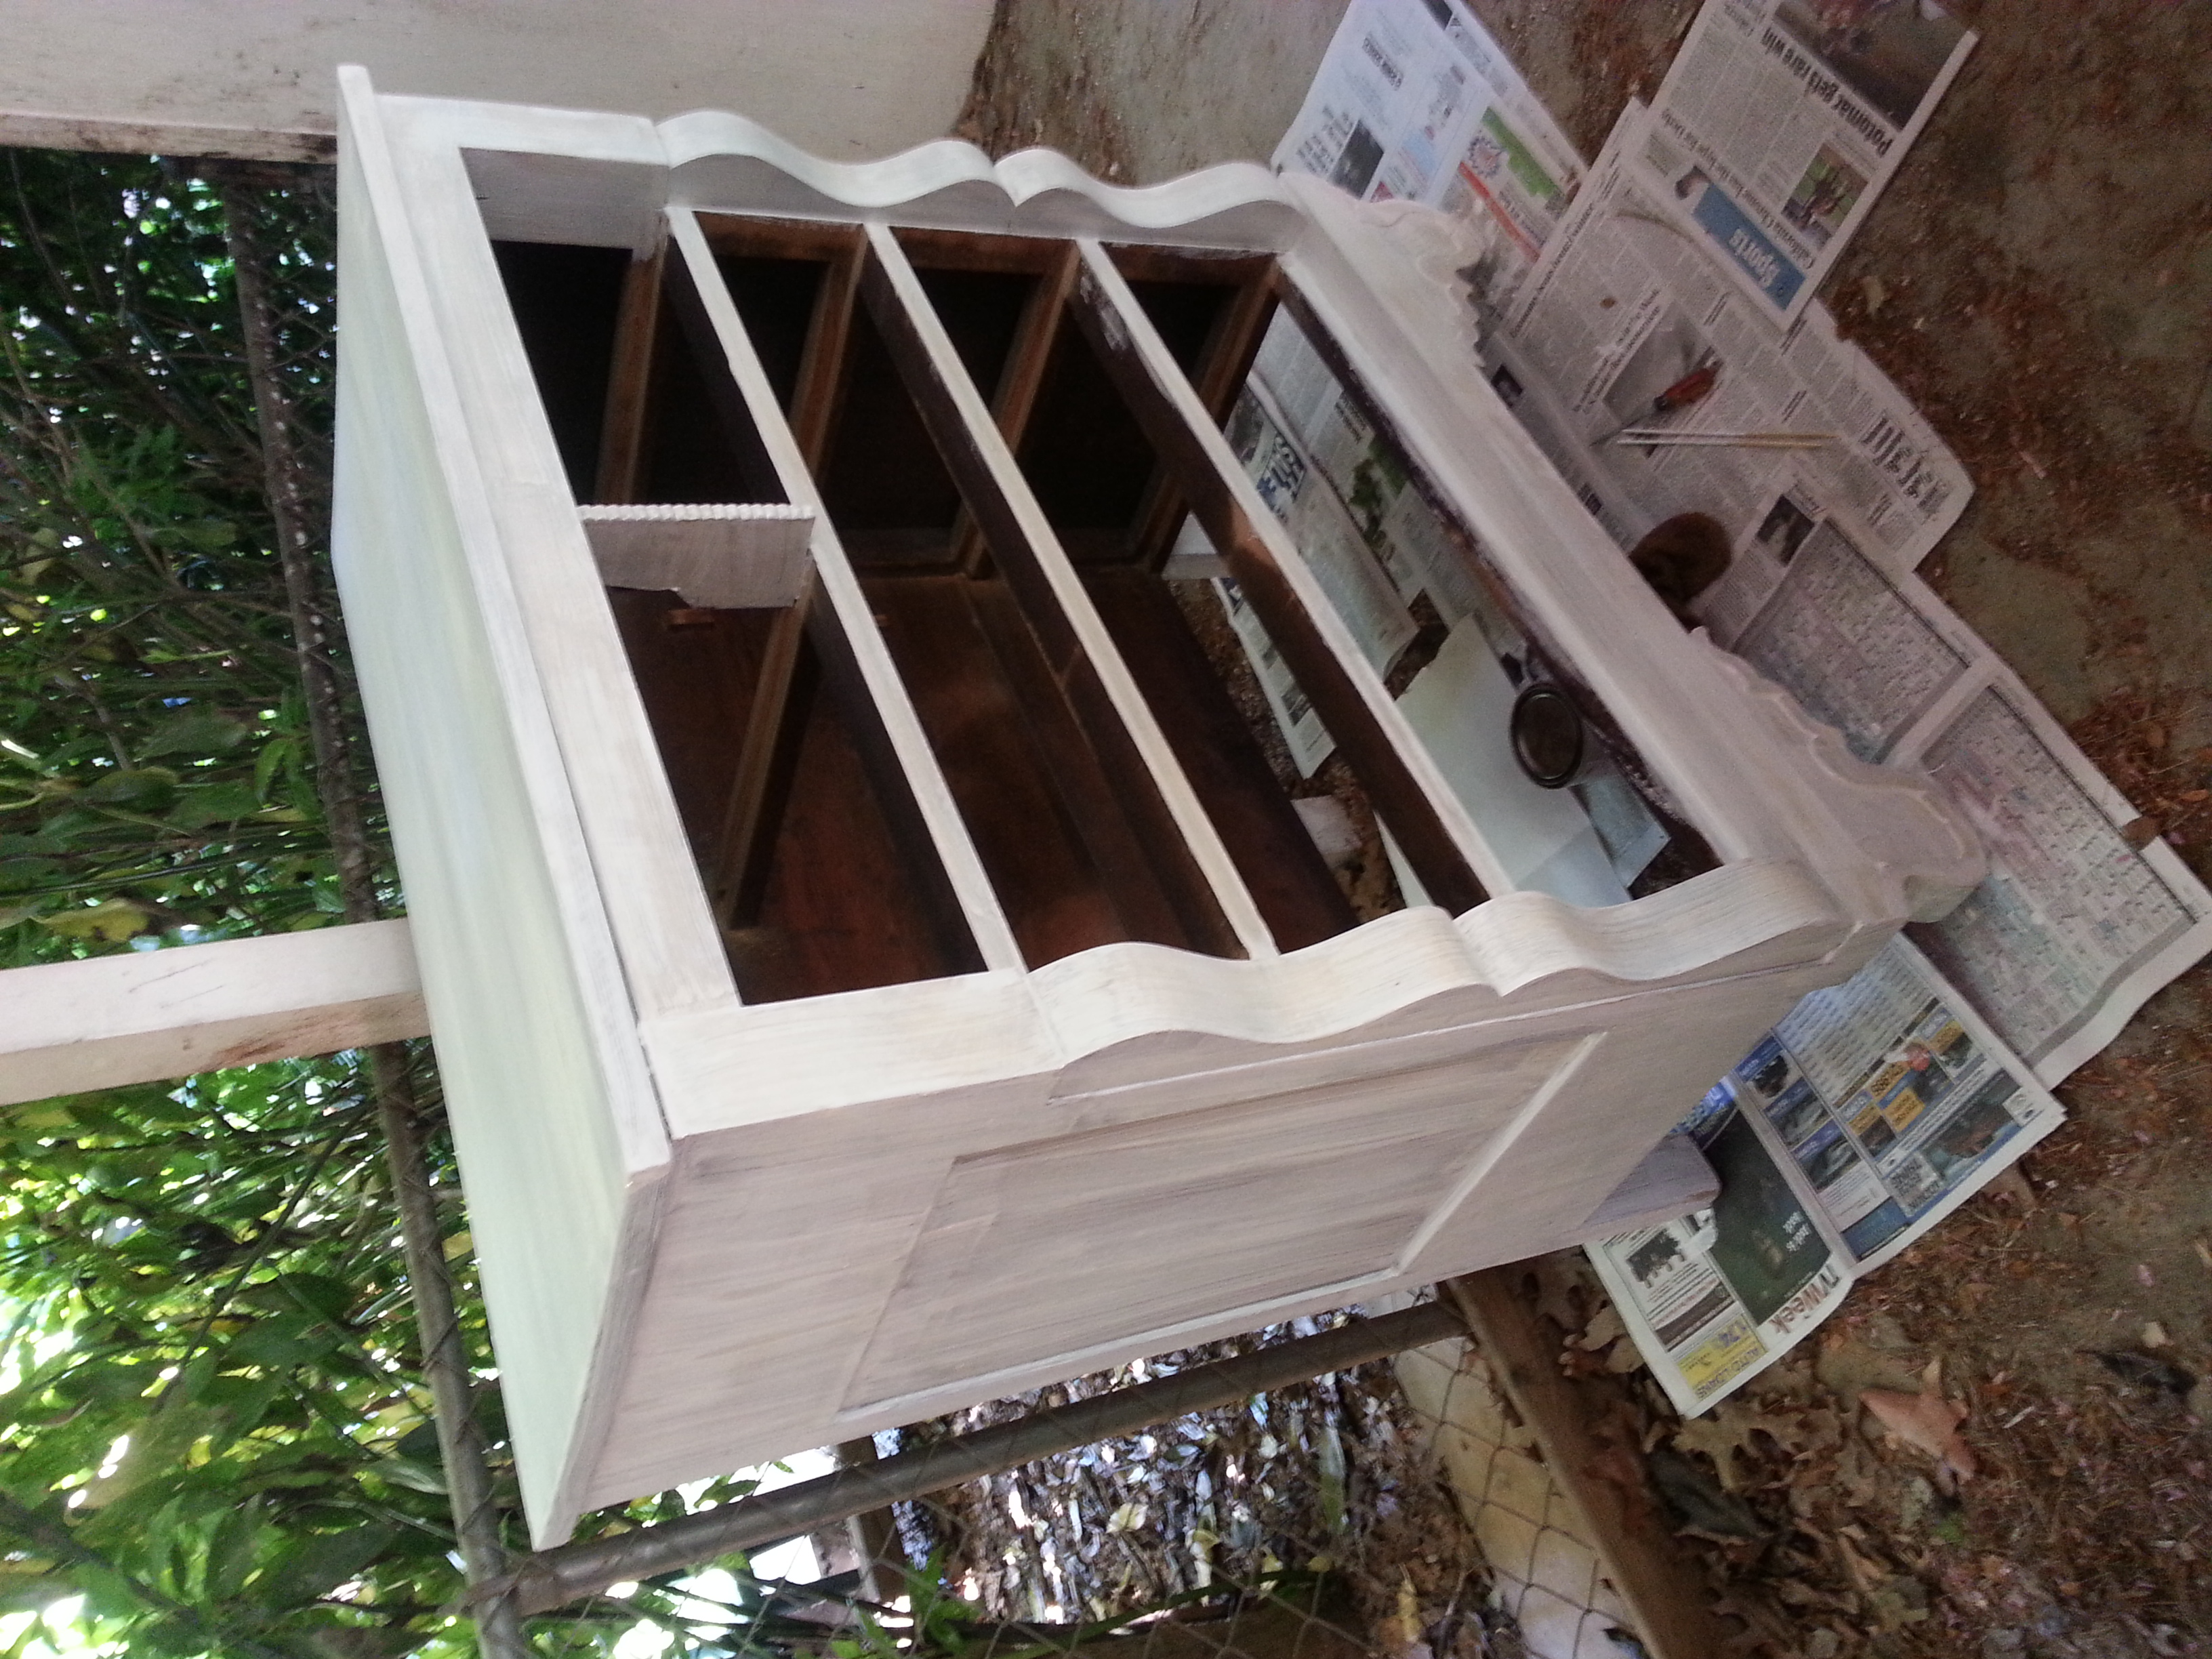
The lady I bought it from was moving to NYC and had to part with her dresser. It was smaller than I thought, but better construction than anticipated. I took it home with the help of a rented Zippy Shell and primed the base. It looks a bit French with the white primer and the base cut. I think I’ll play that up a bit and go with a vintage French-inspired look that pays homage to their national drink: wine.

IMG_6876
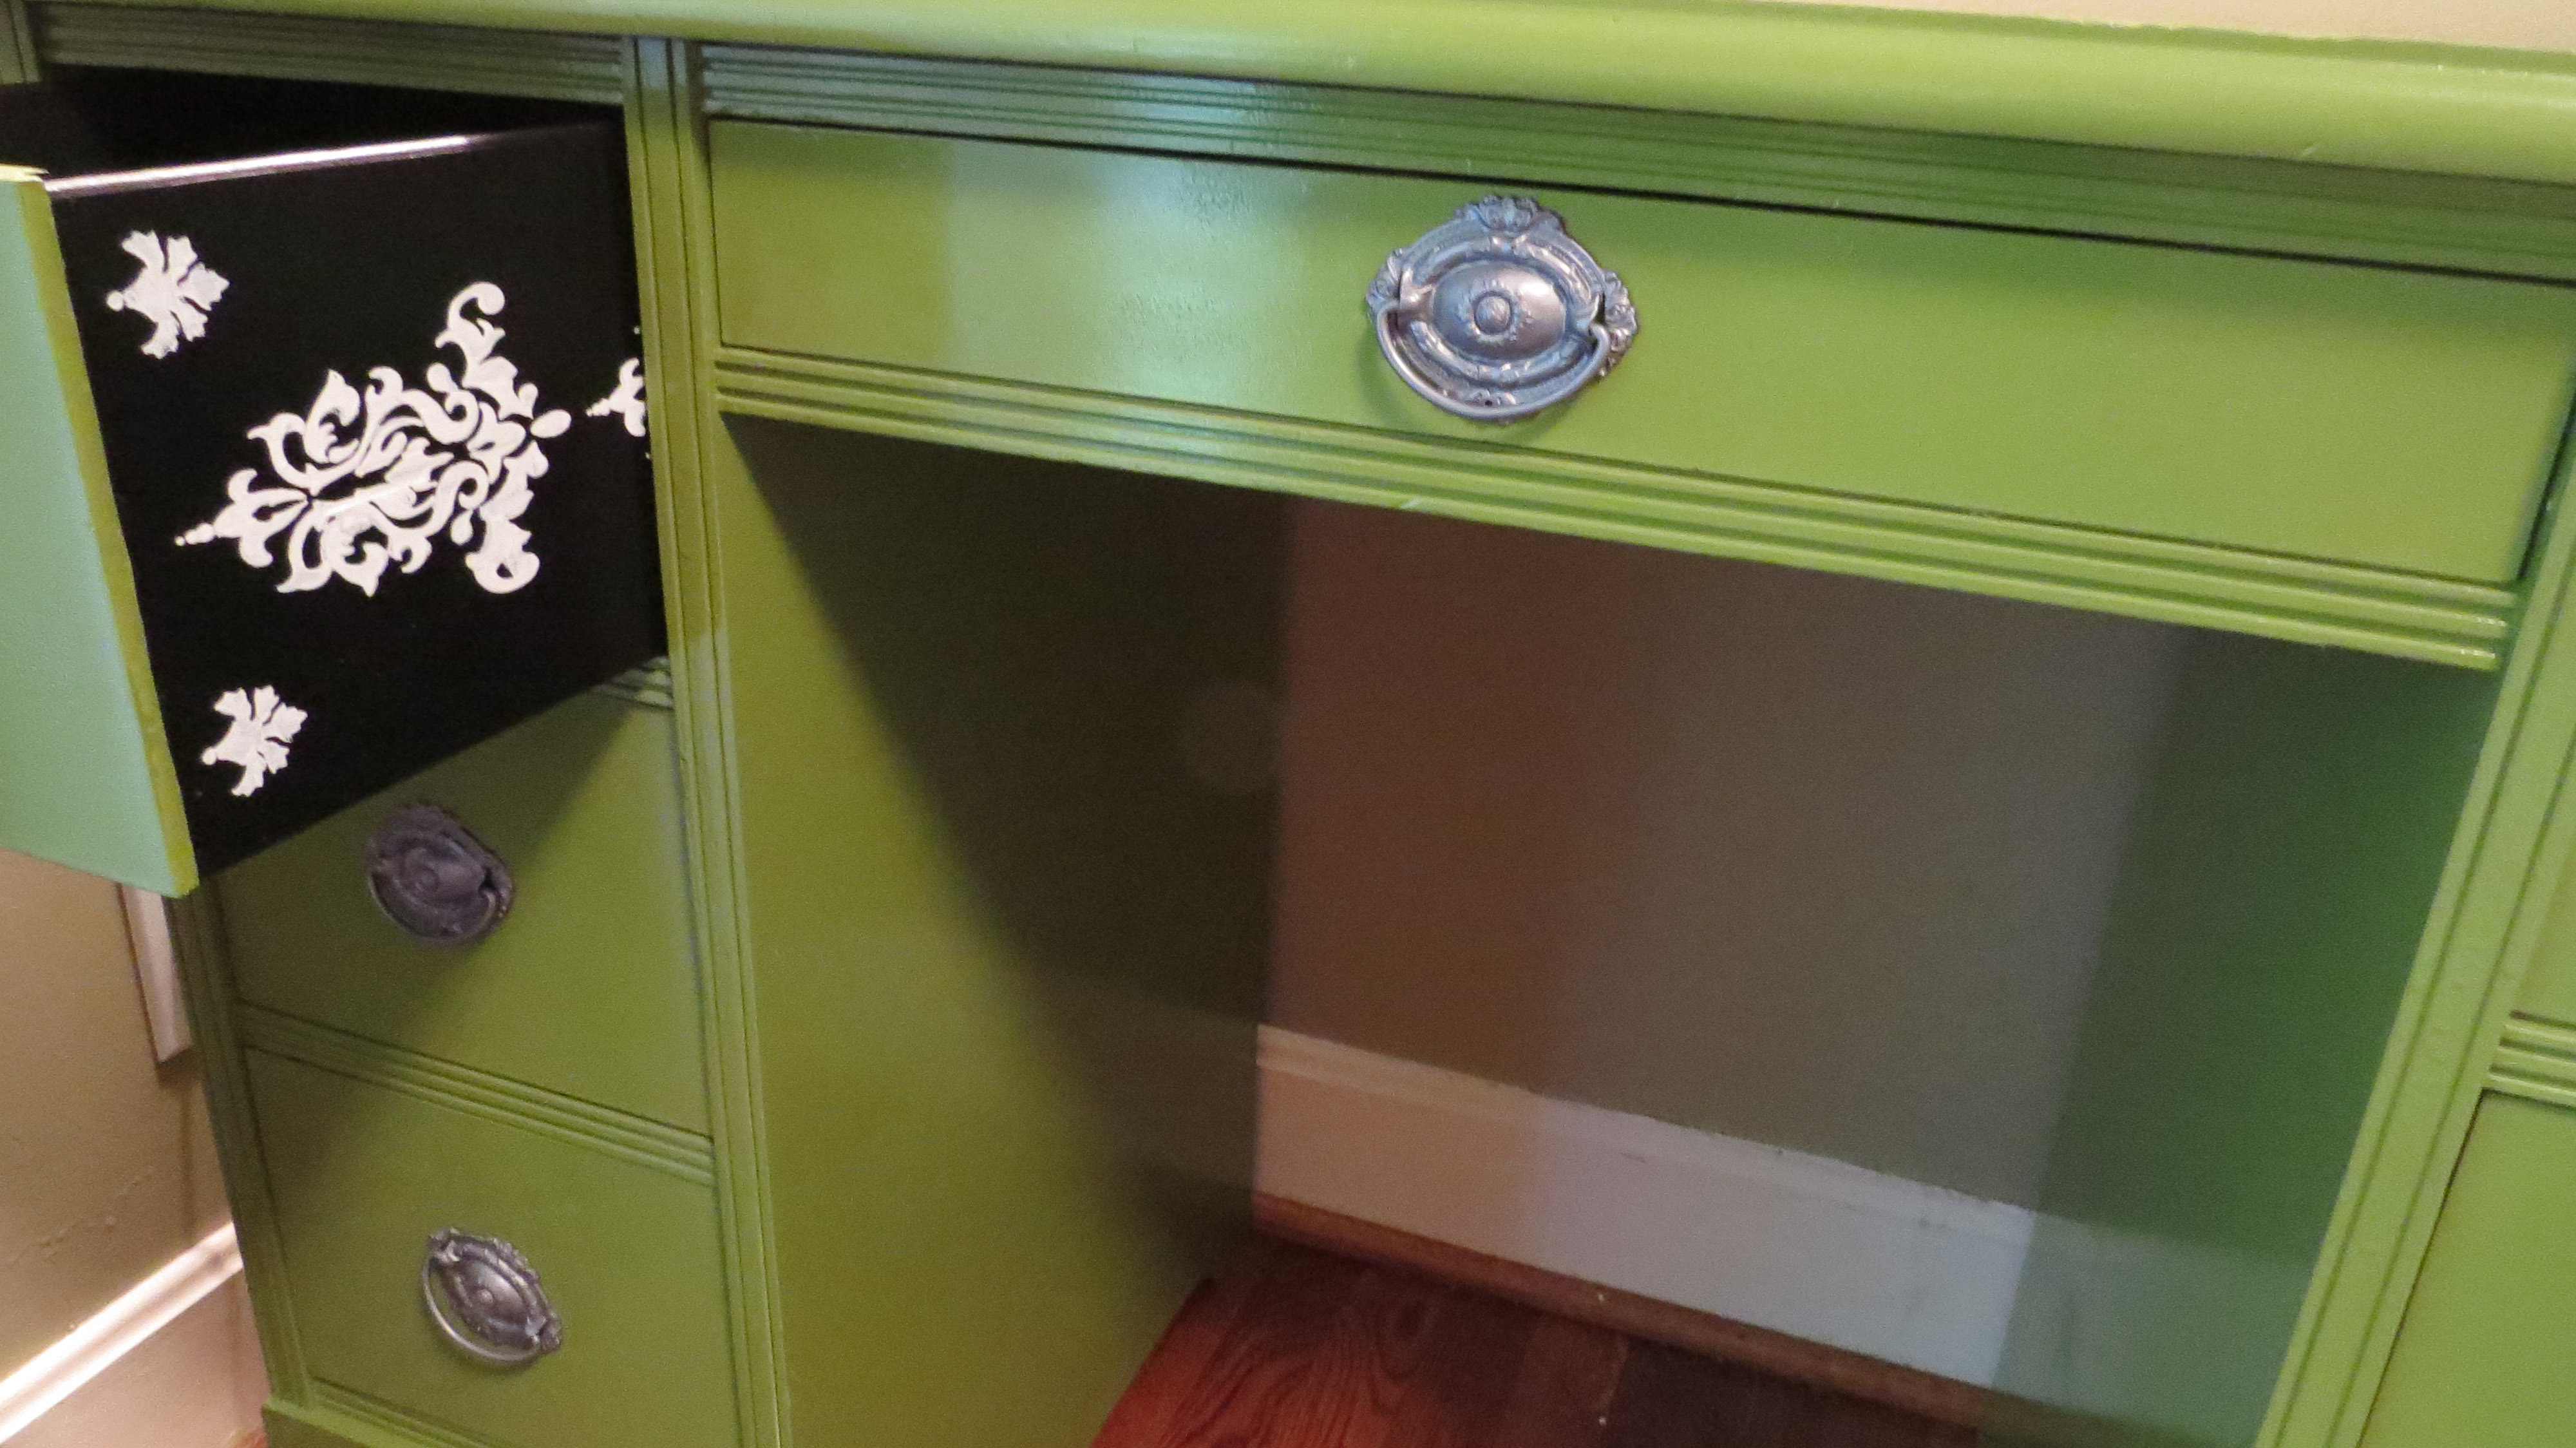
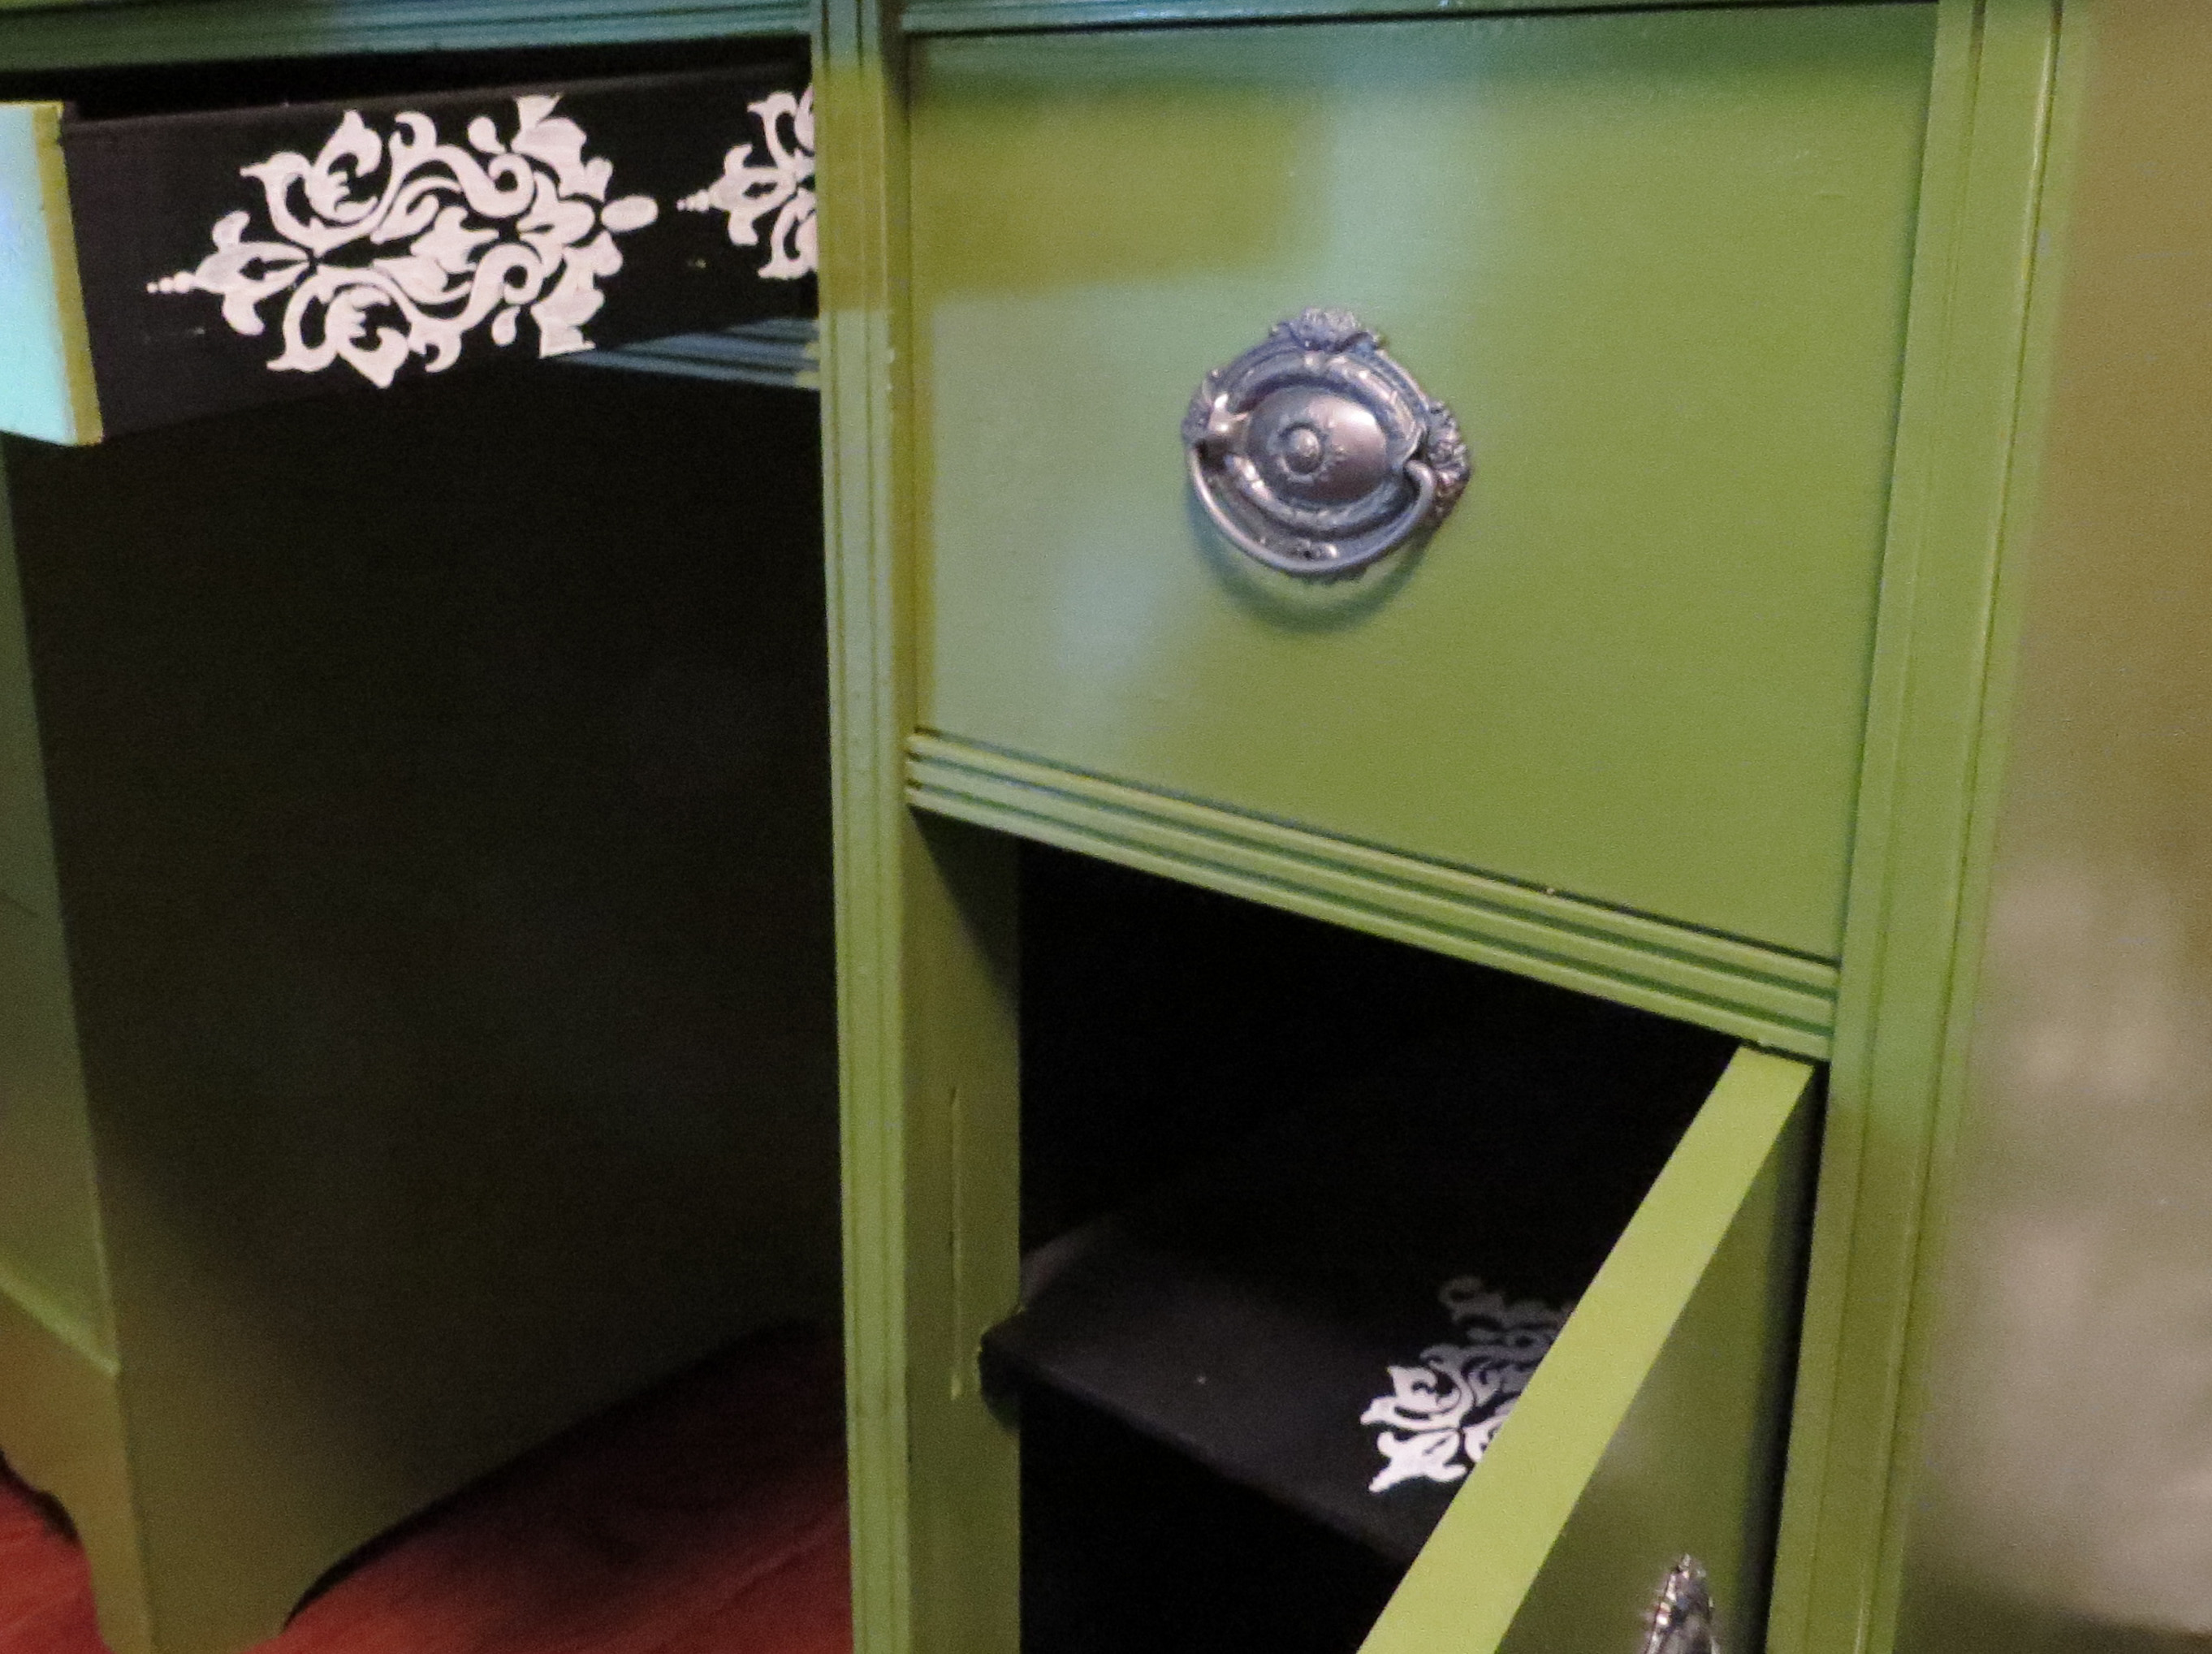
Next, I plan on trying something entirely new. I plan on trying to stencil in more design using a Martha Stewart stencil and some joint compound. Sounds risky! But if this doesn’t work I can easily sand the ol’ girl down and try again. I think a bit of flare will add to the elaborate cut along the base and give it a more overall French feel. I hope my French buddies out there aren’t rolling their eyes. Sorry if this is the equivalent to painting cowboy hats and hamburgers all over a dresser in France and calling it American.

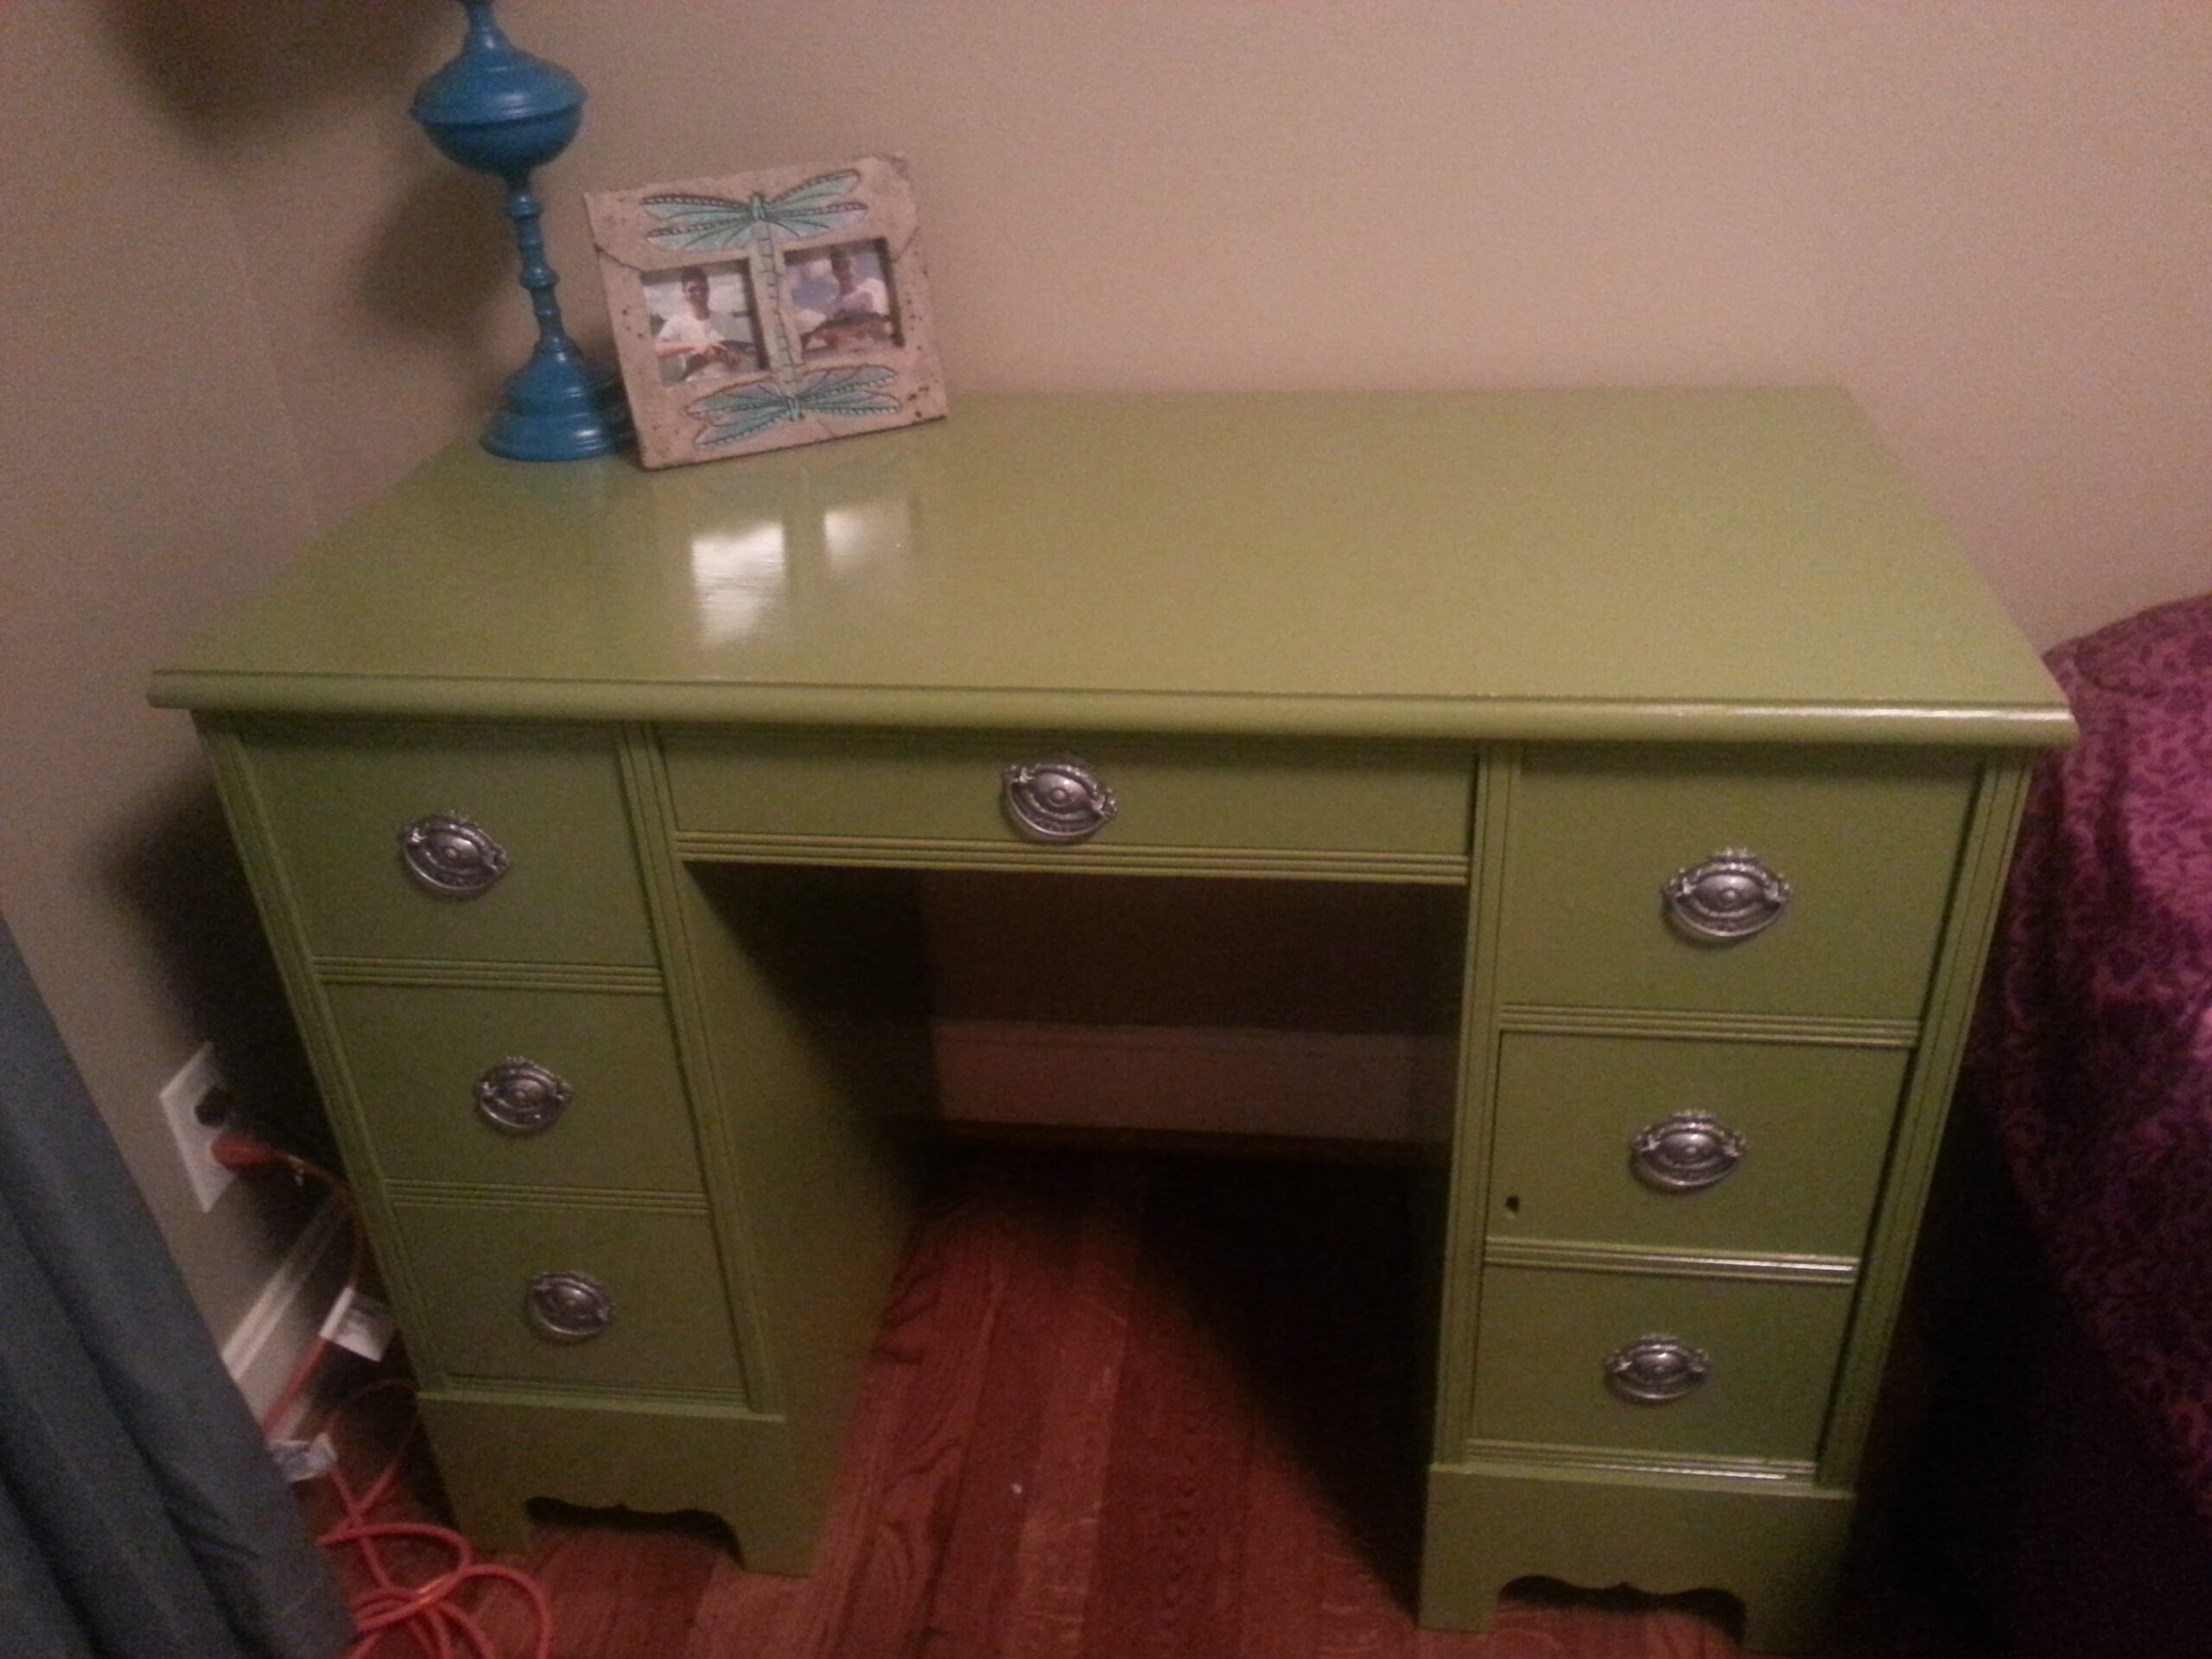
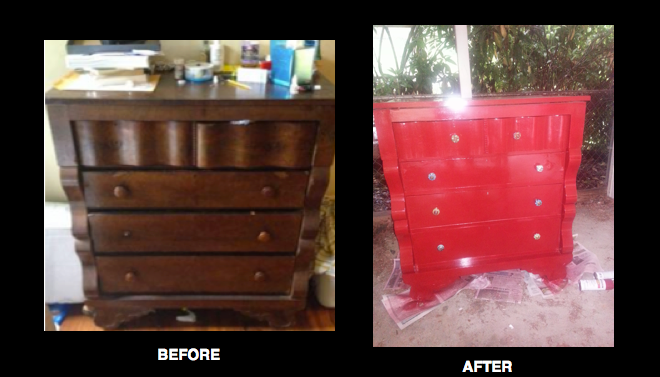
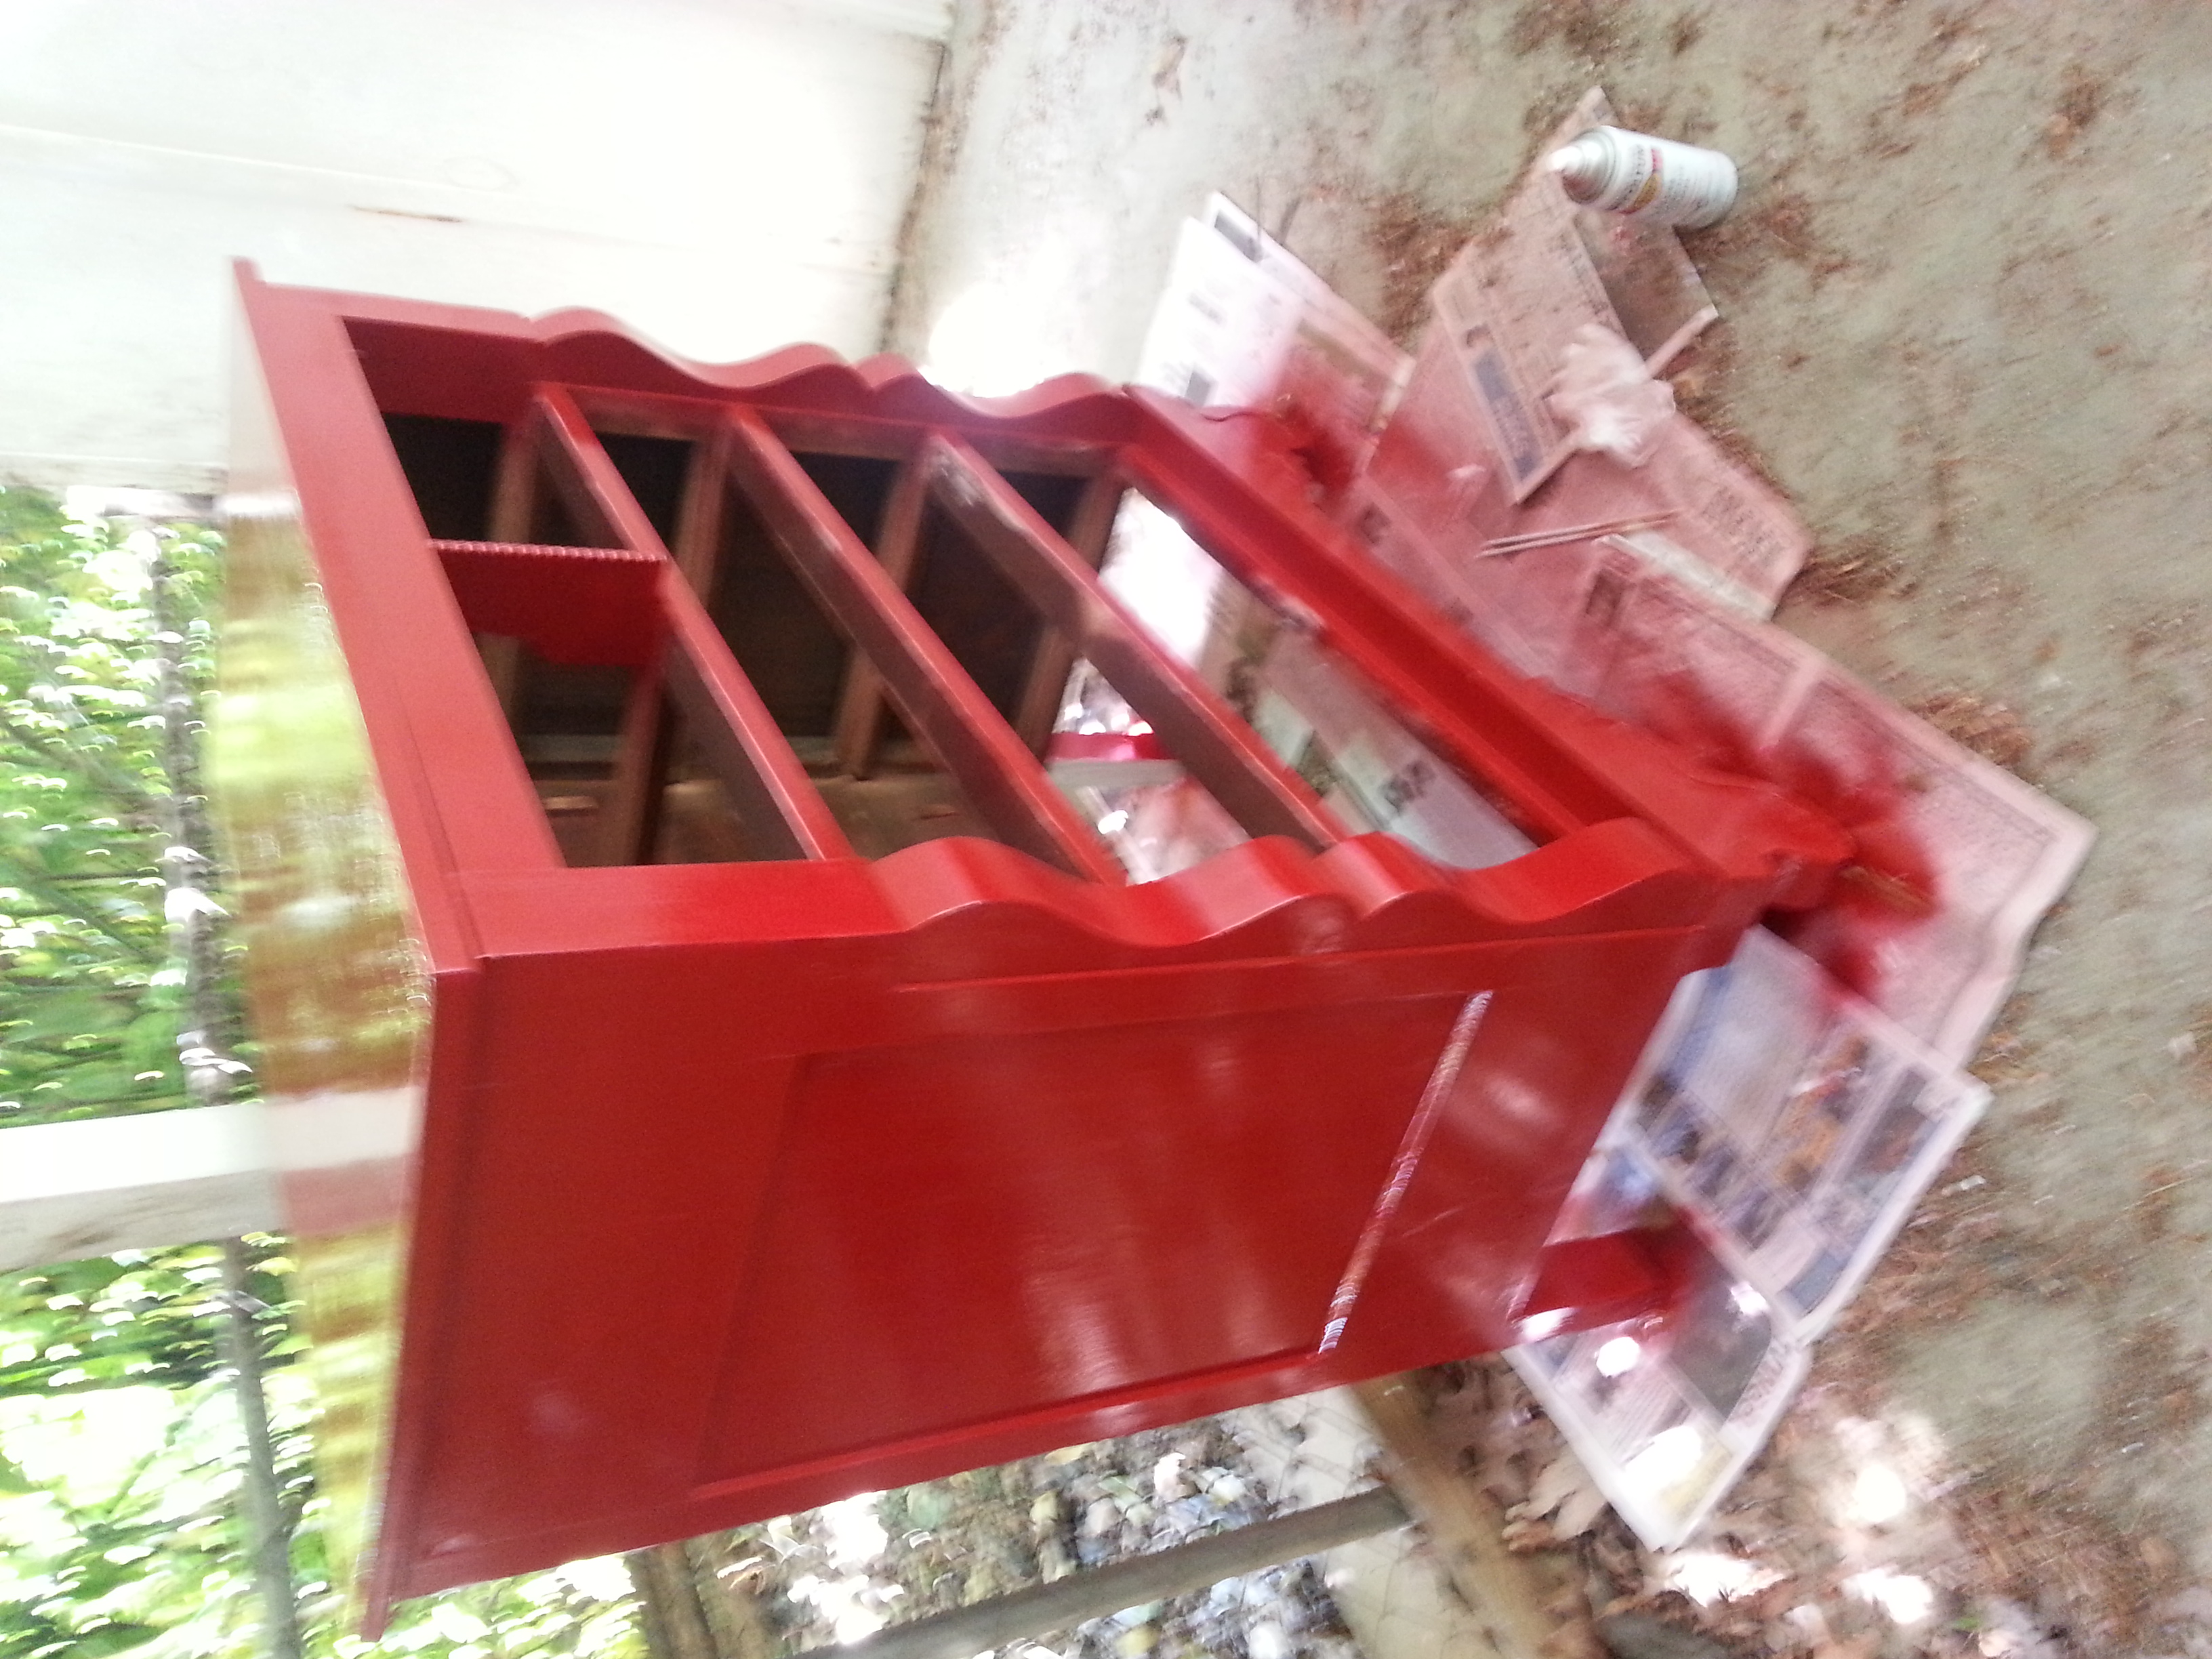
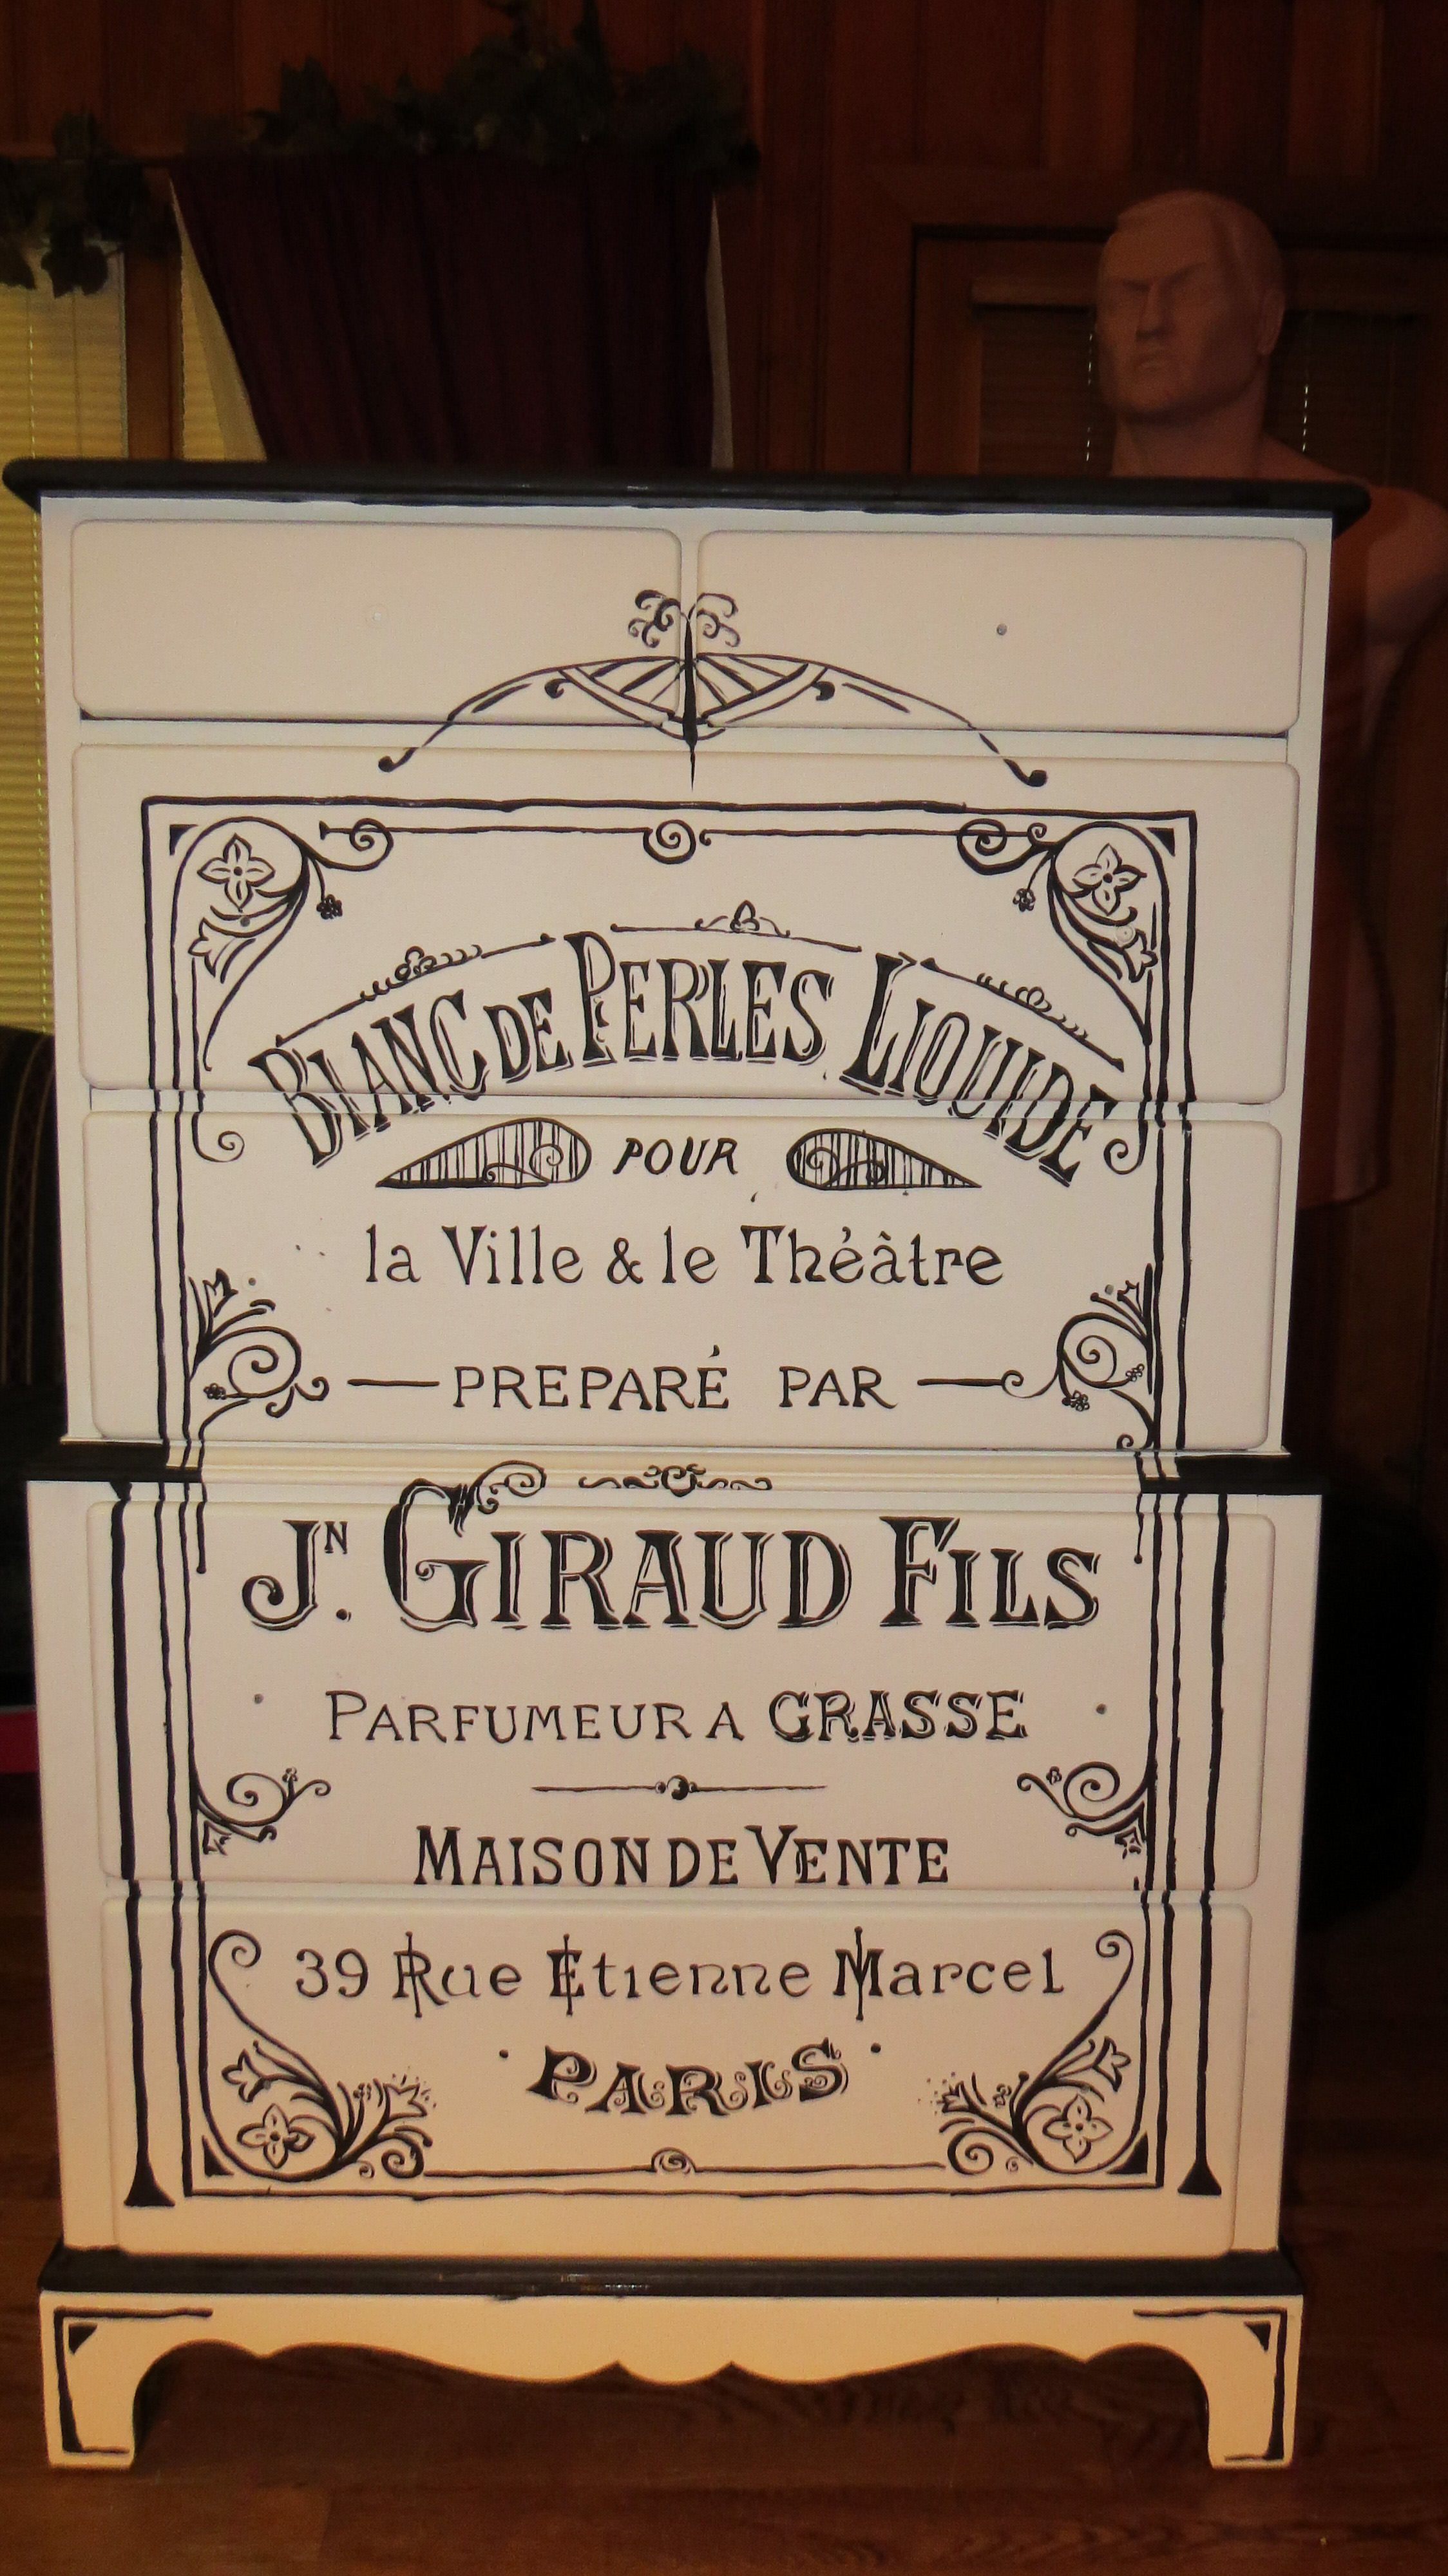
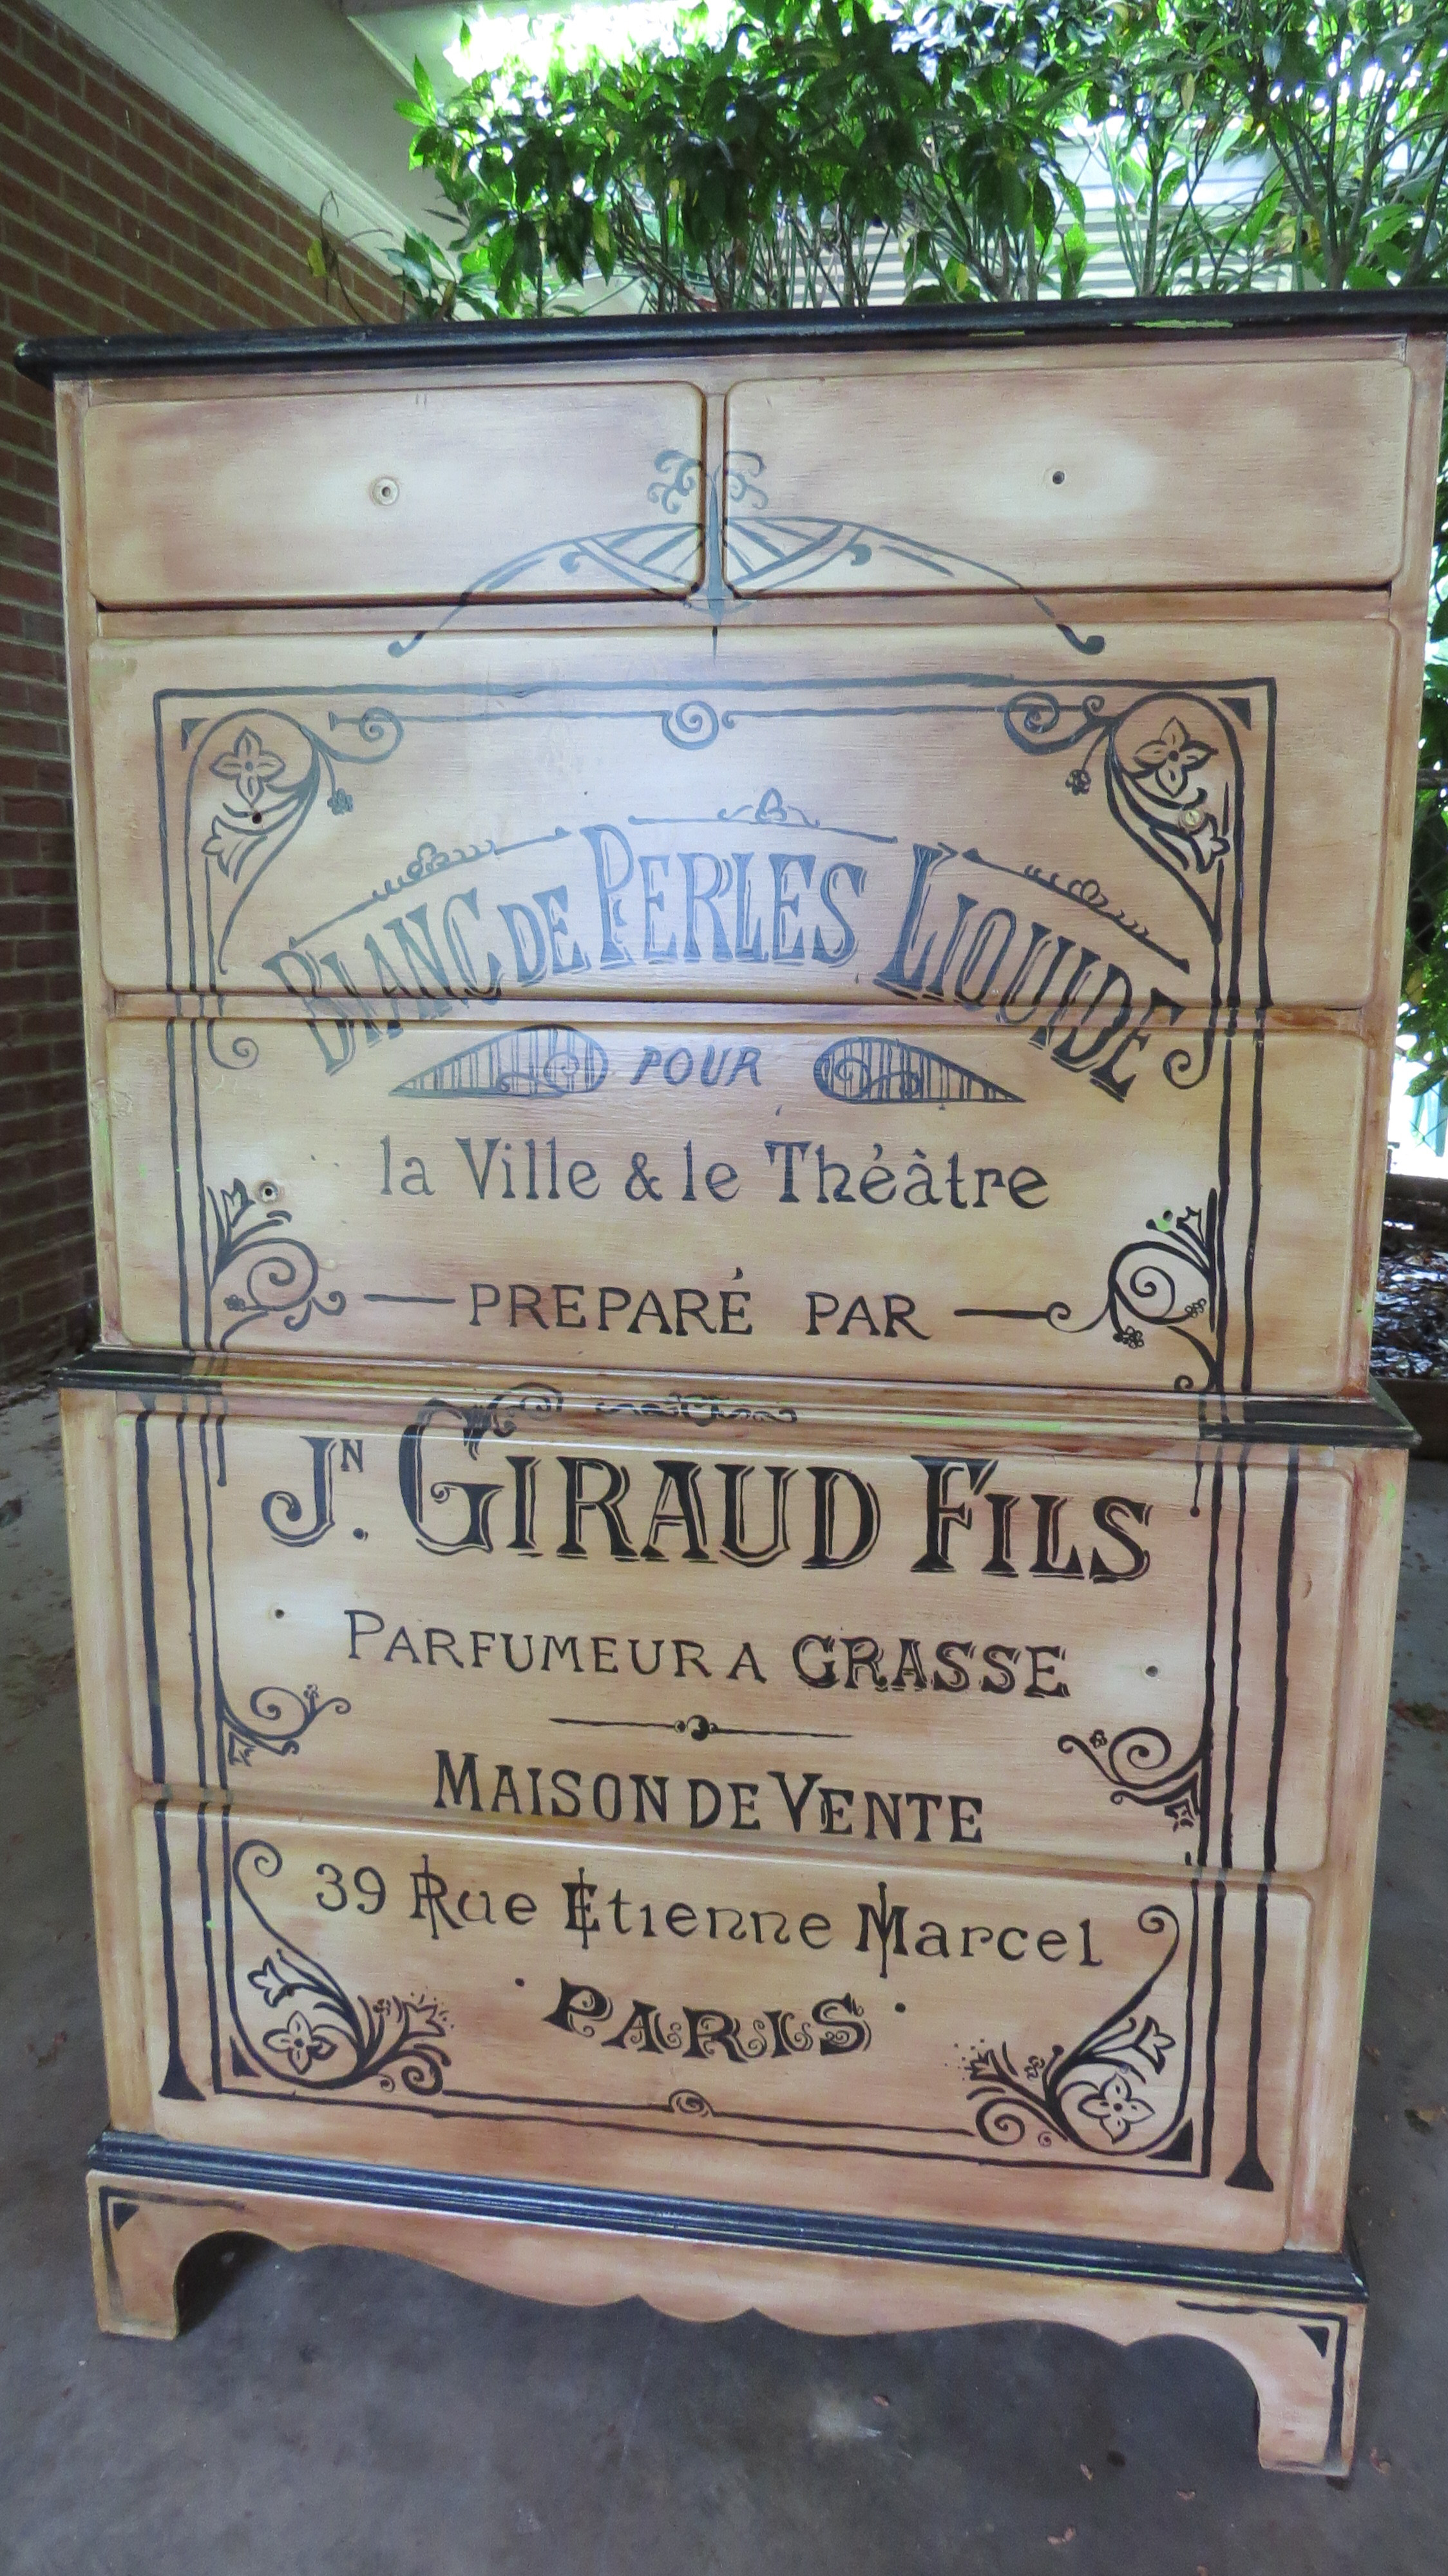
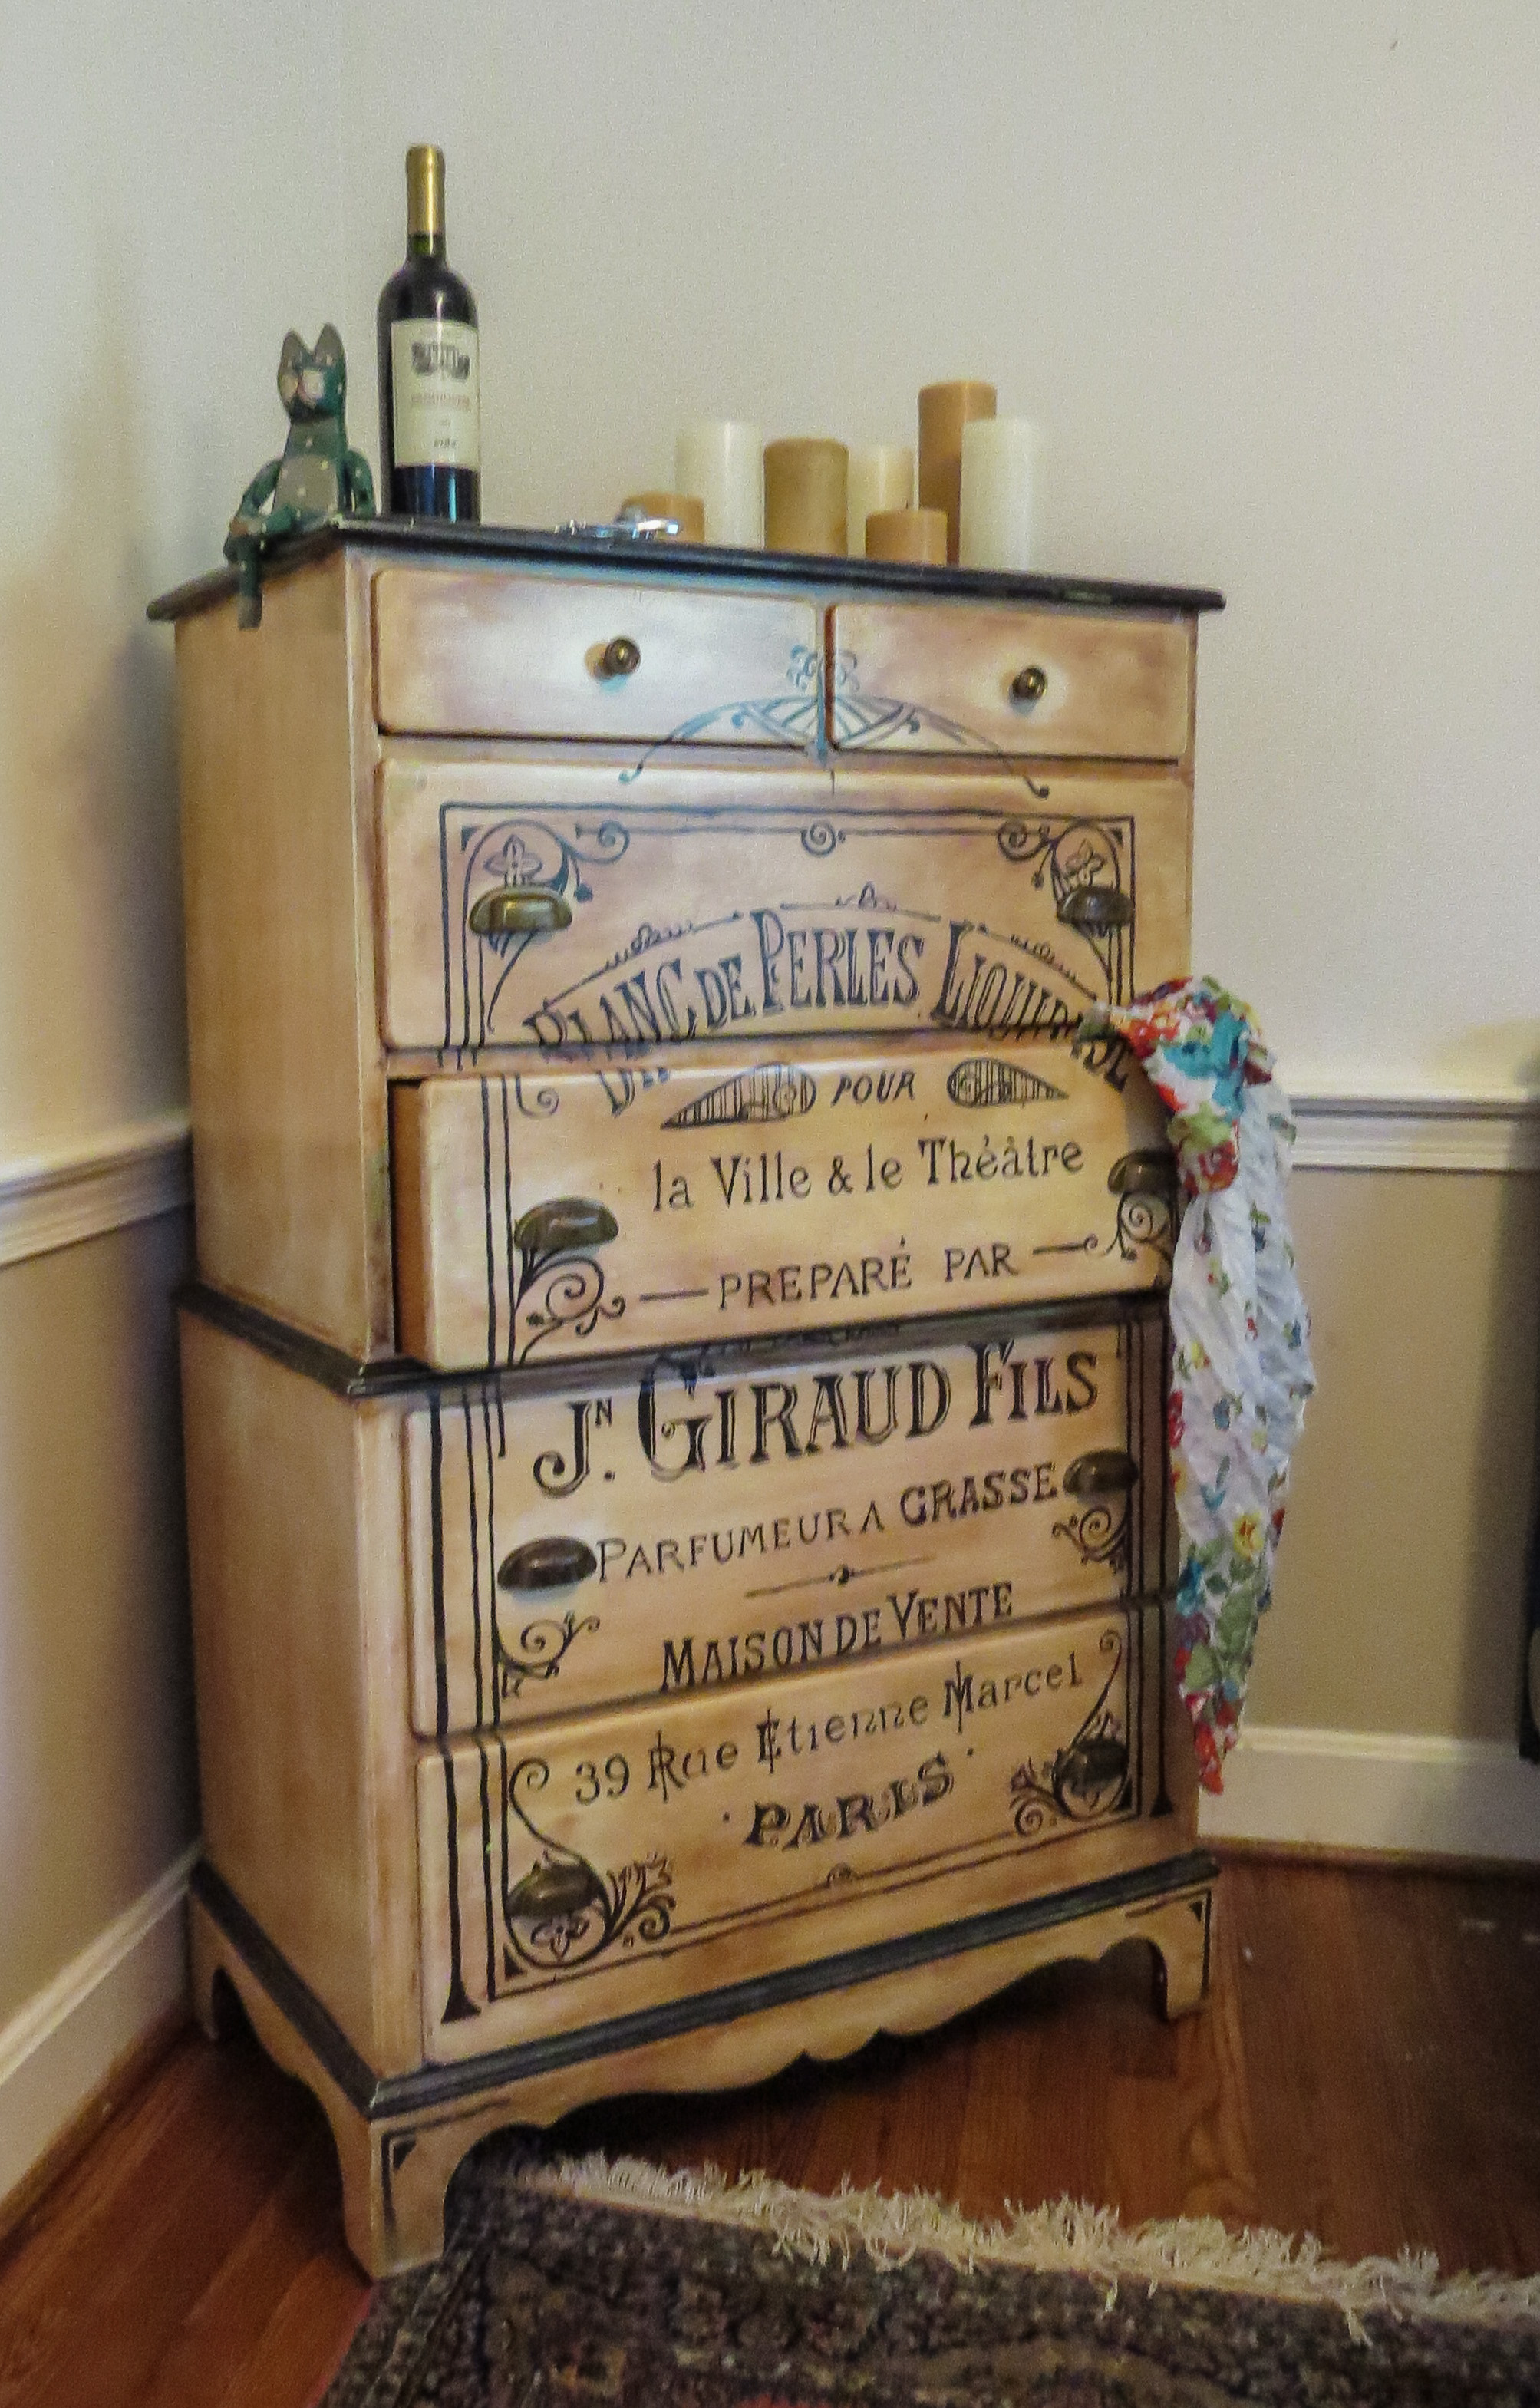
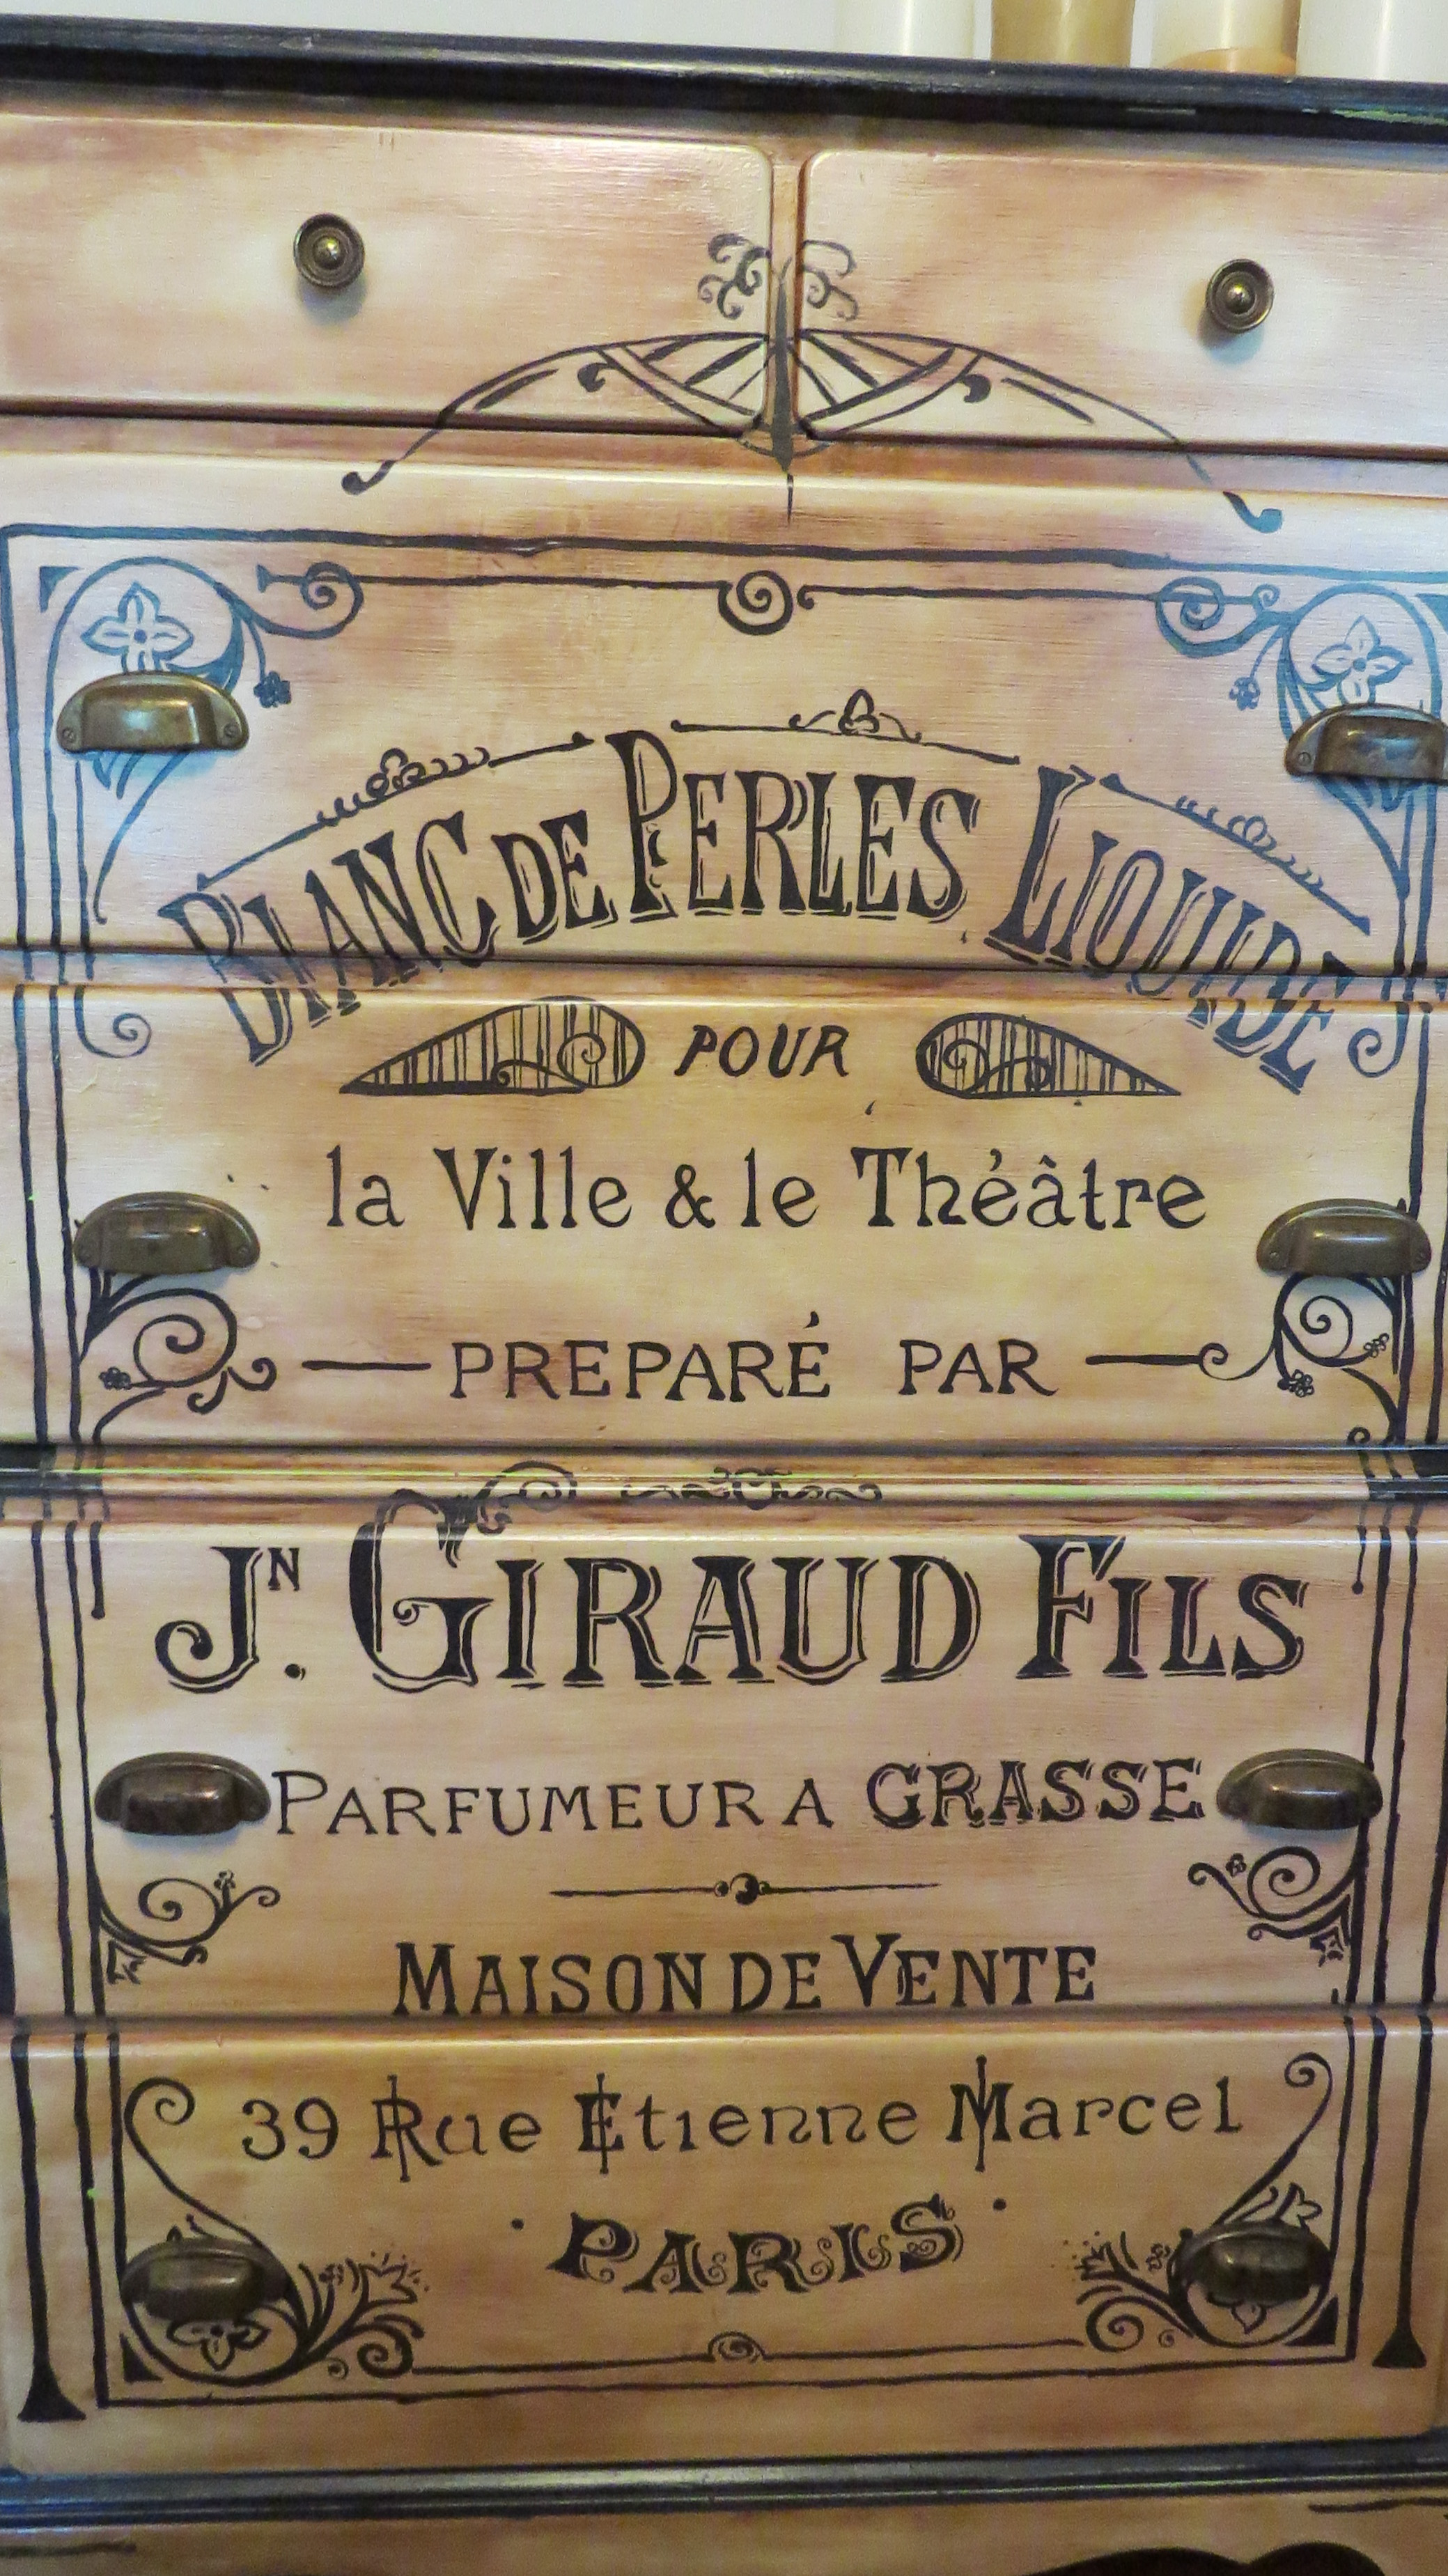
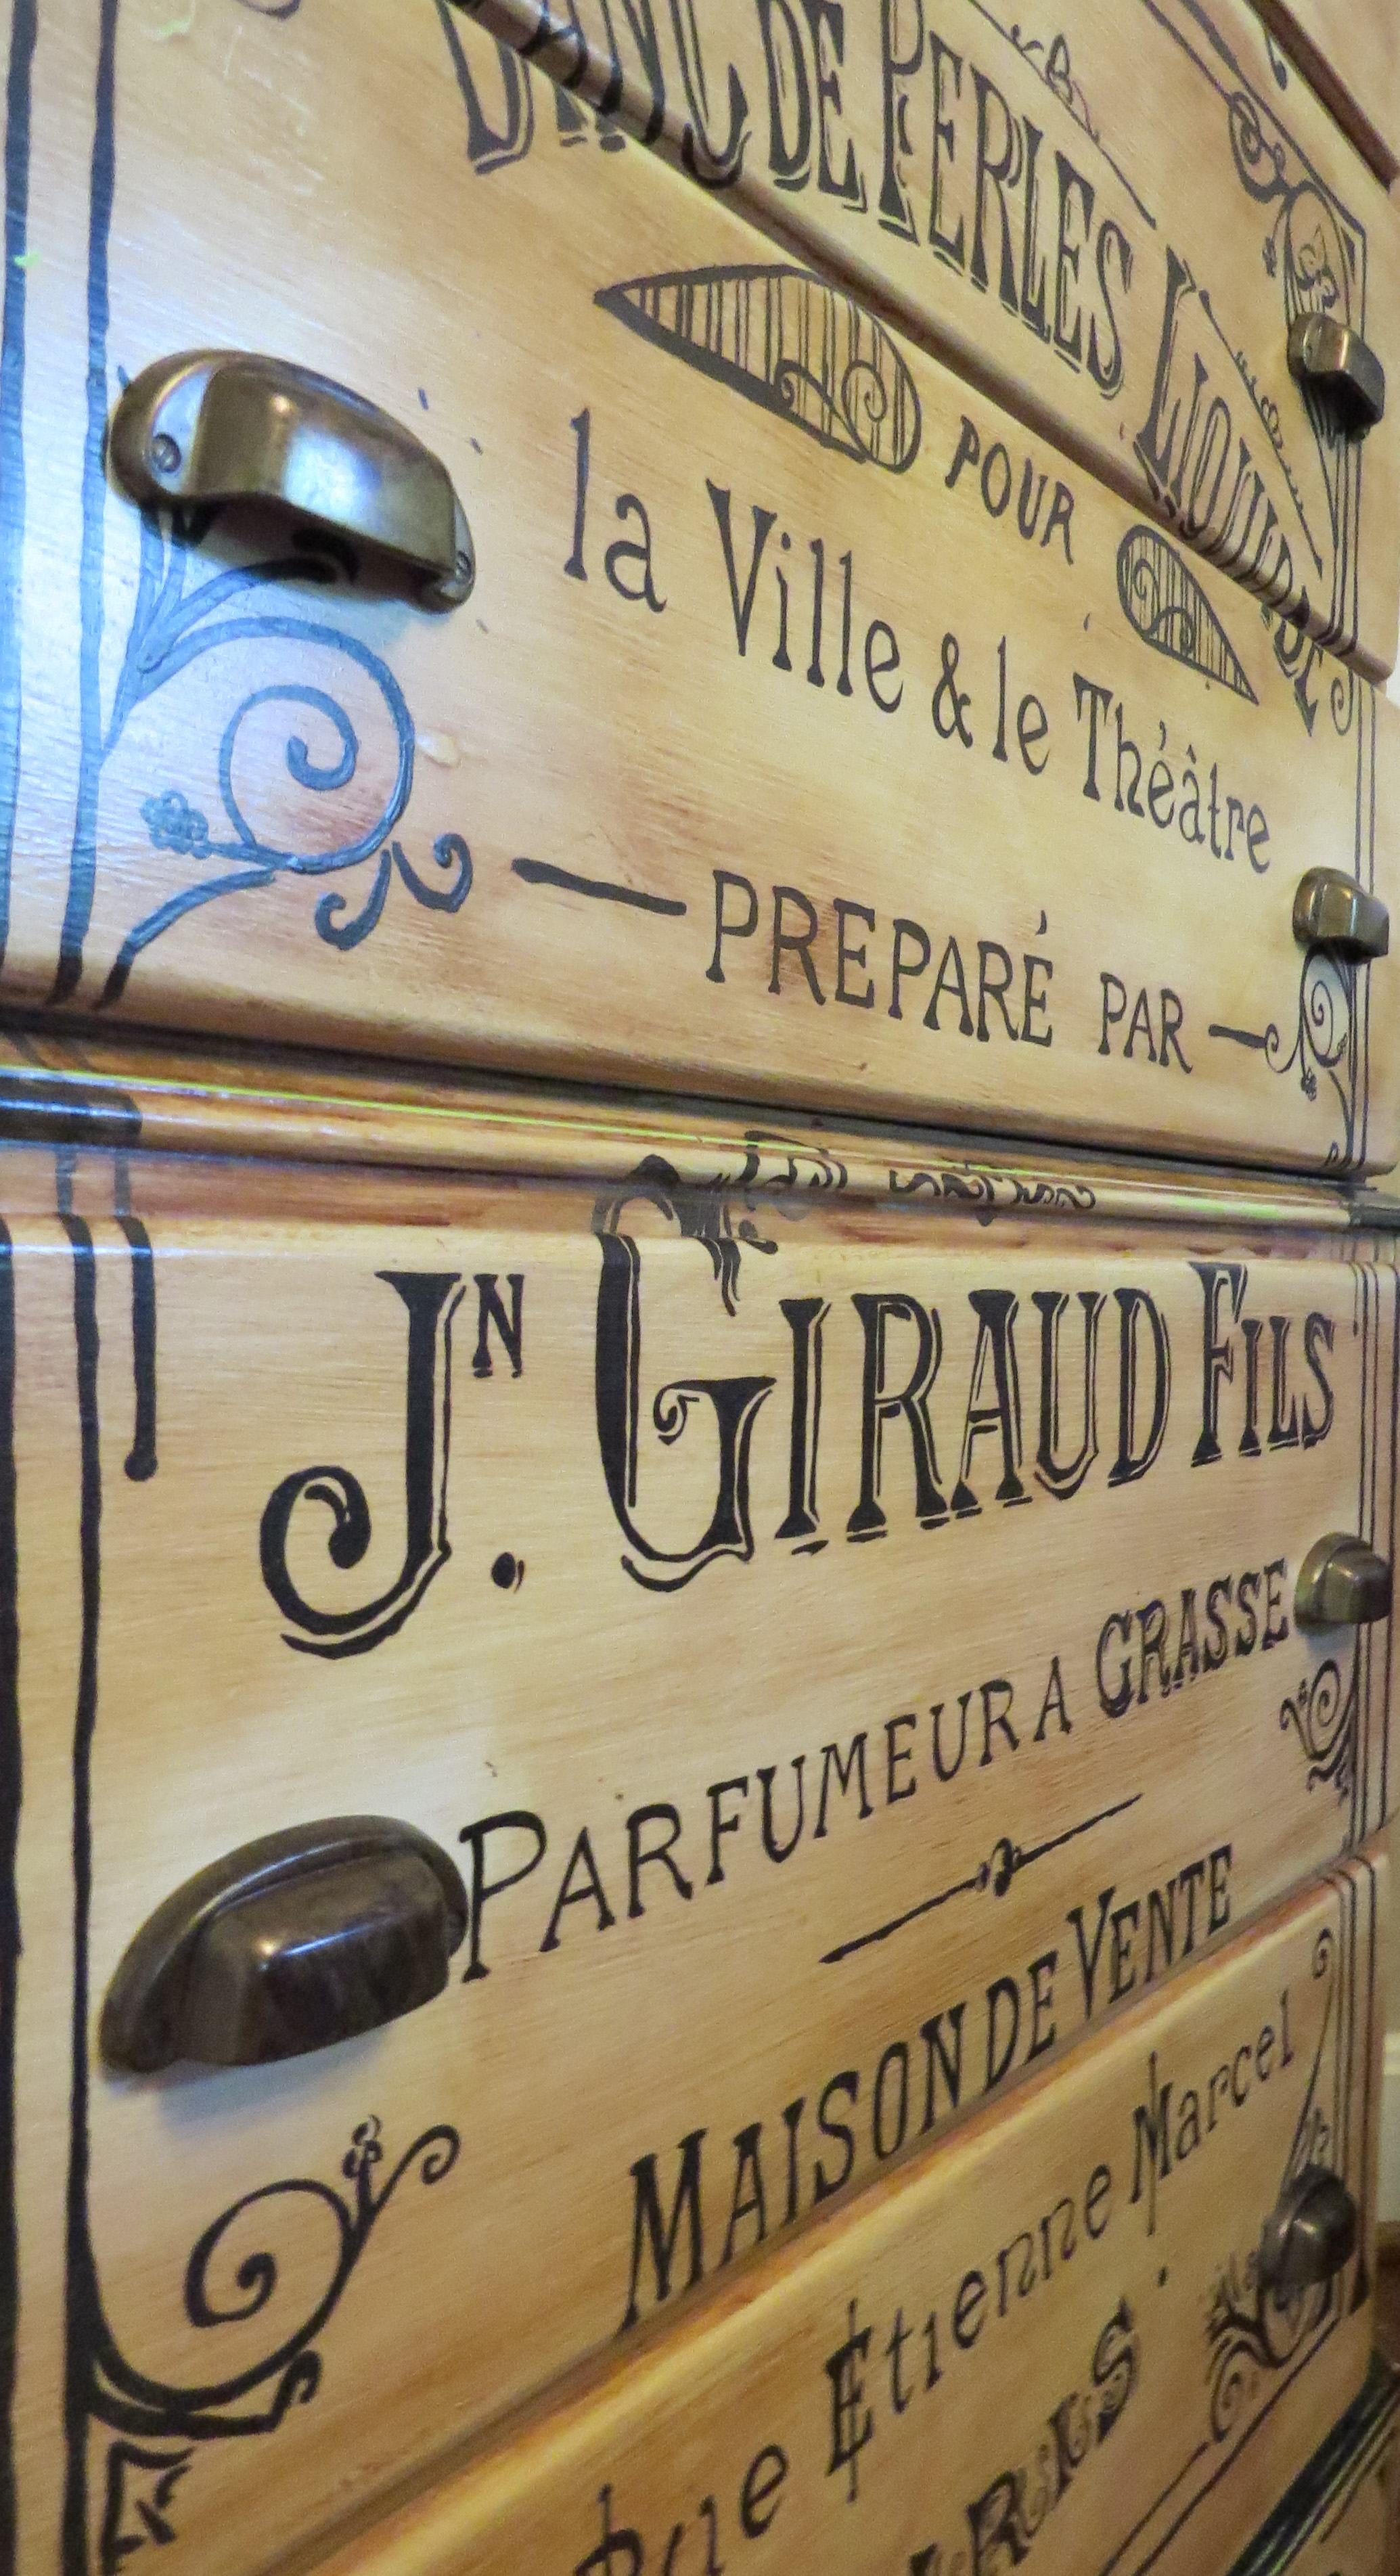
Believe it or not I found some awesome Oops! paint at Home Depot (I love that they do that!) and it was about the exact color I was looking for anyways (ivory). Bought a liter for under $2 instead of the anticipated $14. Sweet. Then I scrapped the whole idea with the joint compound and texture and instead painted the French label right on the ivory paint. It didn’t look quite finished…. so I did the top and tiers in black to pull in some contrast. I can’t speak French, but I think this is some kind of a vintage perfume label. I just loved the lines.

IMG_7637 IMG_7638

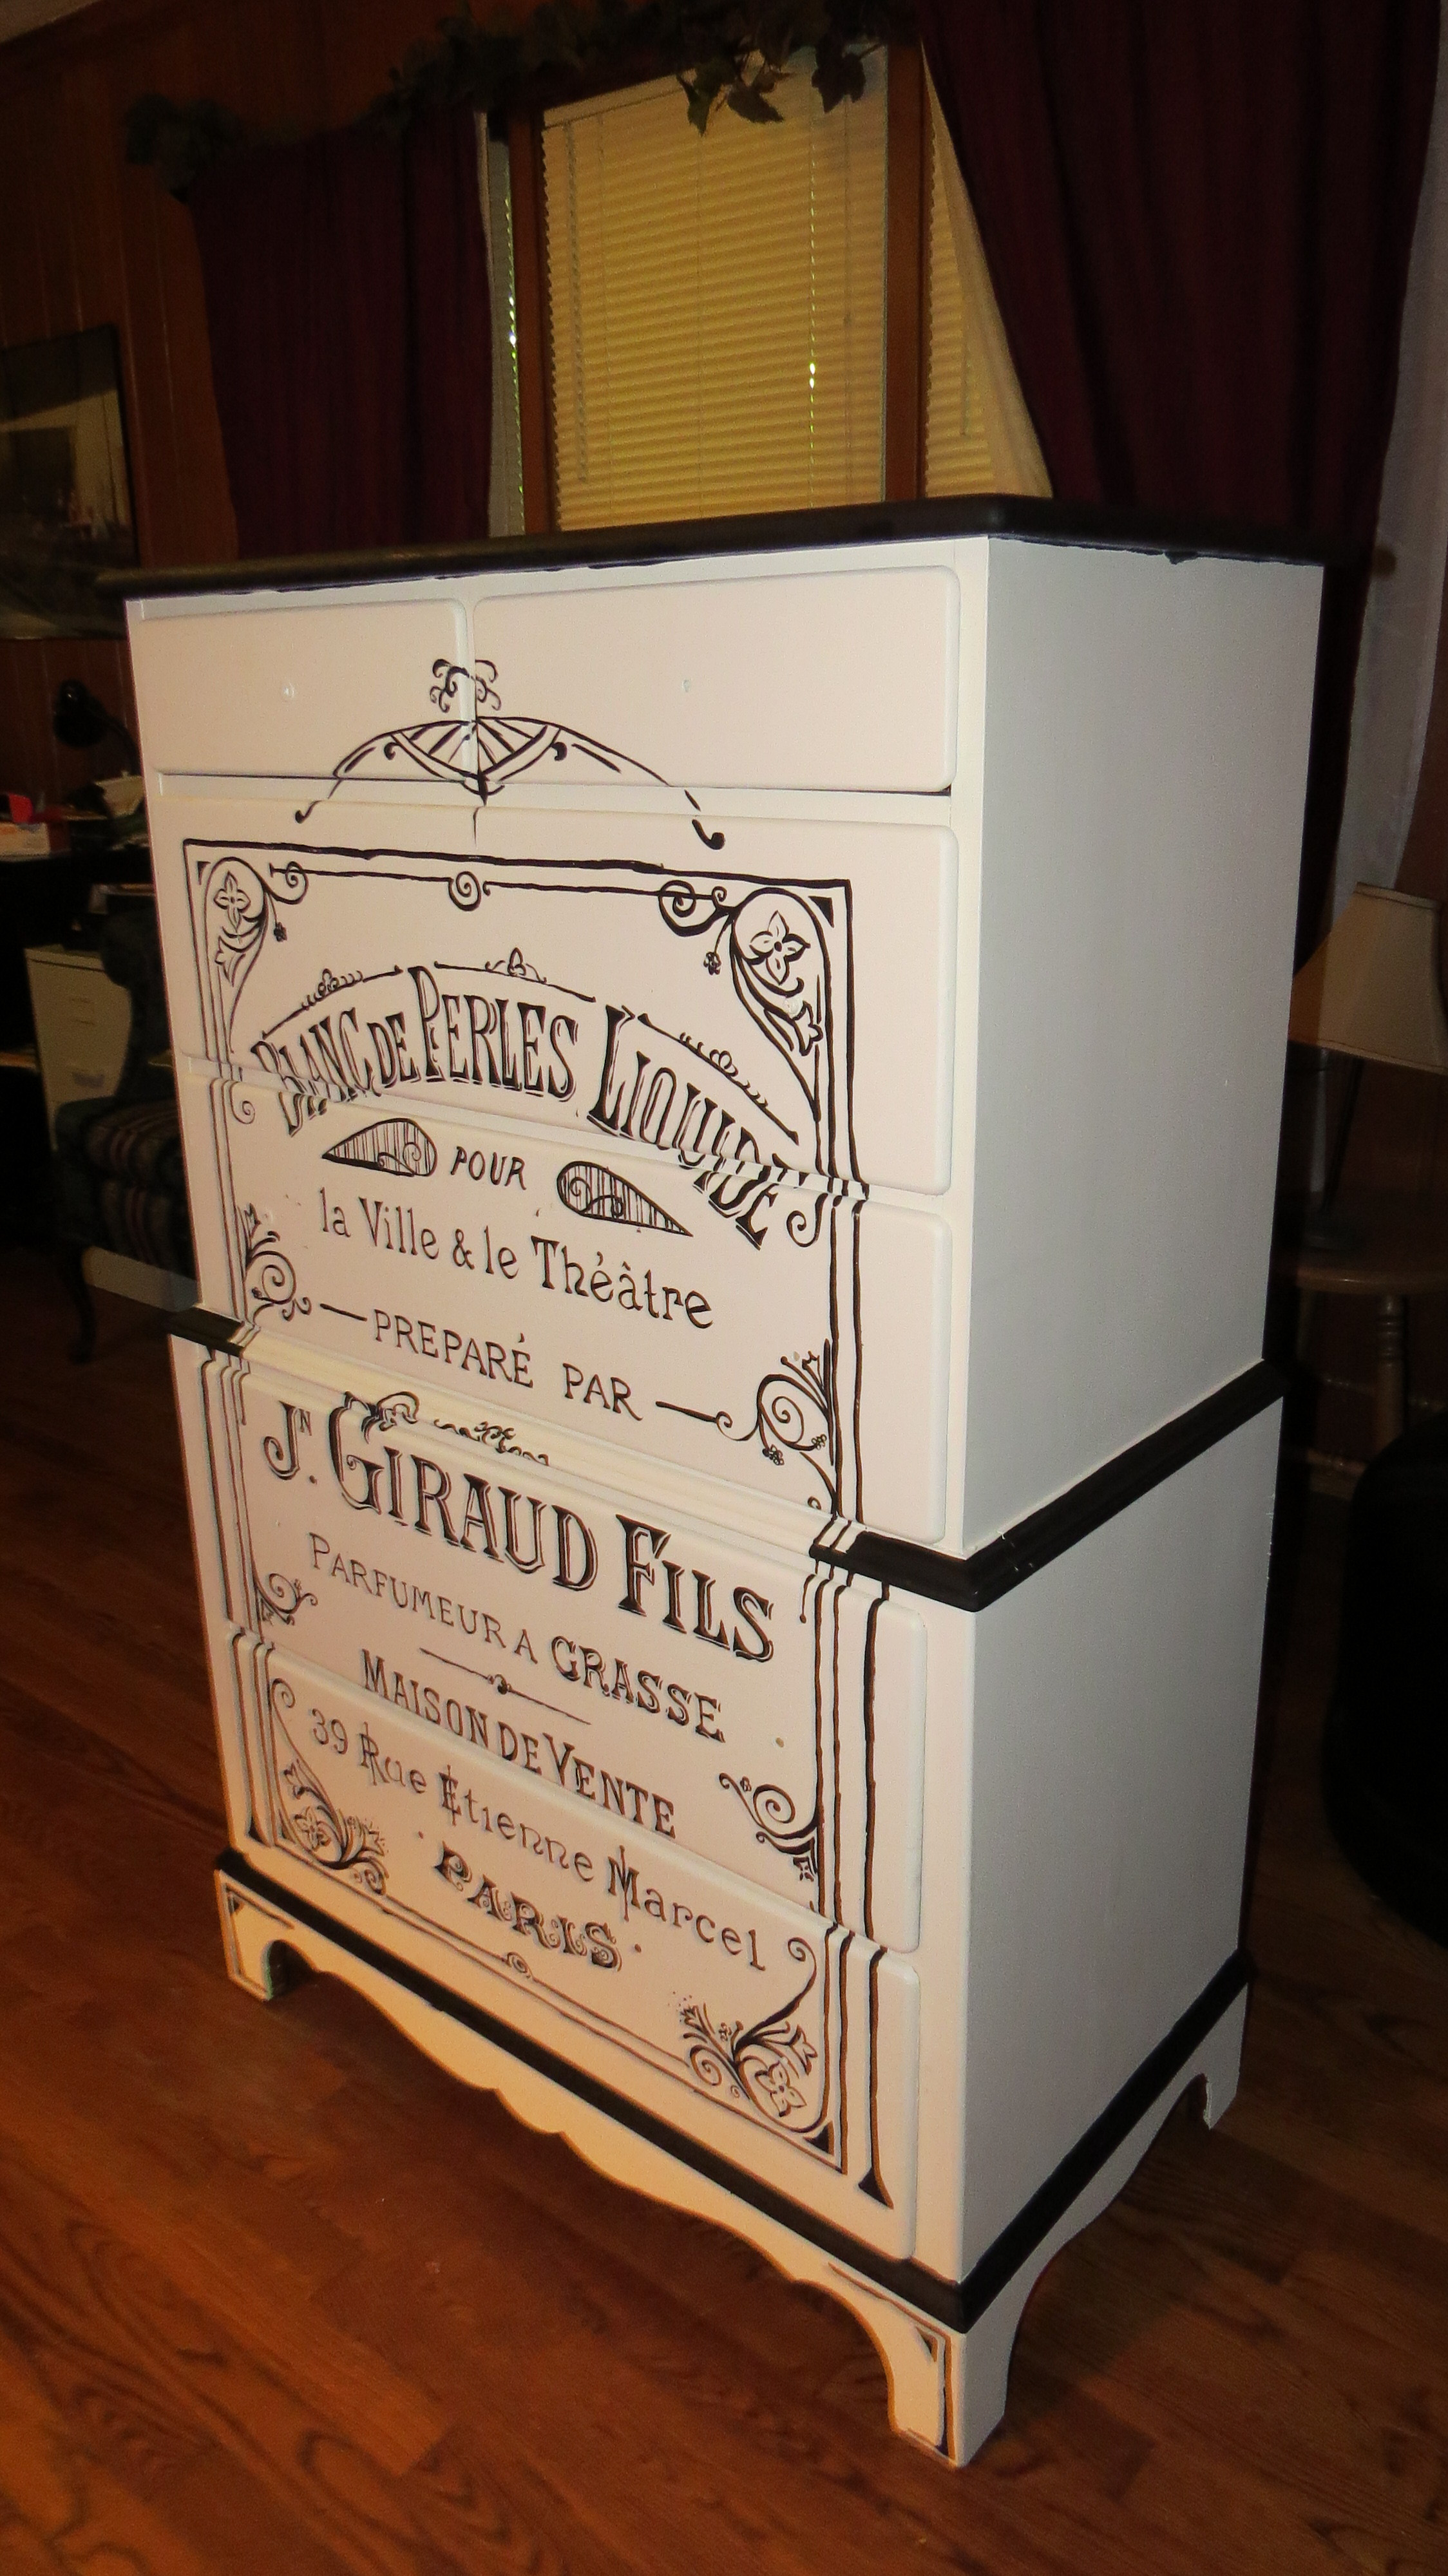
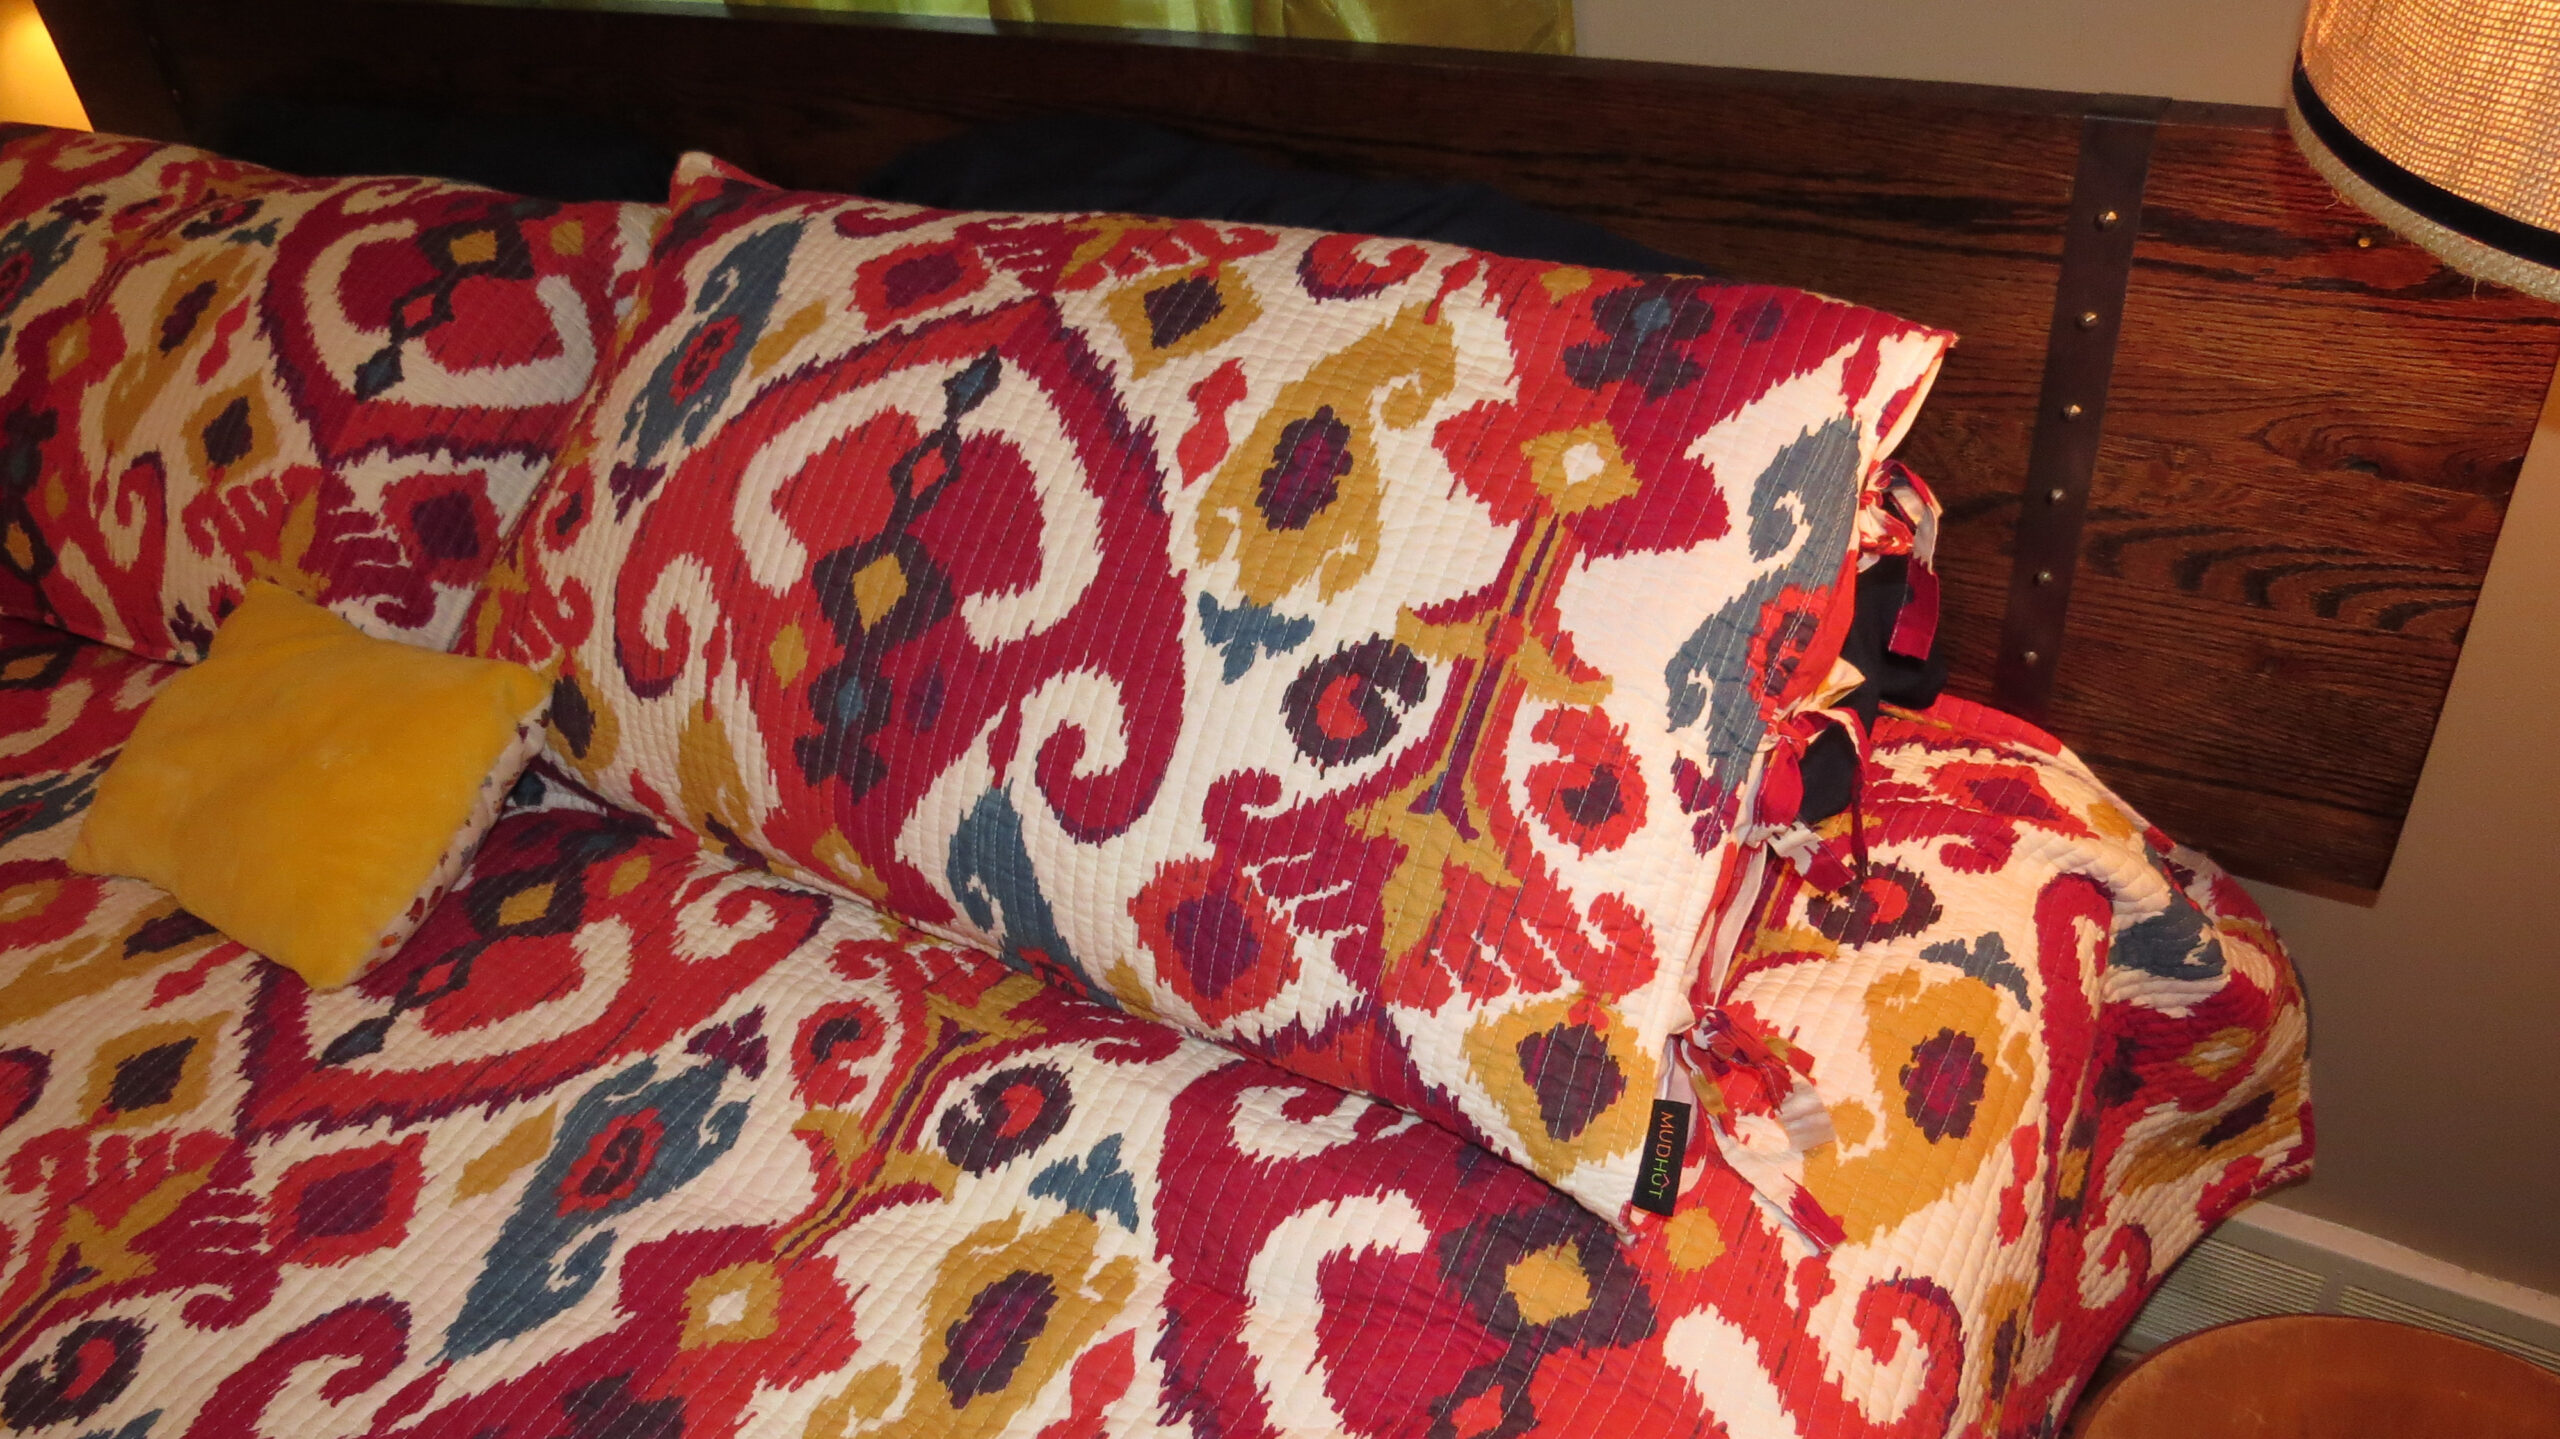
Alas, the white was too stark and I was always planning on an antique finish, so here that is below!

IMG_7695 IMG_7696IMG_7697
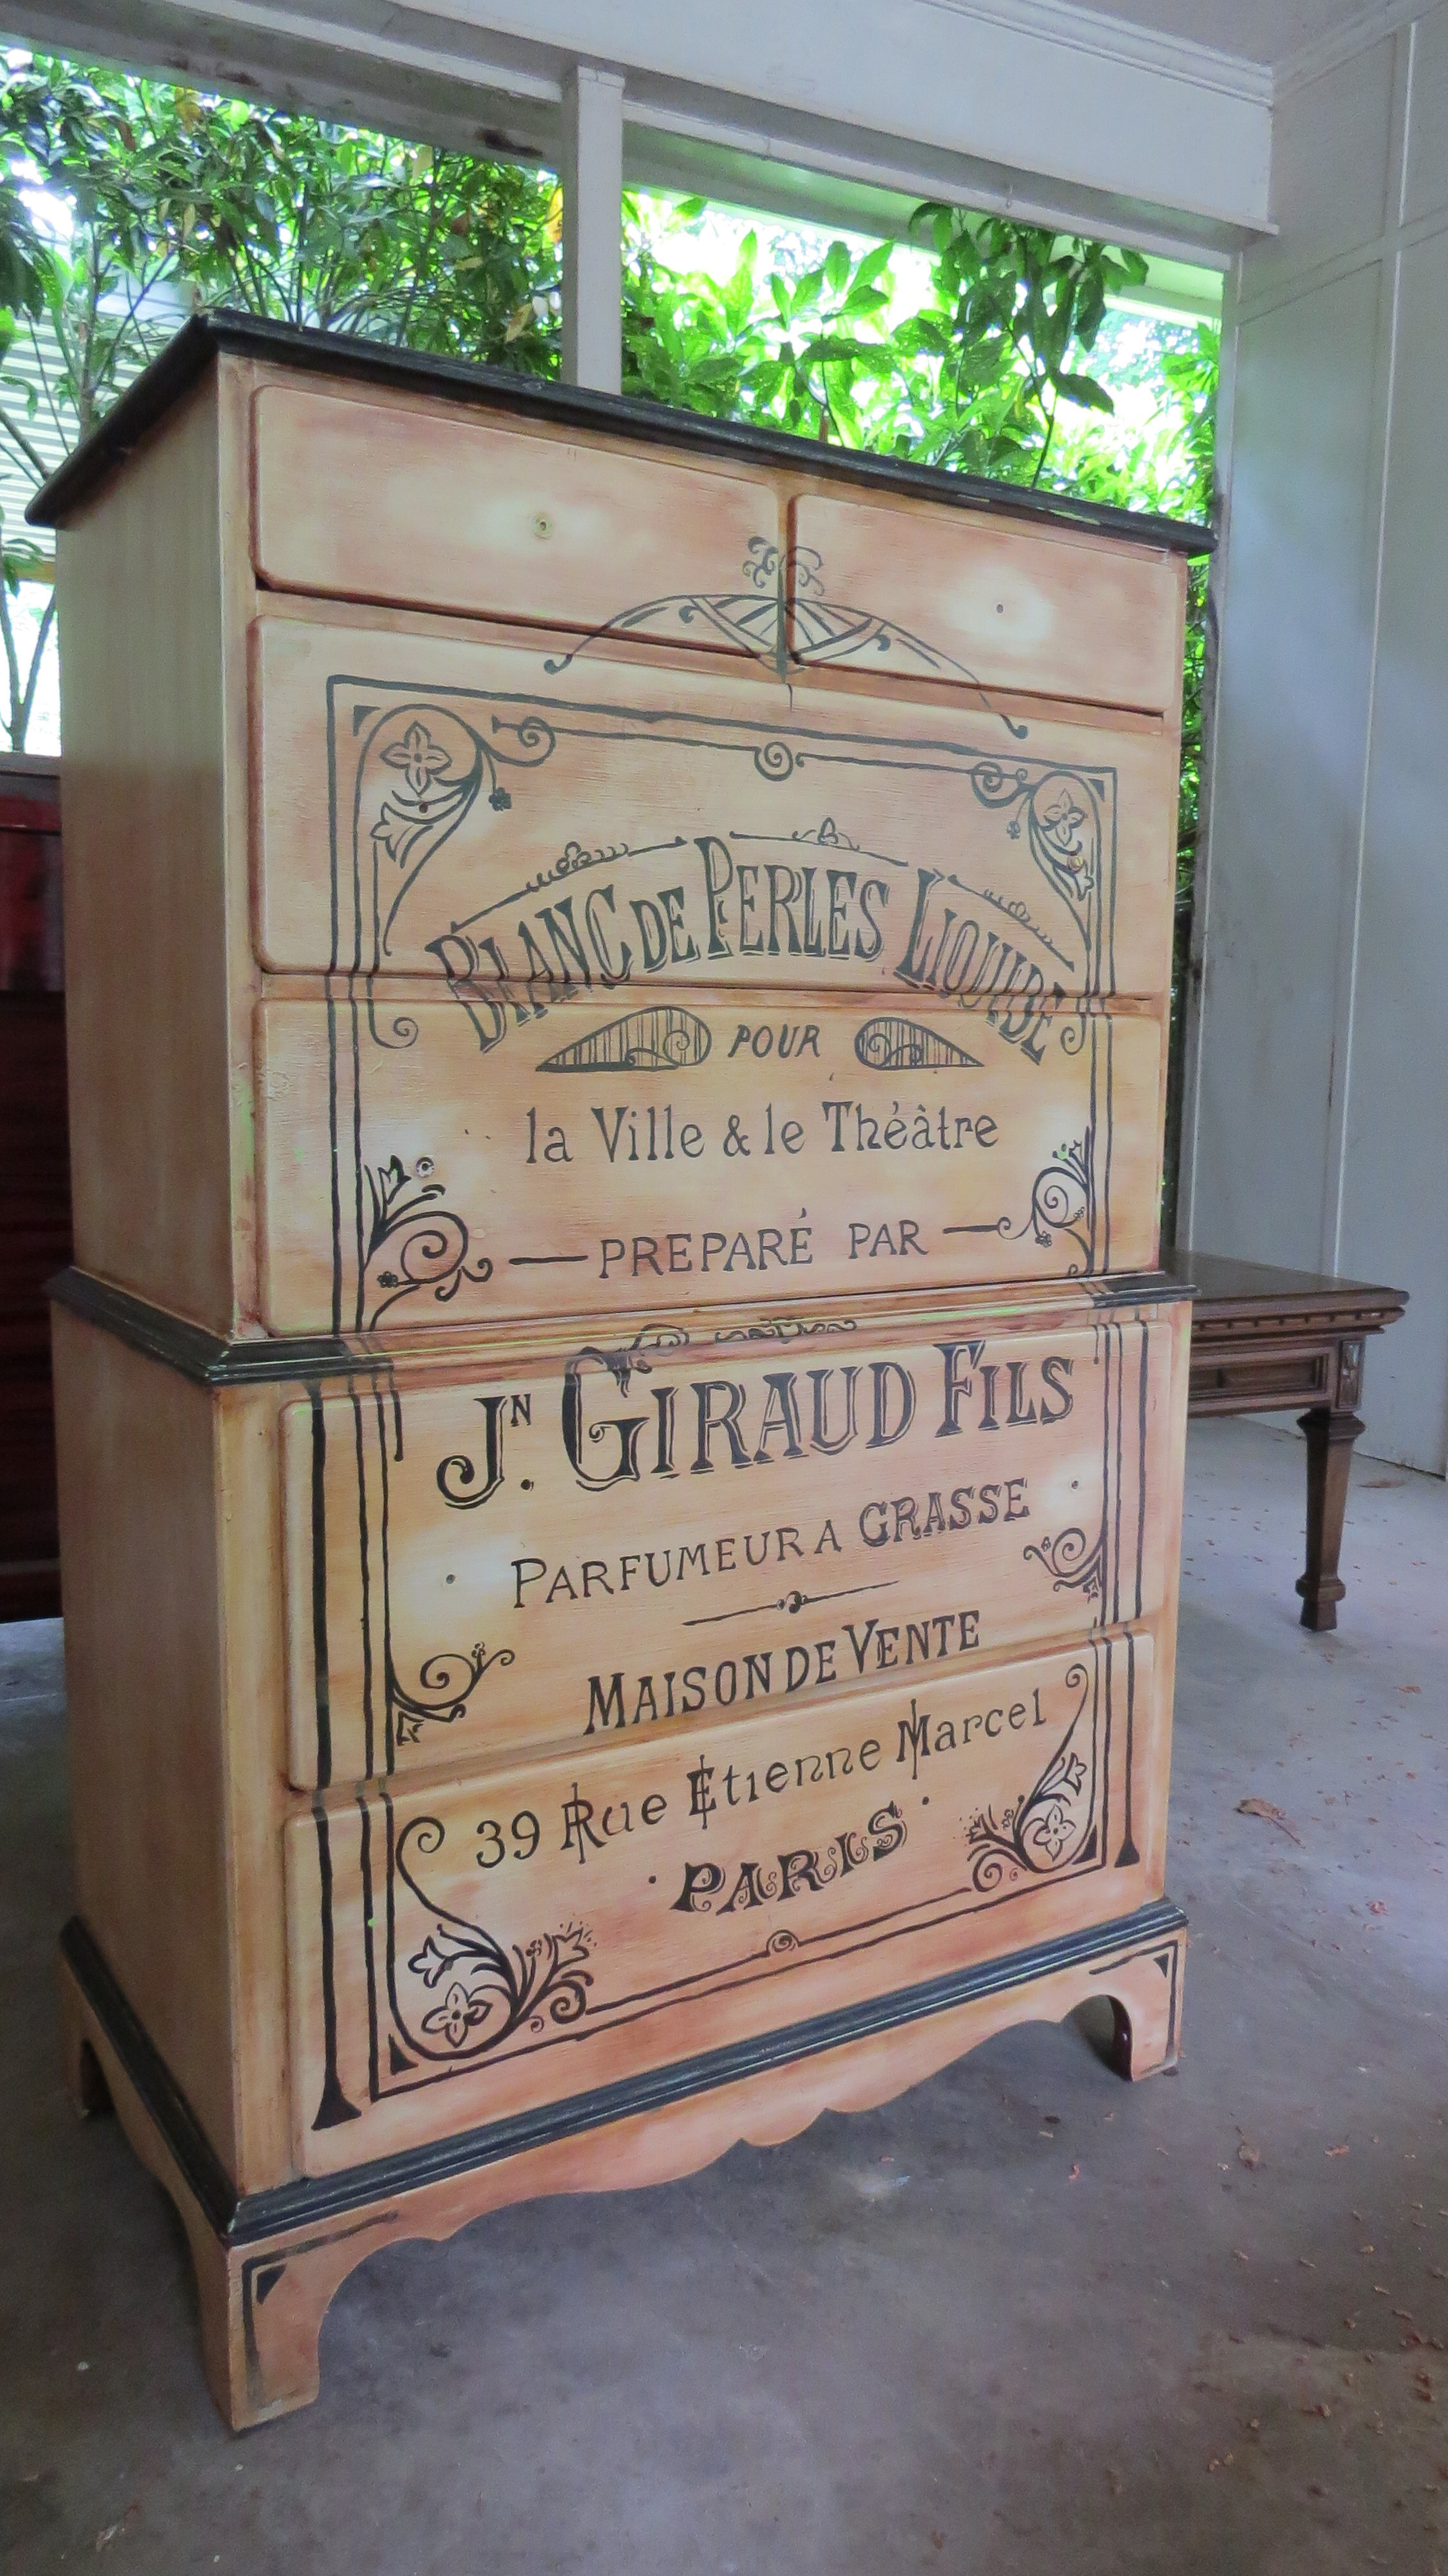
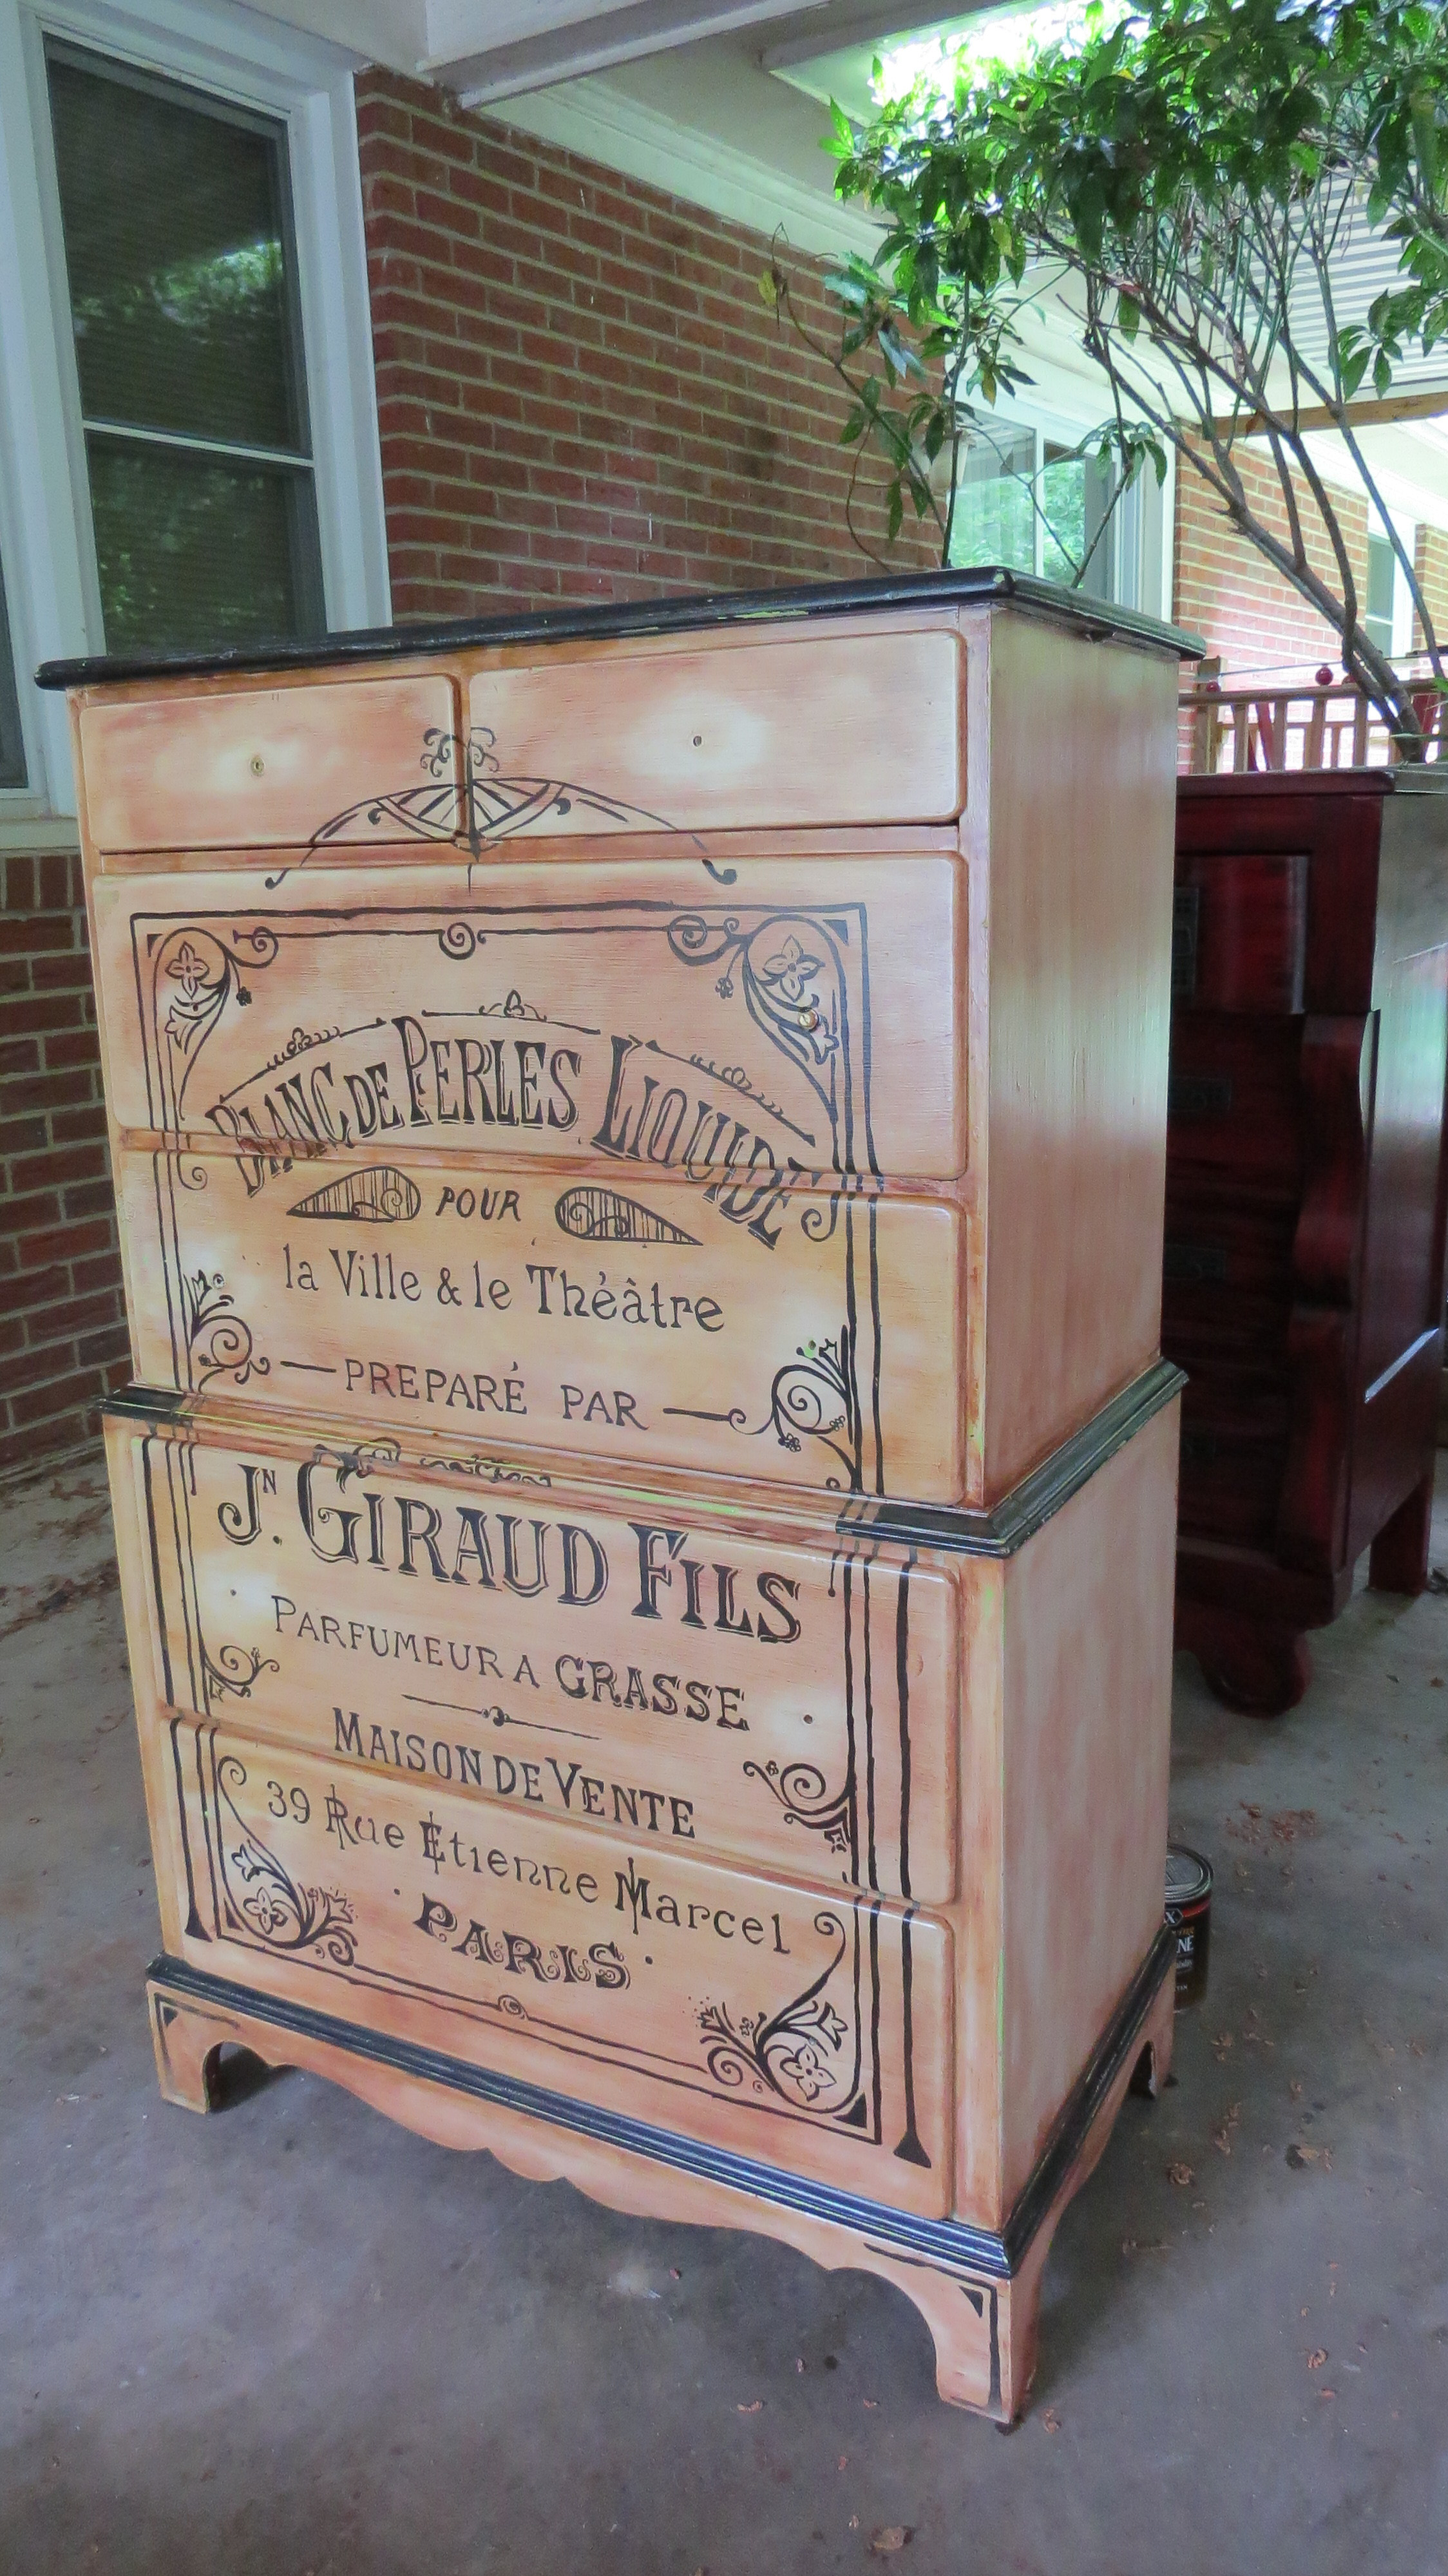
The light is catching the protective layer of poly I put over the antiquing, but it isn’t all shiny when indoors. That is just a super bright, sunny North Carolina morning.

IMG_7698 IMG_7699
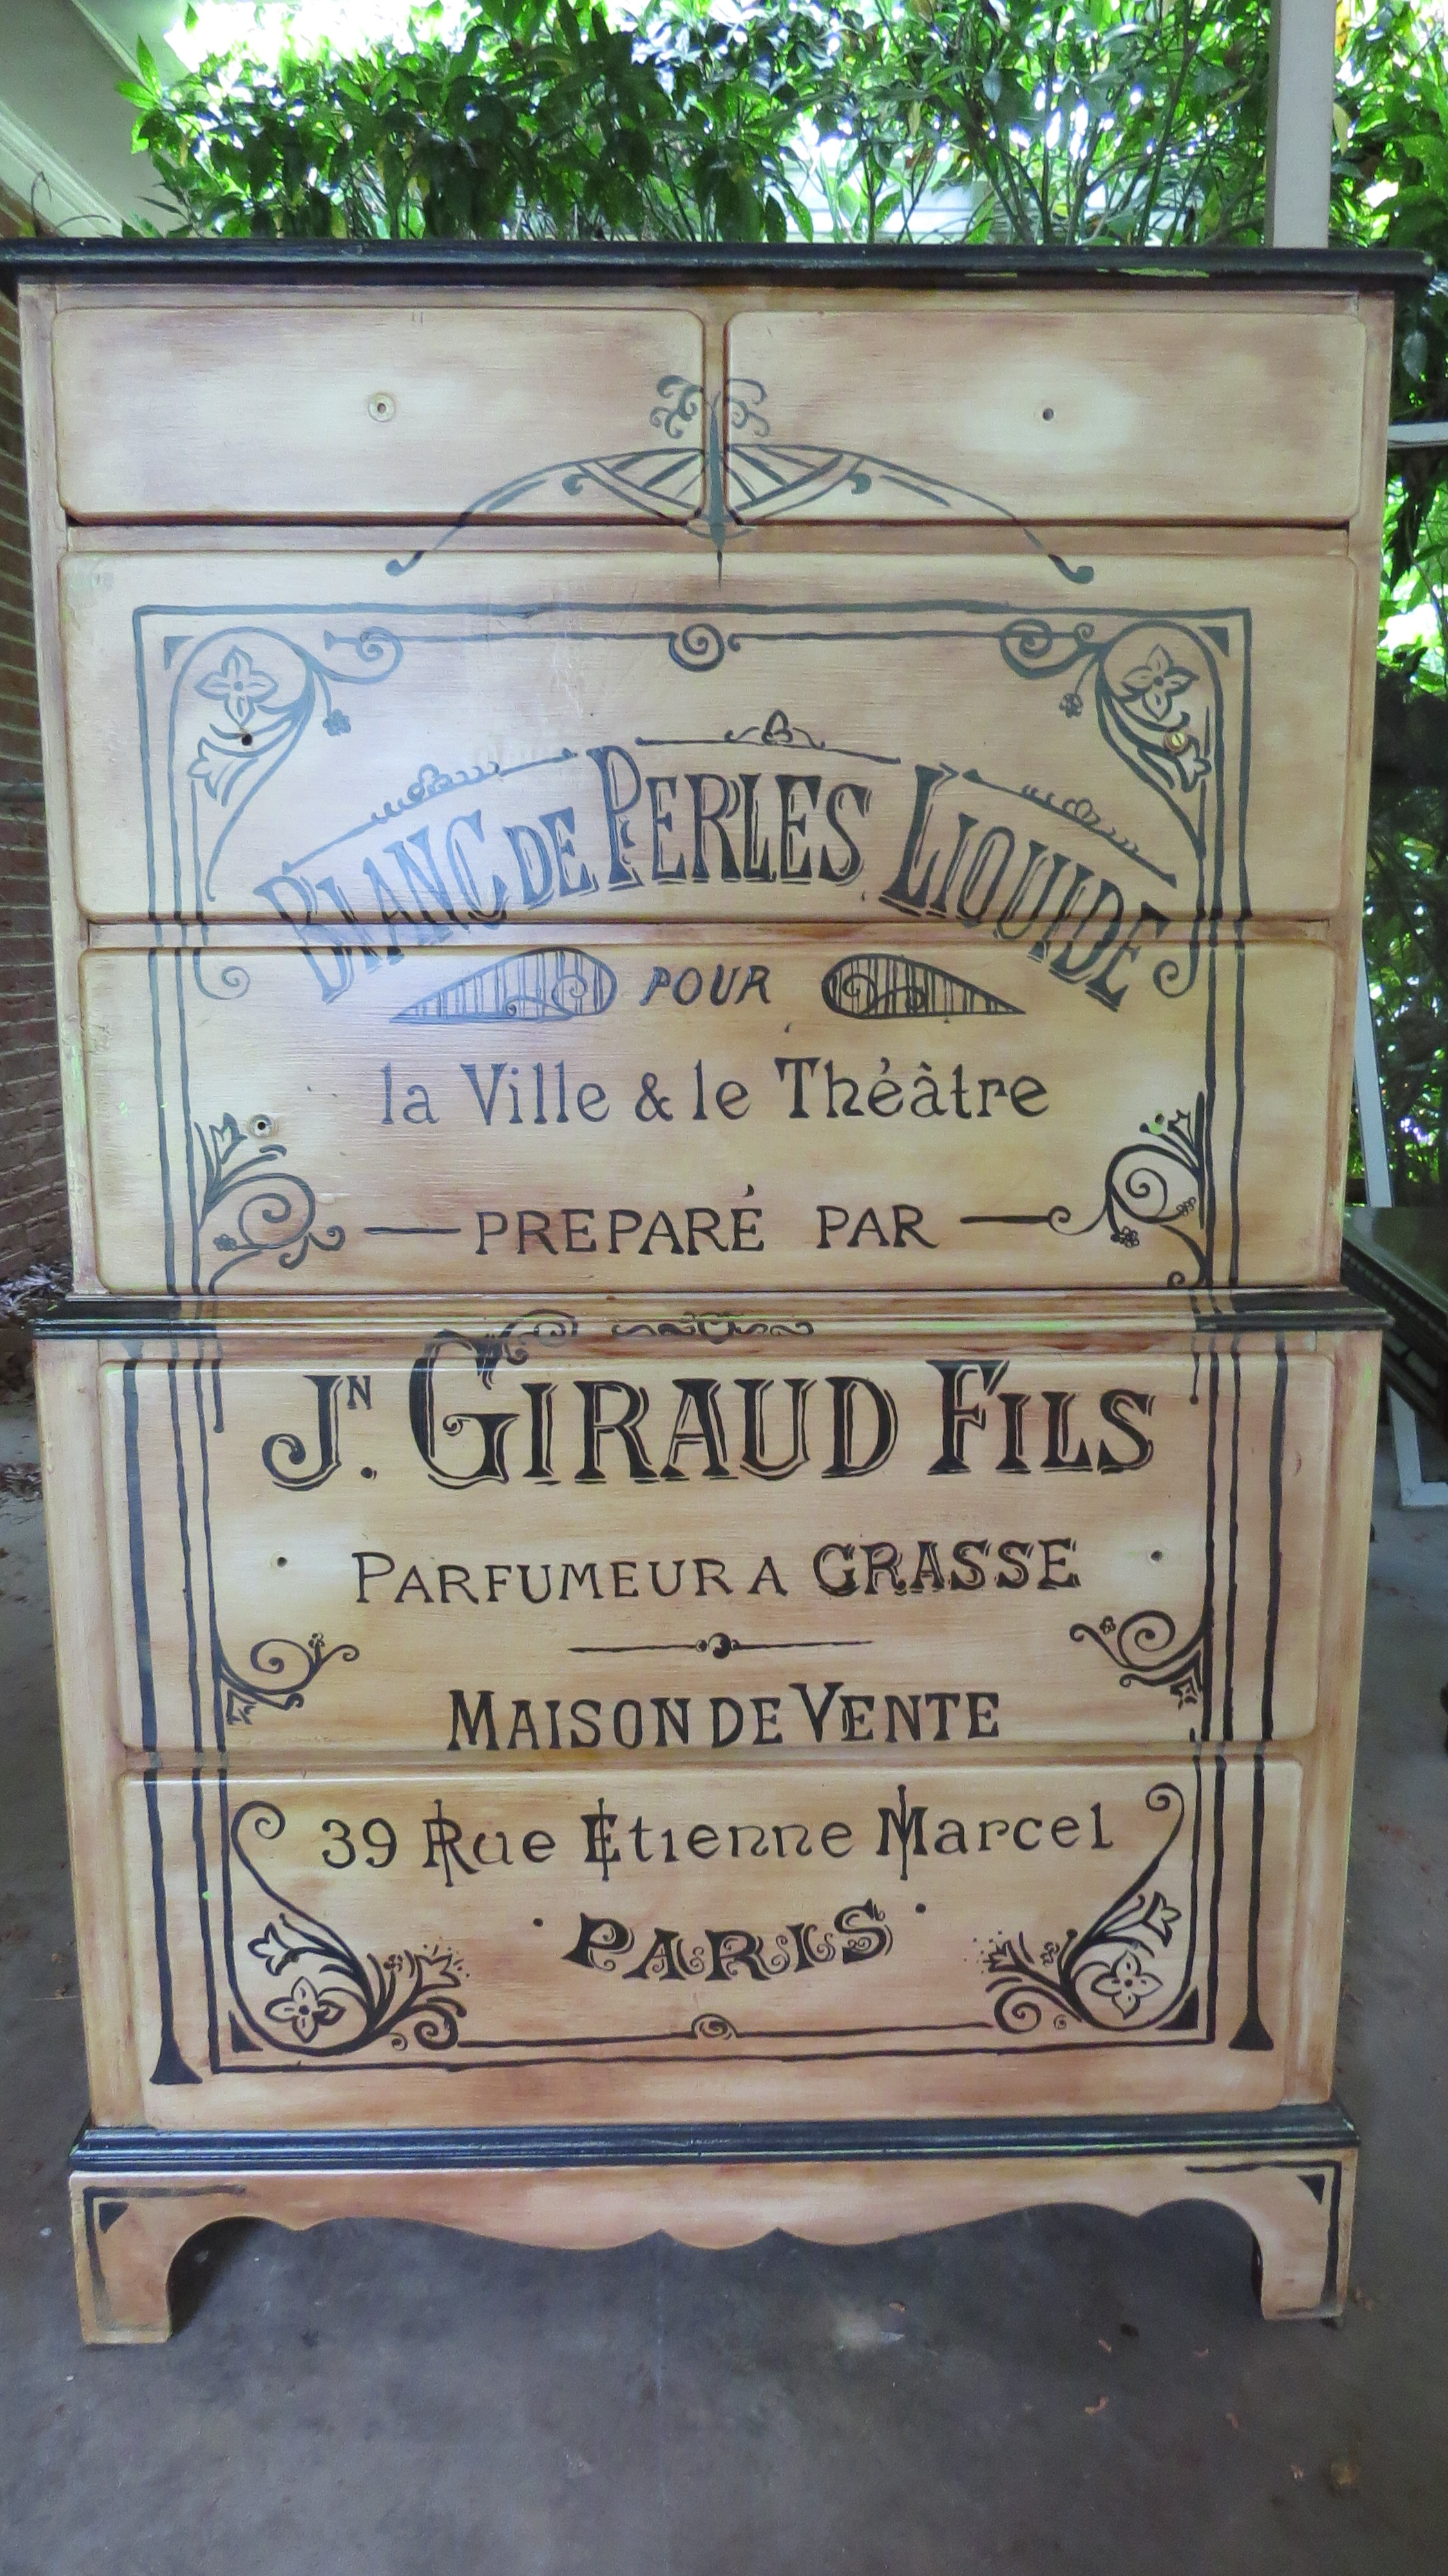
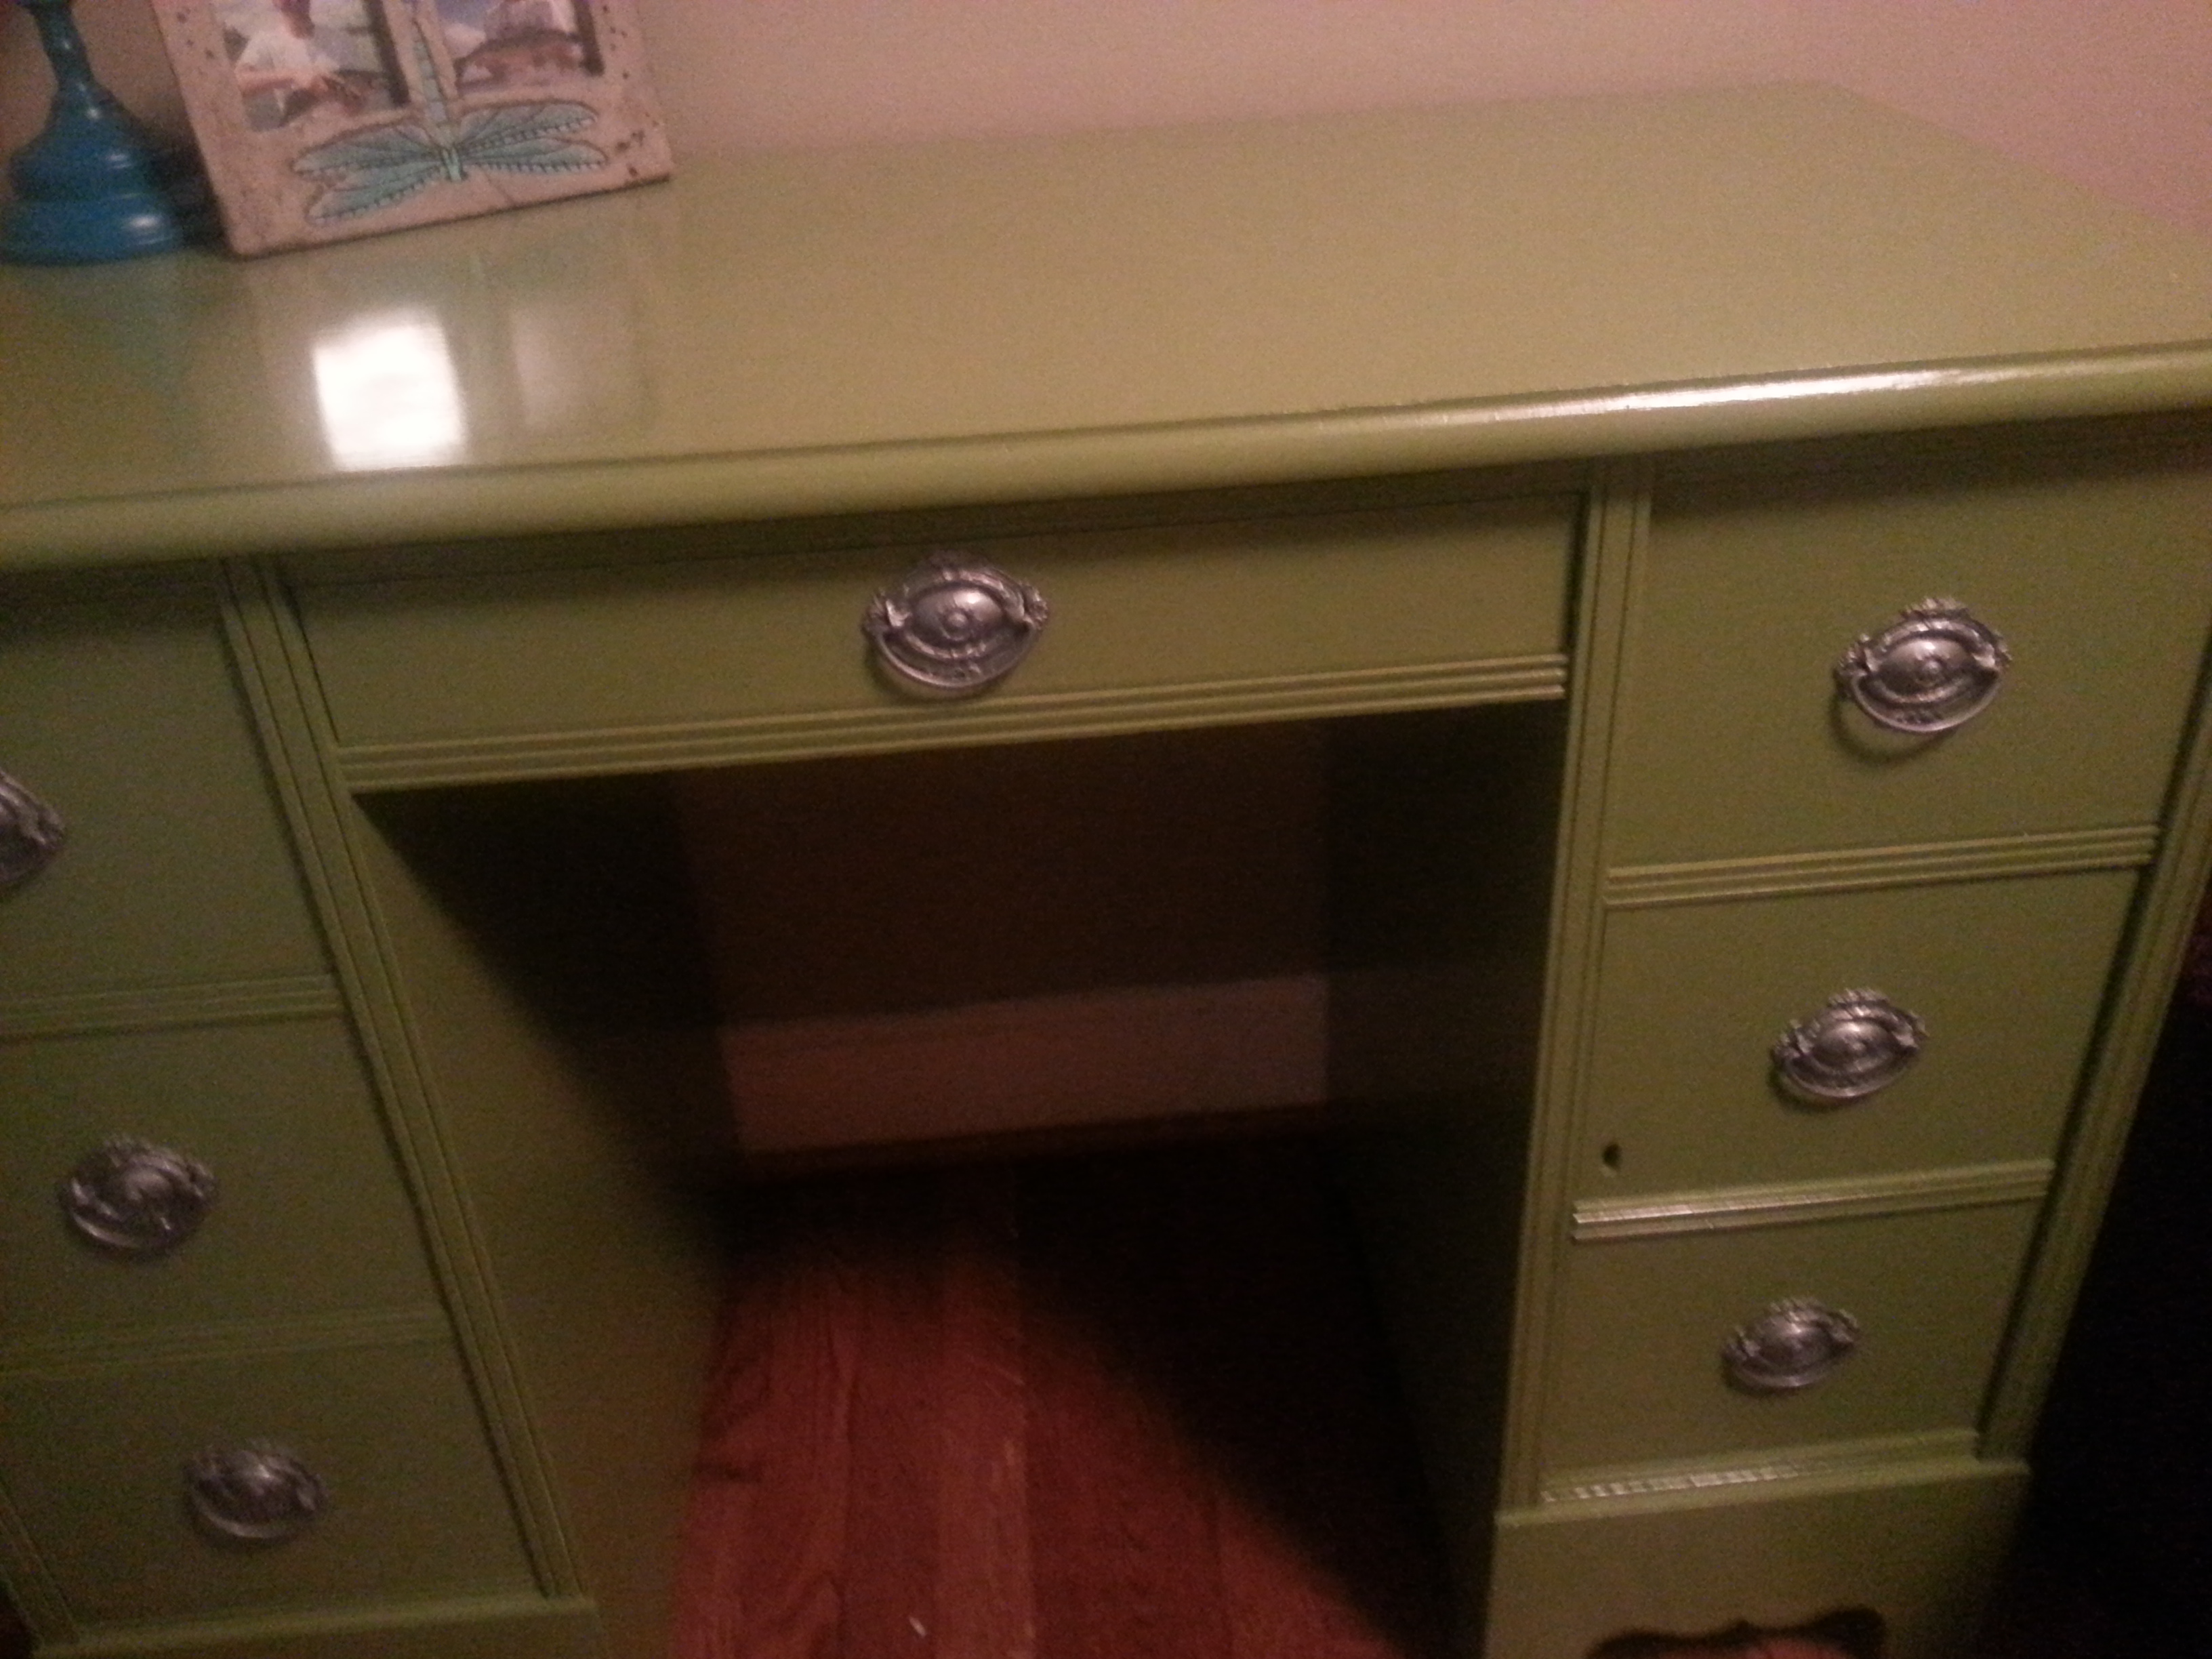
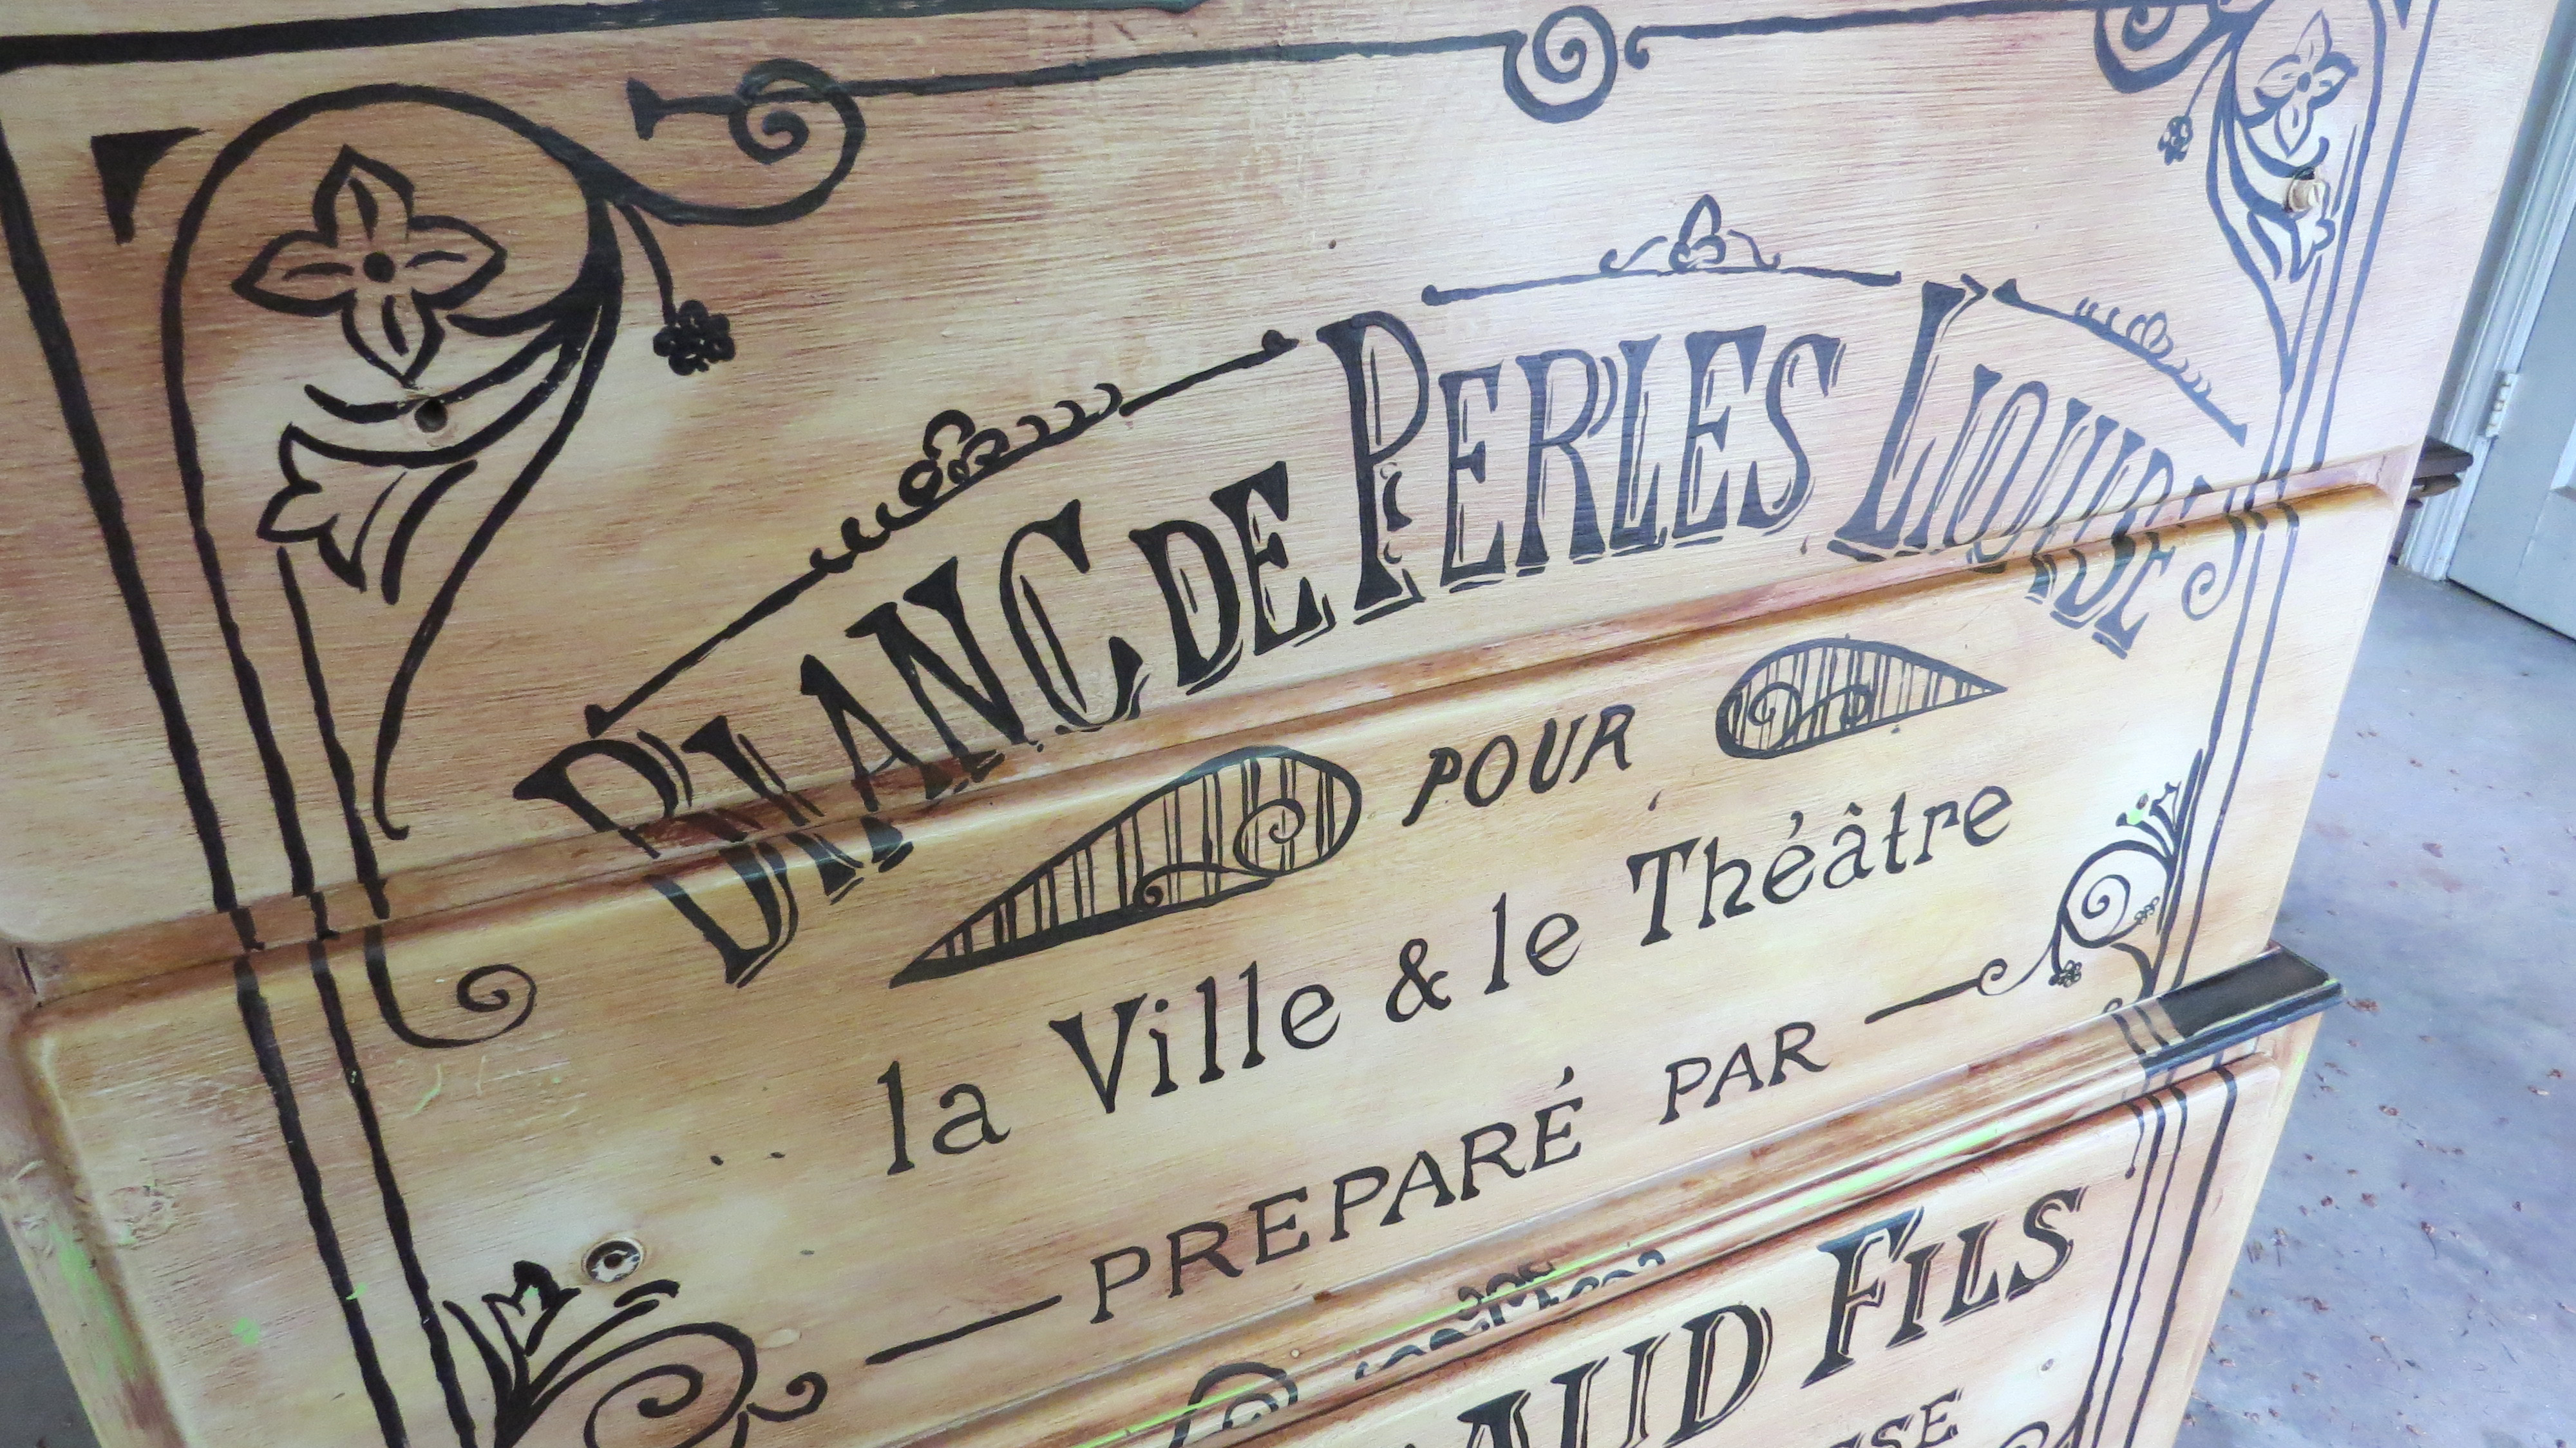
Finally, a close up of the label and antiquing. Now, to slap on some hardware and call it good!

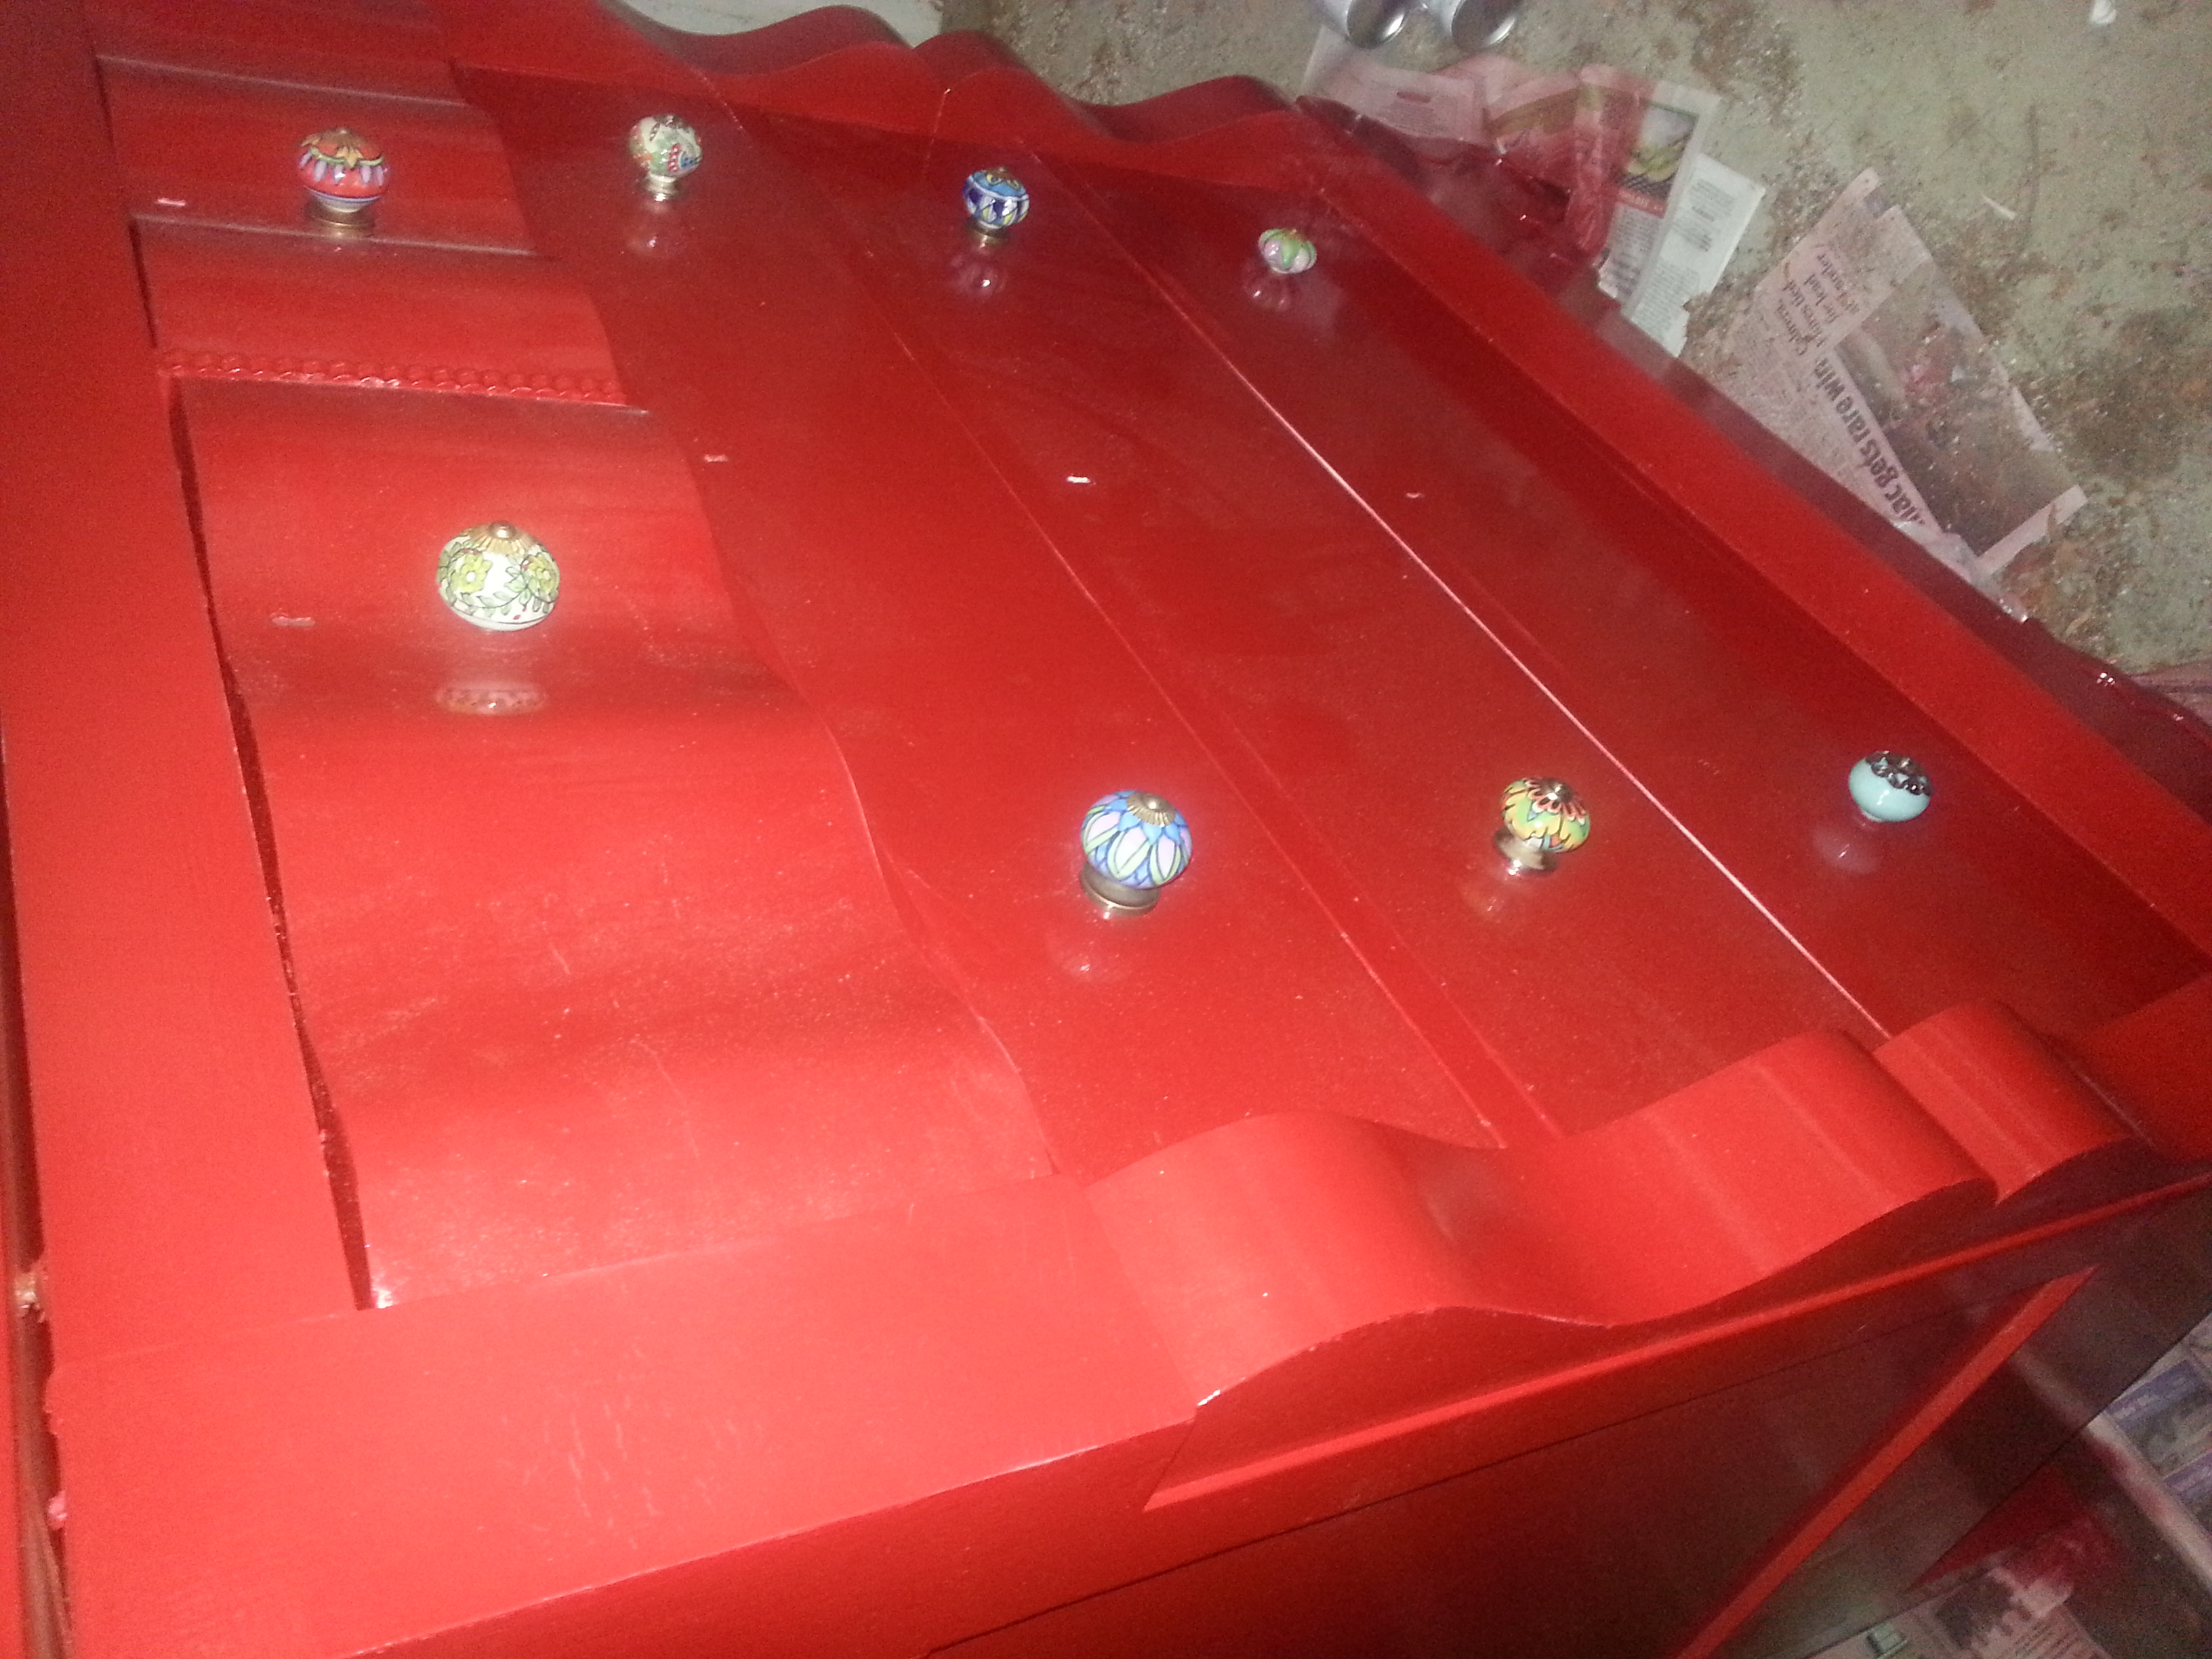
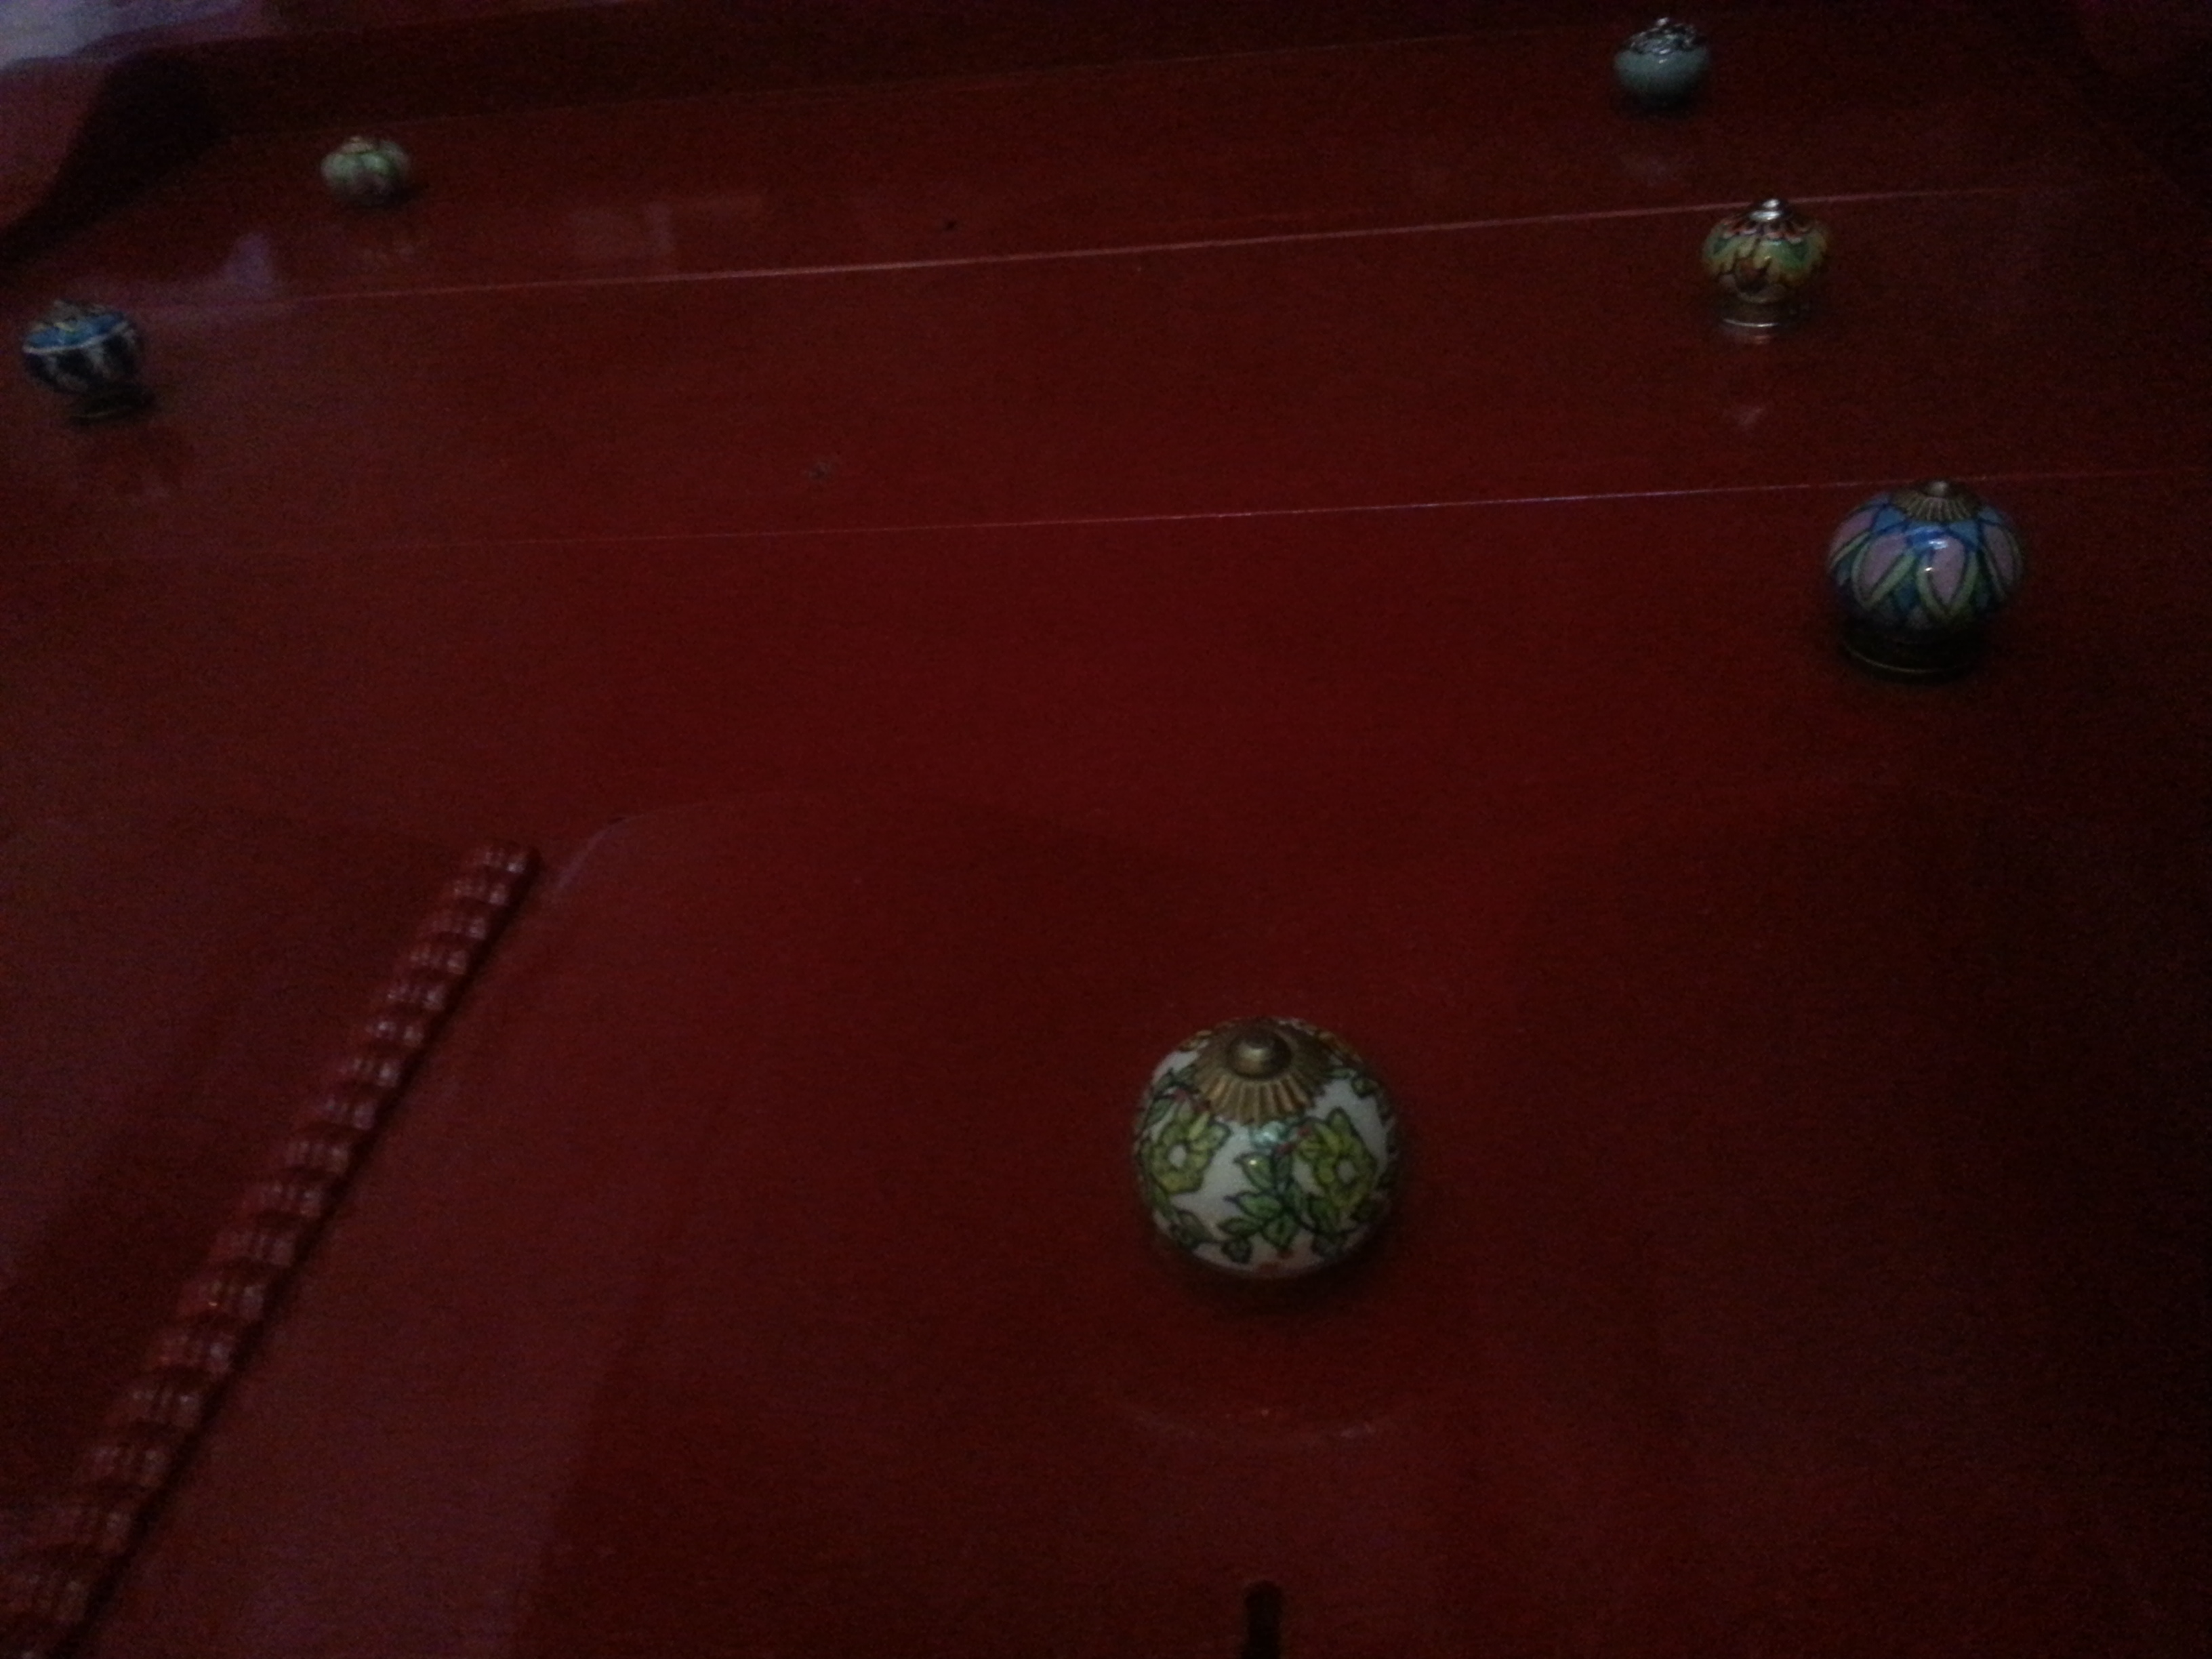
Okay, the hardware is on. I went with an aged, antique brass look with simple knobs for the top two drawers and pulls for the remainder. I was originally hoping to have simple black knobs but it looked too Gothic, so I dated it even more with brass. Here are the final photos!

IMG_7700 IMG_7711 IMG_7717 IMG_7719

Total cost for this project: Dresser $30; paint and paint supplies (stencil and compound) $14; hardware: $32=$76.00. Asking price: $310.

You can find this dresser for sale at Melange, in Winston-Salem, NC. See my other items on Etsy at Fernweh Originals or visit my Facebook Page, Fernweh Originals.

Bedroom Redesign

Well I crapped out and didn’t take a BEFORE photo because it was too embarrassing. But below is a picture from a few months ago when I was building this burlap headboard. It smelled and I had to get rid of it. Also, it was made of cardboard and was a bad idea. So was that bedspread. Barf. Anyways, here was the before:

Screen Shot 2014-05-16 at 1.02.18 PM

I will make this quick and show you what my room looks like now. Imagine the before as a condor pooping from on high and that ball of poo splattering all over four walls. That was my room. Here it is now:

IMG_6865

I think the feng shui is much better now with the bed against the far wall and longer (not grey) curtains. I also think this bedspread is more my style and a lot more fun. Anyways, I made the headboard from a piece of butcher-block. I made the painting of the Buddha Buds, and I sourced the curtains and bedspread from the interwebs. I made the lamps from burlap left over from my wedding, and behind the door is a wardrobe I’m refinishing now.

IMG_6873Here (above) is a close up of the headboard in the event you are too lazy to click on the link above. It was my first foray into metalwork.

Below is a picture of the lamp, again, for the lazies out there. I simply cut out burlap to fit OVER the old shade, then I used a stencil to cut designs in the old shade under the burlap so when it is on, designs are projected onto the walls. Yup, it’s pretty neat.Screen Shot 2014-05-16 at 12.54.35 PM

And below is a picture of my cat admiring the Buddha while the frame dries.

IMG_6856

This (below) is a close up of the Buddha face. I poured a ton of paint on the canvas then tried to move it around using speakers. Since the art is about music and tranquility, I thought this would be a neat way to make the music come to life. It worked in some places, and added a cool story to the image. Wherever you see the neon green and magenta swirling, that was music leaving a permanent impression.

IMG_6859

Finally below is a picture of the wardrobe I’m working on. This is a before photo, I haven’t done anything to it yet. We’ll see what happens to the poor sucker. But, in the background you can see the other burlap lamp I made, and a Picaso replica I painted a few years ago. So, this room is almost entirely made by me. Makes me happy. I do plan on stenciling the curtains at some point with the same peacock blue you kinda see in the foreground of the image below. Maybe just a suzani line across the bottom or sides. Still debating on that one.

IMG_6871

You can find this buddha painting for sale on Etsy at Fernweh Originals or visit my Facebook Page, Fernweh Originals.

Antique Desk Remodel

This is my first desk remodel and I have to say, it went alright!

I bought this crappy desk off of Craigslist and didn’t take a photo of it before I got to work. However, I did find a very similar one again on Craigslist and have a photo of that which will have to suffice as my “before” photo.

Screen Shot 2014-05-10 at 2.17.34 PM

I started by filling in verner cracks, something I spend a good deal of time doing these days, it seems. Then, I took off all the hardware and spray painted them with a hammered steel metal paint. They look great now, the old bronze look was too dated for the plan I have for this desk.

Next I primed the sucker really well. It had a lot of imperfections so a thick coat of primer worked to add bulk and fill in some of the cracks. If this is what you’re priming for, try tilting your furniture piece and priming one side at a time. The top side will allow the primer to kind of settle and level on it’s own and erase brush strokes. Takes a few days to prime one thing but it really does work well.

Next I painted the desk a bright green. I’ve been wanting to try a green piece for a while so this is what I settled on. I love it.

I slapped the hardware back on after a few coats of protective finish and here you have it, a sexy desk remodel.

20140510_195555

IMG_7737 IMG_7735 IMG_7733

Oh, and for a little chic surprise, I did some damask designs on the drawers. Mommy has a like.

IMG_7739 IMG_7740

Hope you like it, and sorry there was no real tutorial here. This was just something I was doing for fun.

Total cost for this project: Desk $40; paint: $18= $58. For sale at Melange in Winston Salem: $148.00.

You can find this desk for sale at Melange, in Winston-Salem, NC. See my other items on Etsy at Fernweh Originals or visit my Facebook Page, Fernweh Originals.

Refinishing a Butcher block Table

Well, I’ve been at it again! This time I took a perfectly good butcher block table from the in-laws and refinished it. Before you get all judgy-face let me explain that it had a yellowish polyurethane on it. And if you’re an avid reader of my DIY section you know I loath the yellow poly look. So, while I loved the table, I hated the yellow.

So, I sanded off the poly and sanded down the legs. The top was maple, the sides were something else and had a slightly pink tint. You can see this in one of the images below where the top is white-ish and the legs are yellow-pink. This presented a bit of a problem when it came to selecting a stain that would apply evenly to both the legs and the top. Before I get to that, let me walk you through the abuse and reincarnation this poor table went through. It’s exhausting, mind-numbing and frustrating.

20140308_144454

  1. February 22, 2014: Sanded table top using belt sander (photo above)
  2. February 24, 2014: Applied Bombay Mahogany stain. Didn’t wipe it off afterwards.
  3. March 8, 2014: Sanded off horrible staining job using circular sander. Took forever.
  4. March 14, 2014: Applied Jacobean stain (Miniwax) and wiped it off this time. Yup, learning by trial and error is tedious stuff. (See second image below.)
  5. March 18, 2014: Applied another coat of Jacobean and wiped it off. Look okay, but there are some marks on the top from the original belt sanding from late February.
  6. Late March, 2014: Husband unhappy with the belt sander marks. Sanded down the whole thing. Starting over. Sanded down the legs as well. (see first image below.)
  7. Early April, 2014: My husband applied Bombay Mahogany to the legs and top.
  8. Mid April, 2014: Husband doesn’t like the mahogany. It didn’t go on cleanly because it was a poly-stain mix and dried too fast.
  9. Late April, 2014: Sanded down the table again. Starting over.
  10. Later April, 2014: Applied Jacobean in two coats, wiping between coats.
  11. Daily, early May, 2014: Applied a coat of poly protection each day, sanded with 320 between coats.
  12. May 9, 2014 (today): Got so sick of seeing the table in my work area that I painted the legs black and applied a final coat of poly to the top. I’M DONE WITH THIS TABLE!!!!

20140308_154525

20140310_175425So, after all of that here is the final product. You can see a few circular sander marks on the top. Screw it, they are staying! This was a tough first staining project for us and it took three months to get it to this point. I like it, and it looks better than I anticipated from the start of this long-lasting project. Anyways, here are a few photos! First photo is without a spray protection on the legs. The second photo I lightly (320 paper) sanded the top coat of poly and applied a protection spray to the legs. Looking sexy, table!

20140509_124948

20140511_152217I like how the legs kind of bring out the darker legs on my blue suede chairs and blue booth. Yes, I have a booth in my house. I’m that cool.

This table has been SOLD. See my other items on Etsy at Fernweh Originals or visit my Facebook Page, Fernweh Originals.

Dresser Refinished, Upcycled and Remodeled

I found this dresser on CL and thought, what the hell… I know nothing about refinishing furniture, let’s give it a try. Both Alanis Morissette and I are fully in favor of biting off more than one can chew.

Here are the before pictures. Please puke along with me as we peruse the following horrifying pictures of this antique dresser gone foul. To be fair, I got them off a college kid who was about as friendly as they come. $40.

Screen Shot 2014-05-03 at 2.16.29 PM

Don’t wipe the vomit from your mouth just yet… more pics to follow! If you’re able to see the potential in the piece note the wavy top drawer and the thick frame. Very cool. Very promising lines.

Screen Shot 2014-05-03 at 2.16.38 PM

Ok, you can wipe off the upchuck. I’ll stop posting petrifying photos of the BEFORE disaster that was this dresser. Now for the step-by-step and finally (gasp) the reveal! Don’t skip ahead, you’ll ruin the dragging out of this surprise!

First I used Elmer’s WoodFiller on the crap verneer cracks. It worked okay, but it sands a little too easily so you have to be careful and use a light sandpaper. I used 220. FYI these pics below are of PRE-SANDING phase.

20140503_145130and another to show more filler…

20140503_145133

Next I sanded down the Elmer’s WoodFiller (as mentioned above for the students paying attention) and kinda did a once over with 220 to help the primer adhere. Here is where I will reiterate the fallback to this product (sorry, Mr. Elmer). It doesn’t really sand evenly because it isn’t as strong as, say, the body filler other posts suggest you use. So, I had to do another round of filling and sanding to get the shape and coverage I wanted. This added a long time to the overall project clock because with deep cracks in the verneer I was waiting five hours between application and sanding. That’s a long time to Forrest Gump myself on a log and wait.

20140508_132824

Yup. Next I primed the sucker. Bye bye wood color, hello primer mess. This is always when a doubting Thomas walks in and says something like, “eh. barf. I liked it better before.” This is good because you can make them eat their words later when they realize it was only primer and the best is yet to come. Although honestly it already looks better with primer on…. I used Giddeon primer, I wasn’t impressed with it because it looked thin. I applied two coats then lightly sanded with 220 to remove any brush lines. I’ll be looking for a better furniture primer for future projects.

20140508_140944

The best has come! Paint! This is everyone’s favorite part. I love watching ugly be hidden by pretty, don’t you? Anyways, I went with red because I feel like, for furniture, it is just a stunning color and you can play around with Asian accents (or colonial, French, etc) for drawer pulls and the like. I was playing with the idea of a bright yellow but then realized that fad (only present in my mind) would fade and I’d be left with a canary dresser. Here is a hint of the color. I put on two coats of light paint (cherry red) so that nothing would run. I used spray paint, which is easier than a brush and doesn’t leave any strokes. If you are going to apply a high gloss later, I recommend the spray method as the gloss will bring out tiny imperfections and lines.

20140509_120657

Finally I applied a ton of lacquer. This is mostly to protect it from my toddler, dog, cats, birds and mice. If I lived a different (bachelorette) life where I didn’t have to be terrified of little sticky fingers and dirty paws scratching my furniture creations I wouldn’t have applied so much protection. I’ll take the sticky mess and paws any day! But, if you don’t have that concern I’d say a less shiny protection would suffice.

Drumroll! Here is the before and after picture of my antique dresser refinishing!

Screen Shot 2014-05-10 at 7.28.33 PM

ABOVE: Here is the classic “before and after” shot. Me thinks the red looks fantastic. Sadly, my phone photography skills at night are lacking.

20140510_191124ABOVE: The front looks super sleek.

20140510_191531ABOVE: This is probably how Tarantino would photograph his furniture (at night, with odd lighting and no real explanation).

20140510_191208ABOVE: You can’t really tell what this is in the dark. I’m thinking I’ll get more photos loaded in daylight.

20140510_191133ABOVE: Finally, a good shot of the knobs. I got each unique knob attached and love the look it lends. Up close it doesn’t look childish, it looks eclectic and adorable. Very Alice in Wonderland meets Marco Polo.

20140510_191144

ABOVE: Another close up of my knobs.

Well, there you have it! My dresser remake. Most of the time was spent fixing the cracked verner and sanding. Actually painting and putting on finishing touches accounted for a fraction of the time but all of the fun.

I am playing with the idea of adding a black antique glaze to this to kinda give it a pop, tone down the red and add to the Marco Polo side (while taking away a bit of the Alice in Wonderland feel). Thoughts?

Ok, I did add it. Here is a sneak peak!

20140512_141538

To date, the total cost for this project is: Dresser: $40; paint: $14; Knobs: $32= $86 + spray sheer coat protector (+8)= $94

You can find this dresser for sale at Melange, in Winston-Salem, NC. See my other items on Etsy at Fernweh Originals or visit my Facebook Page, Fernweh Originals.


DIY Headboard from Butcher Block

To continue the theme of upcycling and creating, here is my tutorial (aka, my creation journal, for the granola crunchers out there) on how I made a headboard out of a piece of wood I bought for $9 at the ReStore.

First off, if you live under a rock and don’t know what the ReStore is, it’s the Habitat for Humanity store that sells stuff like furniture, random doors, chunks of wood, knobs, etc. Stuff you need to make a house or stock a house. And it’s awesome. The Winston Salem ReStore is pretty rad, and just moved to a new facility off University Parkway.

Screen Shot 2014-05-04 at 10.02.49 AM

Okay, moving on. Here is a picture of the piece of wood pre-evolutionary metamorphosis at the hands of yours truly. It was dirty, messy, had some water damage, etc. I bought four, 9-foot by 16 inch wide boards from the ReStore and sanded them down. I selected the nicest for this project, and eventually plan to make a footboard and side rails out of the rest of this wood.

20140503_143147

Here is a picture after I cut it to 7 feet, sanded down the imperfections and sides, and stained it with a lovely, sultry dark stain. I used Miniwax because I like that they don’t have polyurethane in the stain. Makes it go on smooth and silky, like butter, and wipe off easily for second and third coats. This stain color is called ________. I put on two coats because I was really happy with how this stain was bringing out such beautiful grain and more seemed to enhance the awesomeness.

20140503_143153

Next I waited a few dozen hours and applied my first coat of Miniwax interior polyurethane. Normally I’d be against this move but I recently refinished a table and this brand of poly isn’t as shiny and obnoxious and color-changing as others. No, Miniwax isn’t paying me to say this (though if any Miniwax executives are reading this– know that I wouldn’t turn down free cash! ha ha).

For some reason between coats of poly you are meant to sand it down with 220 sandpaper and then reapply. No idea why, but like many a non-chemist I just so what chemical bottles demand. So, I sanded it down lightly and reapplied….. about four times. The last application I used a foam brush to decrease the chances that there would be any texture from the brush bristles. Yes, it’s gotten this pedantic.

Finally, I got to what I consider the fun part! This is where I took some metal packing strips and then screwed them to the back of the headboard (see image below) and then nailed them down with some textured upholstery nails on the front. I’m going for an old world industrial look here. Call me a nerd, but I feel like looks that don’t really go well together actually go well together, like how opposites attract. So, we have metal and nails from the industrial, processed, warehouse style fused with a rugged, rough chunk of wood stained to Middle Earth proportions. Clearly, I don’t know any interior decorating verbiage. Work with me here.

20140506_191037

Anyways, this last step was super time consuming and required math. This may be the first time since high school that I had to do real math. Guess my teacher was right, at some point you’d need it and be glad you knew it. Although when I was in school we didn’t have the internet so…. I guess he didn’t know you could always BS your way through anything using this handy tool. Below you’ll see how I spaced out the lines for the upholstery nails.

20140506_190254

Here is a pictures of the final product (just the headboard design). I did this detail work on both sides, about 7 inches in from both sides. Looks bad ass.

20140506_190446If I do decide to go back and make a foot board you’ll be the first to know. I already bought adorable little legs to be the support structure for the foot board and found a 12 foot cedar board for the side rails, so we’ll see if they join my pile of legs, wheels and arms (all wooden, I assure you) growing in the wood shop or actually get adhered to this project. Time will tell.

To date, the total cost for this project is $32 for the wood. $14 for stain, and poly. $2 for upholstery nails= $48

Screen Shot 2014-05-10 at 7.44.07 PM

IMG_6865 IMG_6873

This headboard has been SOLD. See my other items on Etsy at Fernweh Originals or visit my Facebook Page, Fernweh Originals.